


The garden is growing! I’m always inspired to bring plants into the studio to capture their beauty on paper. I’ve been playing around with three print-making methods that incorporate the beauty of nature: stamping with actual leaves, pounding the color from the leaves and imprinting the leaves on paper by steaming. The prints made from each of these techniques can be used for making cards, stationary, books, wrapping paper or artwork to be framed.
Stamping With Leaves

Stamping is very easy and a fun project to do with the kids.
What You’ll Need:
- leaves
- acrylic paints—I used three shades of green, but use whatever you like
- soft paintbrush
- bowl of water to wash out your brush
- hard brayer—or substitute a small bottle or rolling pin
- waxed paper
- drawing paper
Crafting It
Choose leaves that have heavy veining. Squeeze out the paint onto a palette—glass or paper plates work great. Brush the back of the leaf lightly with paint, but avoid using too much, as it will smudge. (It takes a little practice to get the right amount.) Lay the leaf paint side down on the paper, and carefully cover with waxed paper. Roll the brayer over the leaf. Gently remove the wax paper and leaf to reveal the print.
Pounded-Leaf Prints

Pounding creates a more abstract leaf pattern, but it’s fascinating to see the print emerge from the color in the leaves.
What You’ll Need
- leaves
- rawing paper or watercolor paper
- paper towels
- hammer
Crafting It
Lay the leaf vein side down on the paper. Place a paper towel over the leaf, and pound with a hammer until you can see the color and shape of the leaf come through the paper towel. It will take some time to hit every part of the leaf. Carefully remove the towel and leaf to reveal the print.
Steam Prints
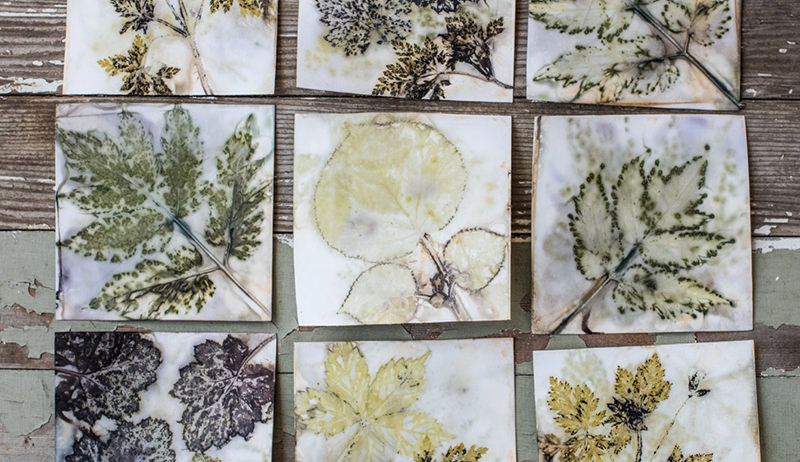
Steaming is a little more complicated natural dye process that produces an interesting image of leaves on paper. Prepare the rust water a week ahead, and allow a couple days for the prints to form on the paper and dry.

What You’ll Need
- leaves
- heavy drawing paper—I cut mine into 12 5-inch squares
- 1/2 tsp. alum (potassium aluminum sulfate)—used as a mordant for natural dyeing
- 1/4 cup rust water—equal parts water and vinegar with iron nails or old machine parts soaked about a week until the liquid is rusty red
- 2 6-inch-square tiles
- string
- bricks, or heavy weights
- craft dedicated steaming pot with rack or devised set up
Crafting It
Make alum water by dissolving the alum into a 1/2 cup boiling water. Add to a basin of water large enough to hold the paper. Place the paper into the alum water piece by piece, so each piece will soak evenly. Lay a tile on top to keep the paper submerged in the water. Soak for a couple hours, or up to overnight—depending on the strength of your paper.
While the paper is soaking, gather leaves and press between paper under a heavy book to flatten them slightly.
Make a sandwich with a tile on the bottom and a tile on the top. Layer the paper with leaves, brushing each leaf with iron water as you add it. Paper, leaf, iron water, paper, leaf, iron water, etc., topping it off with a tile. I did 12 pieces of paper in the stack. The leaves will print on both sides of the paper. Sometimes this is a good thing when it adds a faint design coming through. If you want more distinct prints, add an extra sheet of paper between leaf sandwiches: paper, leaf, iron water, paper—paper, leaf, iron water, paper, etc. Tie the bundle together with cotton string.
Set up the steamer with at least 1 inch of water in the bottom. You may have to add more as the steaming progresses. Don’t let the pot boil dry.
Place your tile bundle on the rack and place a brick or heavy weight that can withstand water on top of the bundle to compress it as much as possible. Steam for 2 hours. Turn off the heat and leave the lid on the pot to cool overnight.
Now, you can leave your bundle to print for another day or two, or cut the strings and look in the morning. Allow the prints to dry on a rack, and press under heavy weights for a day or two to flatten.
