Skip to the content
844-330-6373
Newsletter
Combo Subscription
Contact Us
Newsletter
Login
Register
0 ITEMS
HOBBY FARMS
CHICKENS
Animals
Large Animals
Beekeeping
Waterfowl
Poultry
Flock Talk
Chickens 101
Chicken Coops & Housing
Health & Nutrition
Poultry Equipment
Farm & Garden
Beginning Farmers
Crops & Gardening
Equipment
Farm Management
Homesteading
Urban Farming
News
Food
Recipes
Podcast
Video
Classified
Magazines
Subscribe
Combo Subscription
Print Single Issues
Digital Single Issues
Special Edition
Gift a Sub
Marketplace
Marketplace
Subscribe
Drake Ducks: 10 Reasons to Keep Them
TRENDING
Miniature Cattle: 5 Breeds For Small Farms
Sue Weaver
April 16, 2024
Growing, Harvesting & Enjoying Mustard Greens
Jessica Walliser
March 15, 2024
Bantam Ducks: 3 Breeds For Backyard Flocks
Ana Hotaling
March 21, 2024
8 Tips to Prepare for Baby Chickens
Rachel Hurd Anger
January 29, 2024
Chicken Feed Before Bagged Feed
Sue Weaver
February 5, 2024
What To Feed Laying Hens
5 Key Aspects of Feeding Chickens
Nasturtiums: 5 Reasons To Grow Them
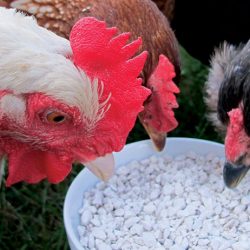
Oyster Shells for Chickens for Stronger Eggshells
Easter Kulich Recipe With Tin Cans
Animals
Farm & Garden
Hobby Farms & Chickens Current Issues
SUBSCRIBE
VIEW THE ARCHIVES >
Food
Akhlesh Singh1
X