

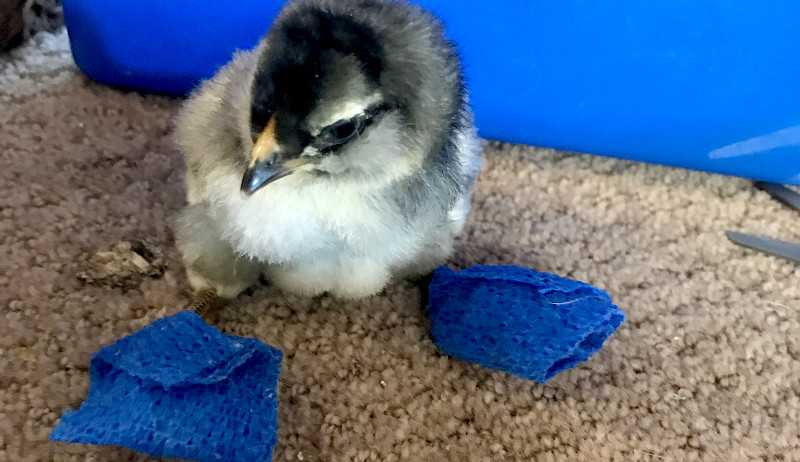
My neighbor Grace texted me the other night, very concerned about her week-old Blue Orpington chick. The little fluff had strolled through some droppings and, when she went to clean its feet, Grace noticed something amiss. “Worried about it. Both of its middle toes need help,” she messaged me. Could I help? Shortly after, the chick was on my exam table, happily peeping and oblivious to the fact that two of its tiny digits were slightly curled to the left, banana like. The baby blue exhibited a classic case of crooked toe.
The Condition And Its Causes
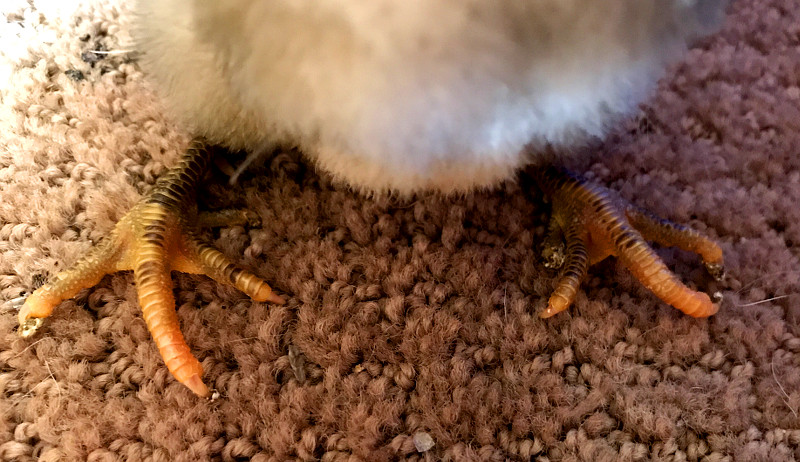
Crooked toe is a poultry foot disorder characterized by one or more toes curving sideways. It can affect one or both feet, and the curve can vary from very gentle to pronounced and acute. Because of this curvature, the afflicted chick stands and walks on the side of these toes. According to the Animal Sciences and Industry Department at Kansas State University, three to five out of every 100 chicks suffers from crooked toe. The condition manifests as early as one week of age.
While genes can play a factor in causing crooked toe, especially if a chick’s bloodline is inbred, several environmental factors can also lead to this condition:
- a vitamin deficiency exists in the starter feed offered to the afflicted chick
- the brooder floor is maintained at an incorrect temperature, affecting growth
- the brooder floor is wired or too slick or smooth, failing to provide traction for developing muscles
- the incubator’s temperature and/or humidity was incorrectly set
Living With Crooked Toe
Crooked toe is benign at best and bothersome at its worst. Left untreated, crooked toe does not cause crippling or even limping. The chick simply becomes accustomed to its toes being curled sideways and compensates. As an adult, it might encounter difficulty digging and might not be able to perch due to the way the toe joints align, but it should be able to live a full and happy life. Crooked toe is also easily treated if caught early in a chick’s life. In all the years I’ve raised poultry, I’ve encountered crooked toe three times: once with a Polish chick, once with a Wyandotte chick, and once with a Black Copper Marans chick. The Polish and Wyandotte wore little “chick booties” to correct the condition and, in a week’s time, both were healed. The same could not be said for Nestle, our Marans chick. She was a feisty pullet and continually found ways to pull off her booties. In the end, we let her have her way. You’d not have noticed that she had a foot disorder by watching her scamper around with her flock, until it was night time, when she bedded down on a comfy pile of shavings—she could not wrap her right foot around her coop’s roost.
Crooked Toe Treatment Essentials

The best time to treat crooked toe is when it first appears, usually in the first or second week of a chick’s life. The soft tissues in a chick’s foot are still growing and developing and, when braced in a chick bootie, crooked toes usually straighten well and remain corrected. To construct a chick bootie, you’ll need the following:
- cardboard (the type found at the back of a legal pad, not the type from a shipping box)
- a pencil
- scissors
- toothpicks
- vet wrap
- a spare set of hands (not required but very helpful)
Building And Applying A Chick Bootie
Choose a quiet location with few distractions as the place to treat your chick. A busy, bustling spot with plenty to see and hear will make it very difficult to keep your patient still and cooperative. When you and your little peep are ready, follow these steps:

- Stand the chick on the cardboard and use the pencil to trace around its foot. The tracing should be slightly larger than the foot. You can draw the tracing shaped like a mitten or draw out separate “fingers” for the toes. Do the same for the other foot, even if the foot is not affected. Wearing a pair of booties will help keep the chick’s legs in balance. Cut the tracings out.
- Cut or tear very thin (approximately 1 inch long by 1/4 inch wide) strips of vet wrap. Stand the chick so that its foot is on top of its corresponding tracing. Gently straighten the crooked toe, then carefully use the thin strips of vet wrap to tape the straightened toe to the tracing (this is where the second set of hands is useful). Do the same for other affected toes.
- Once the affected toes are taped to the tracing, use a 2-by-1/2-inch strip of vet wrap to envelop the entire foot and tracing, finishing with the end of the tape on the top of the chick’s foot. Repeat with the other foot. If you have a feisty or energetic chick, you might wish to make a “sandal strap” out of another strip of vet wrap that goes around the back of the foot to help keep the bootie in place.
- Make sure that the vet wrap on the bottom of the bootie is even. If it is uneven or lumpy, carefully unwrap it and try again. Be certain that the wrap is not overly tight, as this might impede circulation to the chick’s foot.
- If your chick’s toes are acutely curved, use toothpicks as splints. Carefully cut the toothpicks to match the length of the affected toe or toes. Using the thin strips of vet wrap, secure the toothpicks to the toes, straightening the toes against these makeshift splints. Once the toothpicks are in place, proceed with taping the chick’s foot to the tracing and creating the bootie.
The Follow-Up
Your chick will not like its new footwear. It might squawk and protest. It might dash around its brooder like a tottering ragdoll. It might even sit on its hindquarters, feet up, glaring at you. Don’t worry. Within an hour or two (sometimes a little longer for particularly headstrong chicks), your baby will be walking around with its new shoes. Keep the chick booties on for two to three days, changing the outer tape as needed to keep it clean, then remove the tape and examine the affected toes. If they have not yet straightened, put on a fresh pair of booties, using toothpicks if you did not do so the first time. Leave the booties on for three to five days, then check again. In the interim, be sure to add soluble vitamins to your chick’s waterer, check the brooder temperature to ensure it’s at the right level for your chick’s age, and put down paper towels or ridged shelf contact paper to provide it with a grippable surface for walking. If the cause of your chick’s crooked toe was environmental, treating the condition without fixing the cause can prolong the issue.
Grace’s little Orpington baby proved to be as feisty as Nestle: She undid her bootie by the time she got back home. Her freedom was short lived, however. Grace carefully applied a new bootie and, after a few hours, the chick grudgingly accepted her shoes. For a lifetime of full foot mobility, a few days of discomfort is worth it, even for the grouchiest little peep.
