One of my favorite breakfast-time treats is a nice boiled egg, or “chooky egg”as they get called in our house. It’s usually a sparing treat, reserved for lazy weekends, or if we’re lucky, when we’re gifted some lovely fresh eggs from our neighbor. On those days, it’s impossible to stop at just one, so I like to have a few cosies around to keep the extra eggs nice and warm.
I made these simple cosies using left over bits and bots of sock yarn. They only need a few yards each, and if you make a stripy version, you can use up even the smallest scraps so nothing is wasted.

What you’ll need:
- leftover sock yarn, in various colors if you have them
- crochet hook – Size D
- yarn needle to thread in ends
- scissors
Step 1

Start with 32 chain stitches (ch). Without twisting the chain, make a slip stich (sl st) into the first chain to form a loop.
Step 2
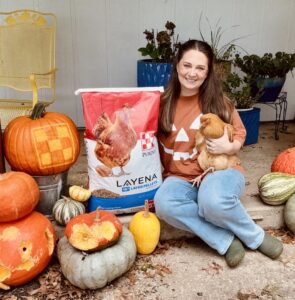
For Row 1, 3 ch, then make a double crochet (dc) into each chain around the loop to the beginning.
Step 3

When you have reached the beginning, make a sl st into the top of the starting 3 ch.
Step 4
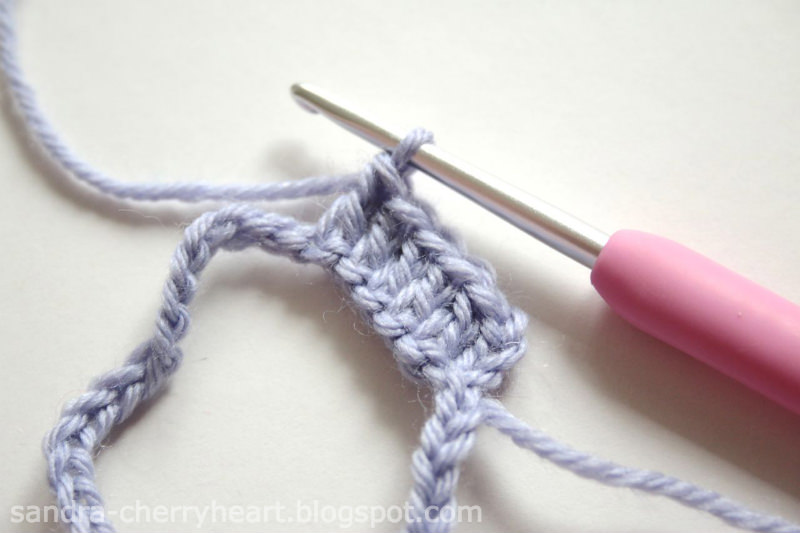
If you’d like to make stripes, change the color yarn you are using. For Row 2, 3ch, then make a dc into each dc of the round below. Once you reach the beginning, make a sl st into the top of the starting 3 ch.
Step 5
Continue making eight rows in this way. Changing color as often as you’d like, or keep to one color if you prefer.
Step 6
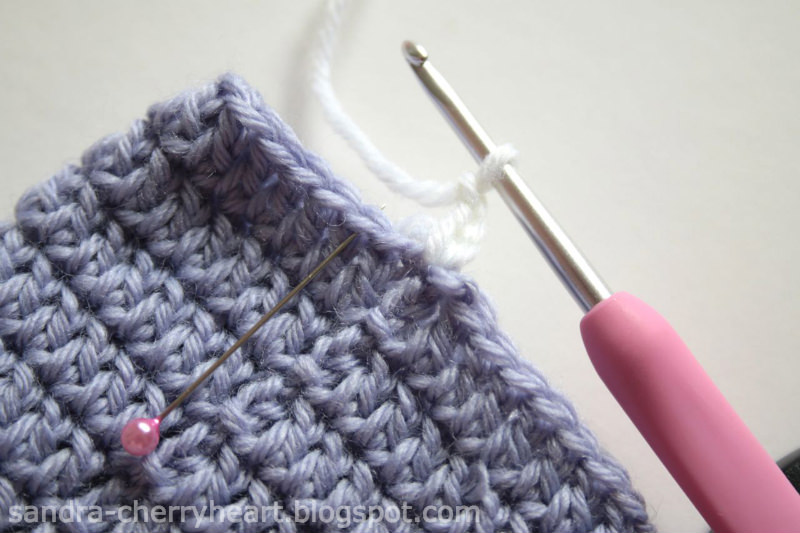
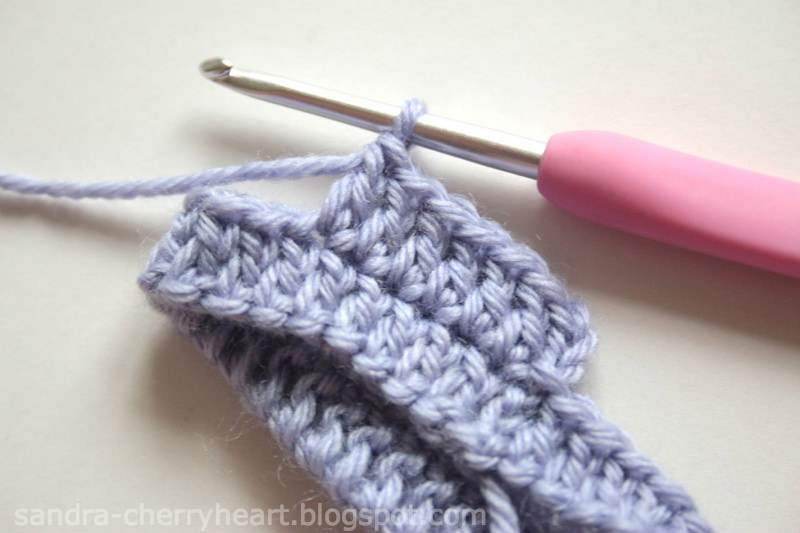
In Row 9, you’ll make the frilly edging on top. Join a new color yarn to the top and make 3 ch, then skip 1 dc and make a sl st into the next dc.
Step 7

Continue in the same way: 3 ch, skip 1 dc, make a sl st in next dc, all around and then make a sl st into the starting stitch to finish.
Step 8
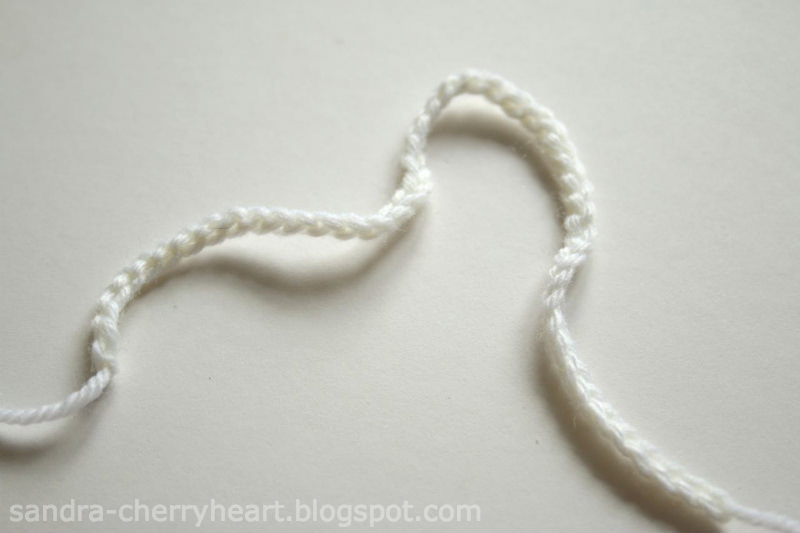
To make the tie, make 50 ch and then break the yarn.
Step 9
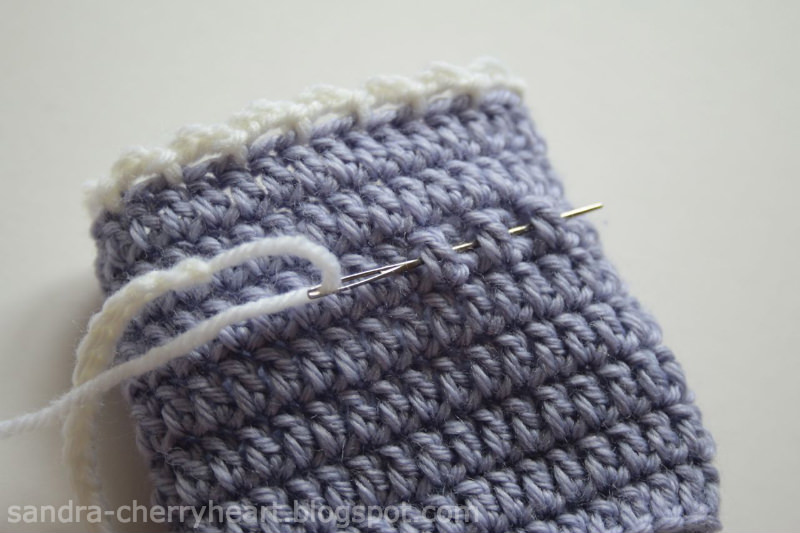
Thread one end of the left-over yarn onto your needle and use the needle to weave in and out of the stitches of the third row down (as shown on photo) and pull the tie through.
Step 10

Once the tie is threaded all, use the yarn needle to weave the ends into the tie to hide them.
Step 11

Pull the tie tight to scrunch the cosy into shape, and then tie a bow to secure.
If you need to adjust the size of your cosy to fit a larger or smaller egg you can easily do this by adjusting the number of starting chains. A few less for a smaller egg, or a few more for a larger one. All you need to do is make sure that you start with an even number of chains and the pattern will still work. You can even make the cosy a little longer by adding an extra row if you need to.
Here’s a few color ideas to get you started:

 | About Sandra Paul Sandra is a stay-at-home Mum living in a small village in England. She spends her days sewing, crocheting, knitting, pottering around the house and garden, and trying to pretend that housework doesnít exist so that she can use the time to craft and write her blog. Look for her sewing and crochet projects for the home and garden each month on The Craft Hub and visit her at Cherry Heart to see more of her work. |
Find more of Sandra’s projects on HobbyFarms.com:
- Sew a Heartfelt Pot Holder
- Sew Napkins with a Mitred Edge
- Crocheted Napkin Rings for Summer Picnics
- DIY Gardener’s Apron
- DIY Mini Ironing Board