

Winter sowing has become more and more popular over the last few years. Gardeners are discovering how easy it is to start seeds of many common perennials, herbs and annuals without having to mess with grow lights and other seed-starting equipment. I’ve experimented with winter sowing at my own house, and I have to say, it’s an amazingly easy way to grow a wide selection of plants from seed, without needing to babysit the plants for weeks on end.
Here’s the winter sowing technique I use.
1. Gather Your Materials
There are just a few items you’ll need before you start your foray into winter sowing. First and foremost, you’ll need a collection of containers. I find the ones that work the best are the clear-lidded, clam-shell containers commonly used for restaurant take-out and fast-food salads. You could also use clear, 2-liter soda bottles or gallon milk jugs. In addition to the containers, you’ll need a bag of high-quality potting mix. I recommend an organic, peat-based mix for the best results. You’ll also need a permanent marker to label your seeds and an exacto knife to cut drainage holes. And lastly, you’ll need the seeds themselves. Almost any plant can be started via winter sowing, you’ll just need to follow the timing schedule I detail below.
2. Prepare Materials for Planting
Begin this step by cutting a few drainage holes in the bottom of every container. Then, if you’re using clam-shell containers, cut several quarter-inch-wide air holes in the top of the lid, as well. Soda bottles and milk jugs should be cut around the middle, about three-quarters of the way around, so you can flip it open like a hinge. Their lids should also be removed. Next, fill the containers with 3 to 4 inches of damp potting mix.
3. Determine the Timing
In order for winter sowing to be successful, you’ll need to determine what seeds should be planted when. Although the timing should be based on your own climate, for my USDA zone 5 garden, I follow this schedule:
- I sow perennial seeds and seeds of cool-season crops, like spinach, kale, broccoli, lettuce, cabbage, Brussels sprouts and chard, in January and February.
- In mid-March, I plant the seeds of annuals, such as zinnia, cosmos, marigolds, and salvia, as well as many different herbs.
- In early April, I sow seeds of warm-season crops, like tomatoes, peppers and eggplants.
4. Sow Seeds and Label Them
Once I’ve separated my seed packets according to the month I plan to sow them, I’m ready to plant. To sow the seeds, simply plant them into the container. Be sure to follow seed packet instructions, burying the seeds only to the depth noted on the packet. Because the resulting seedlings will be thinned as they are planted out into the garden, the seeds can be sown a little more thickly than is suggested on the seed packet. I plant about a dozen seeds in each milk jug. Once the seeds are planted, carefully label them by writing the variety name on the container with a permanent marker. Water the seeds in well.

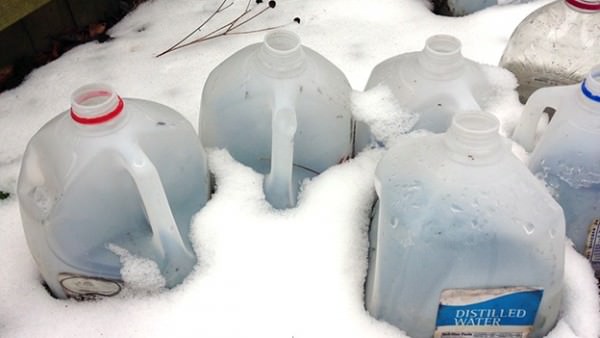
5. Close the Top and Pull Them Out
After your seeds have been planted, close the clam-shell container lid. Or if you used milk jugs or soda bottles, flip the top closed and use clear packing tape or duct tape to seal them closed, leaving the caps off. Place the containers outside. There’s no need to put them somewhere special, but a location with a decent southern exposure is best. If you have a lot of mice or chipmunks around, you may need to put the containers somewhere inaccessible to them. I put my winter sowing containers on the ground in the vegetable garden. There’s no need to insulate them in any way.
6. Wait for Germination
Your newly planted seeds will take their cue from Mother Nature and germinate when conditions are just right. There’s no need to watch over them; they’ll simply grow when they’re supposed to. The condensation that collects inside the containers is often all the moisture they’ll need, but if you notice a complete lack of condensation on warm days, you can add more water to the soil through the holes in the lid. Once the weather warms, things will start to germinate. When this happens, you’ll need to start paying a little more attention to your seedlings.
7. Monitor Temperature
On very warm days, you’ll have to remove the container’s lid or flip open the milk jug’s top to keep the seedlings from getting fried. Just remember to close them back up at night. Water the seedlings when they become dry.
8. Transplant
When the proper planting time arrives for each particular plant, lift the seedlings out of their container and plant them into the garden. For cold-season crops in my garden, that’s late March or early April. For warm-season crops and annuals, I move them to the garden after the danger of frost has passed in mid-May. The nice part about winter sowing is that you don’t have to think too hard about this. The plants will germinate and grow at the time Mother Nature intended them to.
Winter sowing is an excellent—and simple—way to start seeds.
