Paper mache is a simple and versatile craft that has long been a favorite for making bowls, forms, and decorative objects. Using just paper, flour, and water, it’s an accessible DIY technique that requires few supplies and encourages creativity with materials already on hand. Because the ingredients are so basic, it’s an ideal project for spontaneous crafting sessions as well as planned art projects.
Vintage garden books, botanical illustrations, and old seed catalogs are often used as inspiration for decorating paper mache pieces. Their detailed plant drawings and aged paper textures translate beautifully onto finished bowls and decorative surfaces, adding a natural, nostalgic aesthetic to handmade work.
This paper mache bowl project embraces that spirit of resourceful crafting—using simple materials, recycled paper, and natural inspiration. It’s a hands-on, slightly messy process that works best near a sink or easy cleanup area. Expect an experimental approach where imperfections add character and each piece becomes one of a kind.
Key Takeaways
- Paper mache is an easy, low-cost craft made with paper, flour, and water
- A bowl form (like a mixing bowl or jar) is used as the base structure
- Multiple layers (typically 3–5) create a strong, durable shape
- Natural and recycled materials can be used for both construction and decoration
- Finished bowls can be painted, decoupaged, or left rustic for a natural look
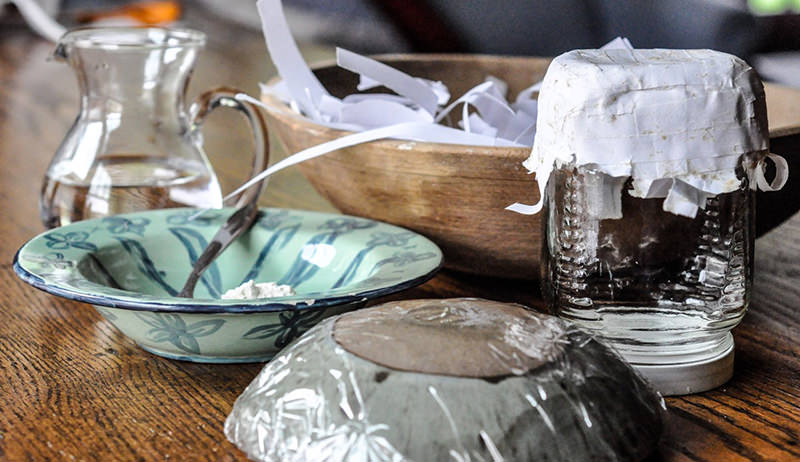
Materials for Your Paper Mache Bowl
- bowl or jar to use as a form
- plastic wrap
- dish and spoon (to mix paste)
- brushes
- all-purpose flour
- water
- paper strips
- gesso (optional, but gives a good surface to adhere your paint or decoupage)
- paints or Modge Podge and book pages to decoupage
Patricia Lehnhardt
Step 1 – Prepare Your Paper Strips
Tear paper into 1/2-inch strips in the length needed for your bowl.
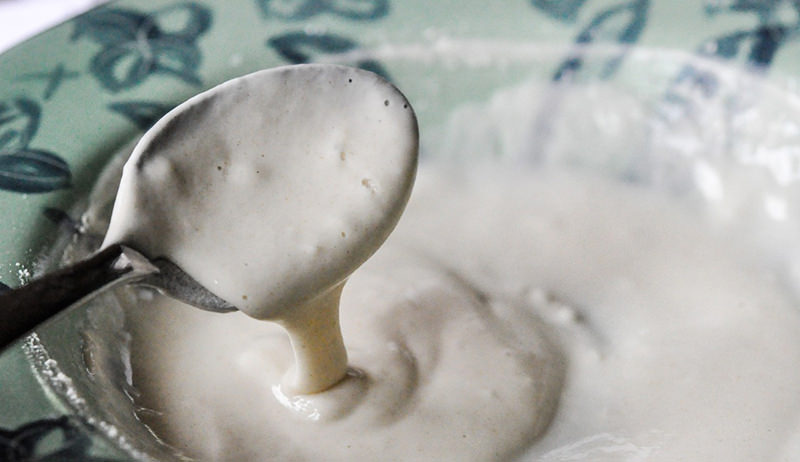
Step 2 – Make the Paper Mache Paste
Mix equal parts flour and water. Stir well to make it as smooth as possible, though there will still be some lumps. The paste should be the consistency of thick pudding. I used about 1/4 cup of each for the small bowls, adding a bit more water to get the right thickness.
Patricia Lehnhardt
Step 3 – Prepare Your Bowl Form
Turn the bowl or jar used for the form over and cover with plastic wrap.
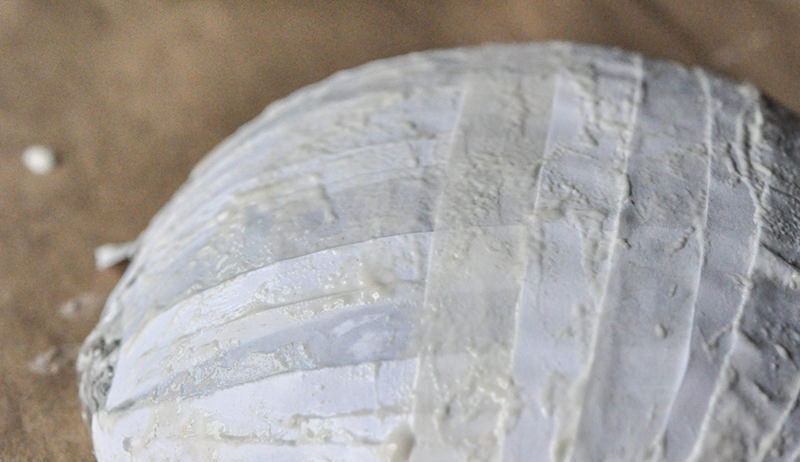
Step 4 – Apply the First Layer of Paper Mache
Dip the paper strips in the paste and pull through your fingers to remove the excess. It needs to be covered, but not too goopy. Lay the strip on the bowl. Continue adding strips of paper, overlapping slightly to solidly cover your bowl or form.

Patricia Lehnhardt
Step 5 – Build Strength with Additional Layers
Crosshatch the bowl with a second layer, and again in the opposite direction for a third layer. Three layers are good, but you can keep adding one or two more for added strength.
Patricia Lehnhardt
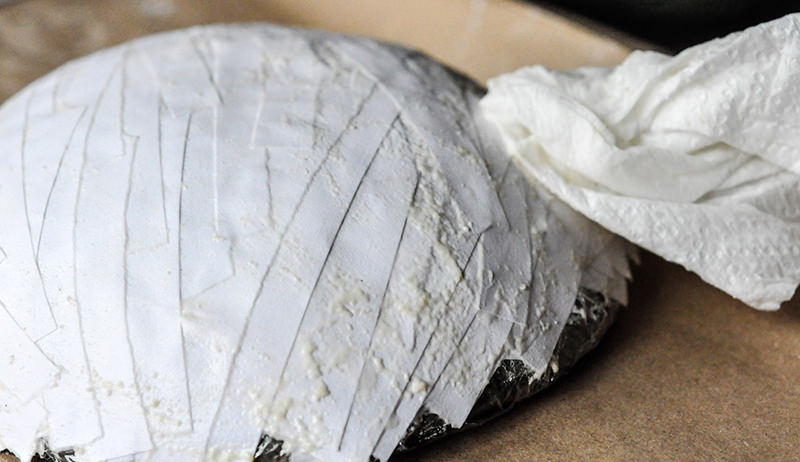
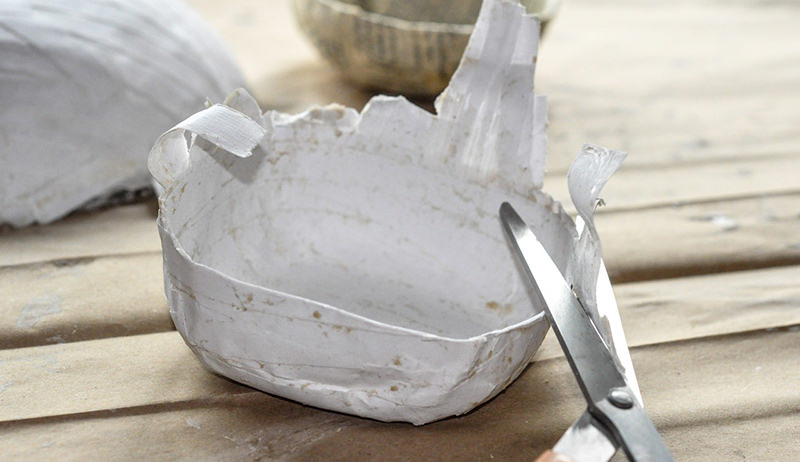
Step 6 – Dry and Remove the Paper Mache Bowl
Use a damp paper towel to wipe off the excess paste when you’re finished. Let dry overnight. Remove from the form and allow it to dry another day.
Patricia Lehnhardt
Decorating Your Paper Mache Bowl
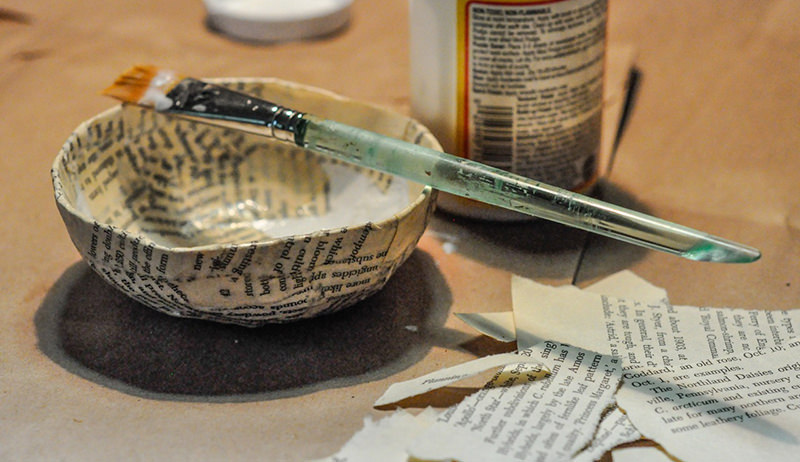
Here’s where it’s fun to get creative with your homemade bowl. I used a couple of decoration methods: decoupaging with the plant book pages and painting. Because I’m not so good at painting, I prefer the decoupage method, but that’s just me. The bowls are rather imperfect in all ways possible, so the funky paint job may be the way to go. Use your imagination to make the perfect bowl for you or the mom you’re gifting it to.
Patricia Lehnhardt
- Trim the edge of the bowl for a clean look, or leave it ragged for something more eclectic.
- Brush on a coat of gesso and allow it to dry overnight.
- Paint with acrylic paints.
- Tear old book pages in irregular shapes. Paint Modge Podge on a small section and place the scrap of paper on the bowl, brushing with more Modge Podge on top of it to secure and seal. Repeat with more scraps, overlapping slightly. Let dry overnight and repeat with the other side.
Patricia Lehnhardt
Frequently Asked Questions
What is paper mache made of?
Paper mache is traditionally made from paper strips combined with a simple paste of flour and water.
How many layers do you need for a paper mache bowl?
Most bowls require at least 3 layers, but 4–5 layers provide added durability.
How long does paper mache take to dry?
Drying time varies, but most projects require at least 24 hours to fully dry and another day to cure completely.
Can you waterproof a paper mache bowl?
Paper mache is not naturally waterproof, but sealing it with varnish, Mod Podge, or resin can improve moisture resistance.
What kind of paper works best for paper mache?
Newspaper, recycled paper, and tissue paper all work well. Thinner papers layer more smoothly.
A paper mache bowl is a simple yet creative DIY project that transforms basic materials into functional or decorative art. With just paper, flour, and water, you can build layered forms that are endlessly customizable. Whether painted, decoupaged, or left natural, each finished piece reflects the handmade character of traditional paper mache craft.
This article about making a paper mache bowl was written for Hobby Farms magazine. Click here to subscribe.