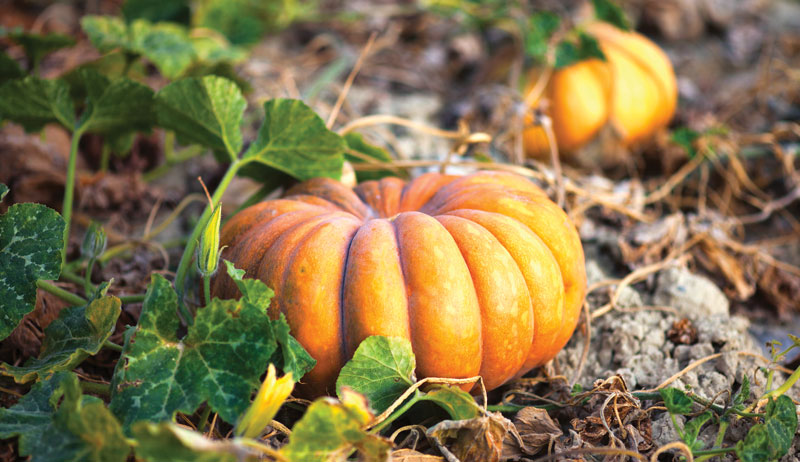
I was ecstatic the first time we grew pumpkins. My kids anxiously awaited their homegrown jack-o’-lanterns while I eagerly envisioned homemade pumpkin pies. Pie pumpkins, jacks, miniatures and even Cinderellas sprawled across our too-small garden that year. Our family was surprised at the sheer quantity of pumpkins a tiny patch can provide!
In the years since, we have narrowed down our selection of pumpkin varieties to those that make the best decorations and the best pumpkin pies. Even better, all those pumpkins are readily preserved with a pressure canner, a few jars and a bit of time.
Here’s how we turn our pumpkin patch into a larder full of jars, each ready to make a pie.
Pumpkin Selection
The good news is that it only takes two to four plants to produce all the pumpkin puree a small family will likely need for an entire year. However, you don’t have to grow your own pumpkins to achieve that sought-after, fresh-from-the-farm flavor.
Beginning around September and running through the holidays, most regions maintain a steady supply of these delectable orbs in the stores and the farmers markets. From-scratch baking is just a simple matter of making a quick trip to town.
The best pumpkins to use in any type of recipe are by far the pie pumpkins. Also commonly called sugar pumpkins, these varieties are much smaller than the more recognizable jack-o’-lantern varieties and boast a significantly higher sugar content. Most pie pumpkins also produce a smoother final product than others, such as the jack-o’-lantern varieties.
However, don’t be discouraged if a large jack-o’-lantern is the only pumpkin you have access to. While technically not the best for pies or other pumpkin-based food fare, these will still produce a fine end product with a little extra prep. Most often, this simply means adding more sugar to the recipe than originally called for to offset the lower sugar content.
These pumpkins also tend to be stringier than their smaller counterparts and may require additional runs through a sieve or blender to create the smoothest texture possible. So don’t worry if you can’t find those little pie pumpkins.
Regardless which type of pumpkin you select, always go for the firmest pumpkins available with little to no blemishes. Stems should be firm and connected solidly to the pumpkin. You should notice no soft spots, including on the bottom of the pumpkin.
When handling, hold pumpkins by the sides and not the stem to avoid damaging the tender flesh inside. Store pumpkins in a cool, preferably dark, location until ready to process.
Read more: Save seeds from your pumpkins! This video shows you how.
Canning Help
While it’s true that pumpkin can be easily frozen for future use, not everyone has access to extra freezer space. By using a pressure canner, however, enough pumpkin can be processed within a few short hours to supply a small family with an entire year’s worth of pumpkin products.
Just be sure to follow the USDA’s safety guidelines to ensure the final product is safe for consumption.
Step 1
Carefully wash pumpkins to be canned. Using a sharp knife, slice the pumpkin into halves. With a large spoon, remove seeds and any visible strings just as you would do with a jack-o’-lantern. Set seeds aside for later use as desired.
Step 2
Once the seeds are removed, slice the two halves into 1-inch-long strips. Carefully remove the rind from the flesh and discard. Cut each strip into 1-inch cubes.
Step 3
Place cubes in a saucepan. Cover cubes with water. Boil 2 minutes. Cubes should not be soft or mushy but should retain a level of firmness. (Note: According to the USDA, pureed forms of pumpkin can’t be safely canned in any manner in a home-canning environment.)

Kristi Cook
Step 4
Prepare hot jars, lids and bands according to the manufacturer’s recommendations.
Step 5
Fill hot jars with cubes and cooking liquid, leaving 1-inch head space. Be careful to not overpack cubes. Some cubes may become squashed in the bottom, so just be extra careful to avoid squashing as much as possible. Remove air bubbles and adjust headspace, if needed.
Step 6
Wipe rims of jars with a dampened clean paper towel. Adjust lids and process in a pressure canner according to the floowing “Pressure Points” chart.

From Jar to Pumpkin Puree
Minimal time and equipment are needed to turn those golden cubes into a velvety smooth puree ready for Thanksgiving pumpkin pie. Just drain the excess liquid from the jar and blend. It couldn’t be simpler.
- One quart jar of home-canned pumpkin cubes is the equivalent of one 15-ounce commercially prepared can of pumpkin puree.
- To achieve the smoothest texture, puree canned pumpkin cubes using a potato masher, ricer, sieve, blender or processor.
- If using jack-o’-lantern pumpkins, additional blending may be required to achieve the desired smoothness.
- Fresh purees can be slightly more watery than standard canned pumpkin. To alleviate this concern, strain and/or squeeze excess liquid from puree using cheesecloth until desired consistency is achieved.
- Jack-o’-lantern type pumpkins often require an additional 1⁄4– to 1⁄2-cup granulated or brown sugar to achieve the same level of sweetness as pies made with pie pumpkins.
Once you’ve tried your hand at pumpkin pie in a jar, you may be surprised to find you no longer have a need for the commercially prepared versions of pumpkin puree. Your new creations will have a richer, fuller flavor reminiscent of all things made from scratch. The trick is to find which pumpkins you enjoy best.
More Information
From-Scratch Pie Crust
I don’t recall where I found this recipe, but it has become one of my family’s favorites over the years. Light and flaky with a hint of buttery goodness, this recipe uses butter and shortening. Make a delicious pumpkin pie or whatever pastry you fancy!
However, I’ve had great success swapping the butter entirely for shortening when butter wasn’t available. This dough freezes exceptionally well for up to three months.
Ingredients
- 2 1⁄2 cups unbleached all-purpose flour
- 1 teaspoon salt
- 6 tablespoons unsalted butter, cut into cubes and chilled
- 3⁄4 cups vegetable shortening, chilled
- 1⁄2 cup ice water
Preparation
In a medium-sized bowl, combine flour and salt. Add butter and shortening to the bowl. Using a pastry blender or two forks, cut the butter into the flour until crumbly.
Slowly add chilled water to the flour and butter mixture, one tablespoon at a time. Continue adding water slowly until dough can be formed into a smooth ball. (All of the water might not be needed.) Be careful not to overwork dough.
Once smooth, divide dough into two equal balls. The extra dough ball may be placed in a baggie and frozen for later use.
Lightly flour the work surface, placing dough ball in the center. Flip dough ball to allow both sides to be lightly coated in flour. With the rolling pin, begin rolling dough from the center out, turning dough in circles periodically to all for a more even circle of dough.
Roll until 1⁄2-inch thick.
Place crust into nongreased pie pan, crimping edges. Cover edges with aluminum foil to prevent over browning.
Crust is now ready for pie filling. For baked crust pies, bake each crust using pie weights at 375 degrees Fahrenheit for 10 to 15 minutes, or until lightly browned.
Kristi Cook
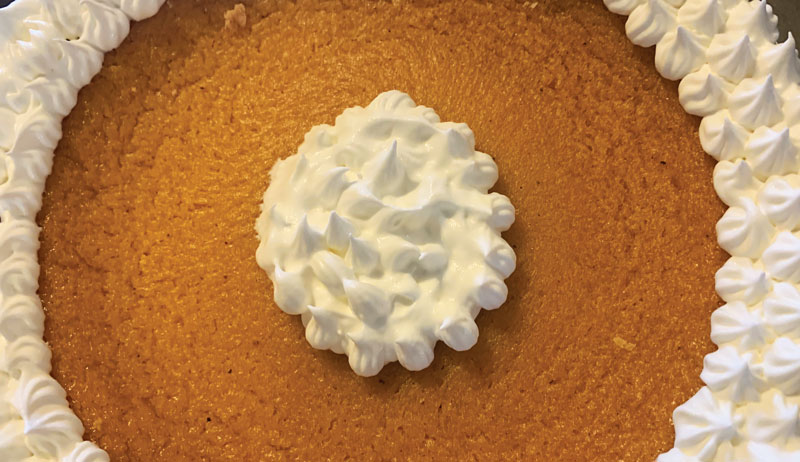
Homemade Pumpkin Pie
Everyone needs a good pumpkin pie recipe. Here is mine.
Ingredients
- 1 3⁄4 cups pumpkin puree
- 1 2⁄3 cup evaporated milk
- 1 egg, beaten
- 1 cup firmly packed brown sugar
- 2 tablespoons flour
- 1 teaspoon cinnamon
- 1⁄2 teaspoon nutmeg
- 1⁄2 teaspoon ginger
- 1⁄4 teaspoon ground cloves
- 1⁄2 teaspoon salt
- 1 deep dish pie crust
Preparation
Preheat oven to 375 degrees F. In a large bowl, combine brown sugar, flour, salt and spices. Add pumpkin puree, evaporated milk and beaten egg. Stir until smooth. Pour into an unbaked pie crust.
Bake for 40 to 45 minutes, or until knife comes out clean when inserted 2 inches from the edge of the pie. Serve warm with homemade whipped cream.
This article appeared in Hobby Farm Home, a 2023 specialty publication produced by the editors and writers of Hobby Farms magazine. In addition to this piece, Hobby Farm Home includes recipes, crafting projects, preservation tips and more. You can purchase this volume, Hobby Farms back issues as well as special editions such as Healing Herbs and Goats 101 by following this link.


