

Many chicken keepers like to have the ability to allow their birds to free-range for part of the day so that they can utilize new areas. But you might still want to contain your chickens in a specific area so that you can protect them from predators and control where they range. There are a number of ways to create a portable chicken run, including the popular chicken tractor, but you can also make an easy-to-build, 4-by-4-foot chicken run that collapses into a small, lightweight package whenever you want to move it or store it.
In the instructions that follow, we’ll show you one way to create a simple collapsible chicken run, but you can certainly make variations to this design to fit your flock, no matter the size; for instance, you could opt for a larger 8-by-8-foot design by essentially “doubling the recipe.”
Materials For The Chicken Run
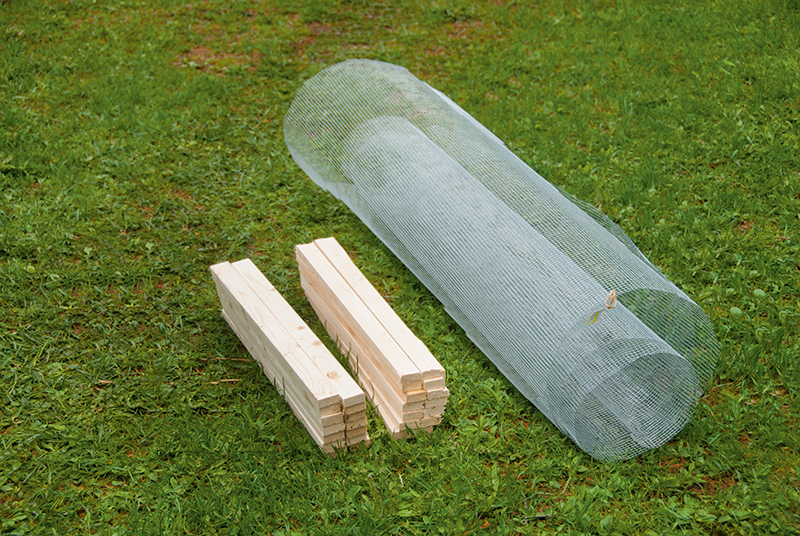
Wood & Cut List
- (16) 24 ½-inch 1-by-2s
- (16) 23-inch 1-by-2s
Hardware
- (8) 24-by-24-inch sections of ¼- or ½-inch hardware cloth
- (2) hook and eye latches
- (14) 2-inch hinges
- Box of 1½-inch nails
- Box of staples
Tools
- Circular saw or miter saw
- Staple gun or hammer
- Electric drill or screwdriver
- Framing square
- Metal snippers
- Wood glue
Step 1: Assemble Panel Frames

To begin, we’ll assemble the frames that will form the skeleton of the collapsible chicken run. We’ll need eight complete frames.
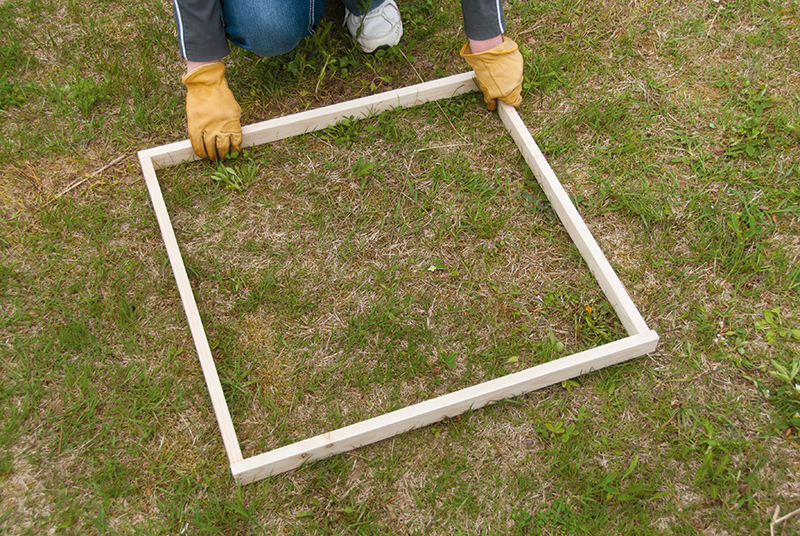
To build the first, take two of the 241⁄2-inch 1-by-2s and two of the 23-inch 1-by-2s and use them to create a square, with the shorter 23-inch 1-by-2 on the “inside,” and the longer 241⁄2-inch 1-by-2 on the “outside,” as shown in the photos. Use a framing square for precise corners.

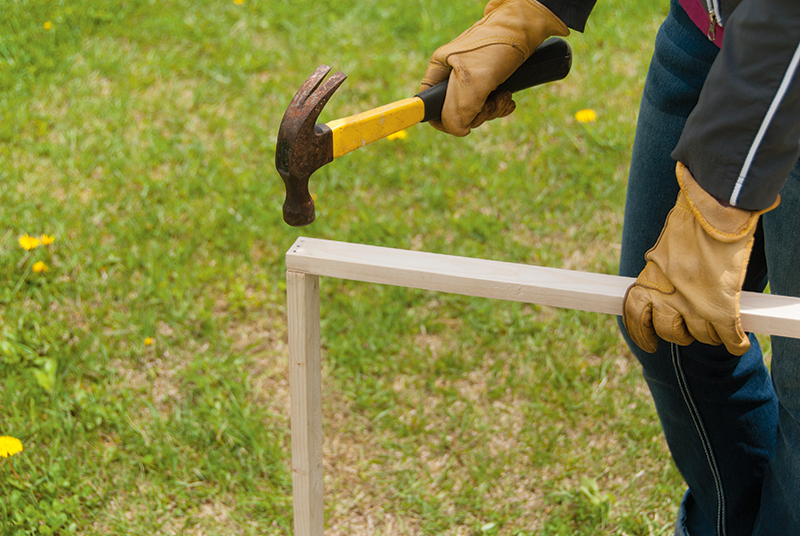
Predrill nail holes with a small drill bit and then fasten with 11⁄2-inch nails. Use wood glue on each joint for a firmer bond. Repeat this seven more times to create a total of eight wooden squares. Set these aside.
Step 2: Cut Hardware Cloth

Now we’ll need to add the hardware cloth to each panel of the chicken run. Using your choice of 1⁄4- or 1⁄2-inch hardware cloth, carefully cut a total of eight 24-by-24-inch squares with wire snips.
Our supplier provides hardware cloth on rolls 4 feet wide, so it was a simple matter to purchase a 4-by-8-foot section to use for this project.
Step 3: Fasten Hardware Cloth
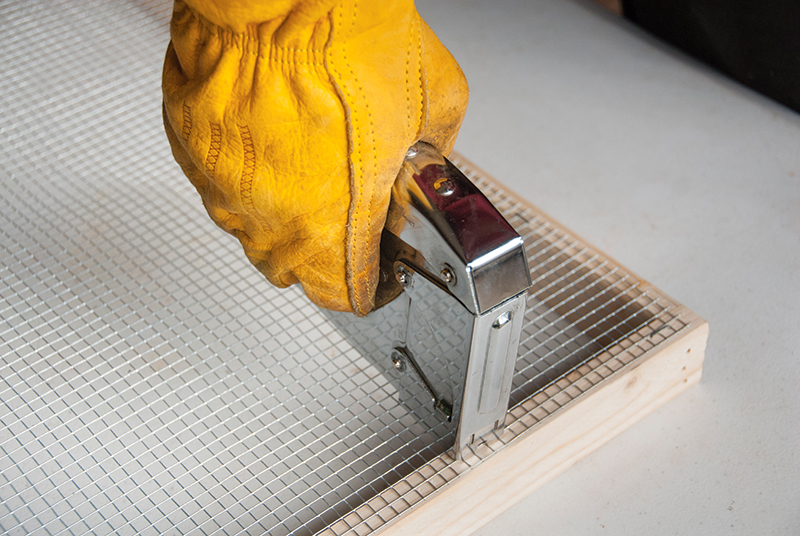
It’s time to attach the 24-by-24-inch sections of hardware cloth to each of the eight wooden panel frames of the chicken run. We used a manual staple gun for the job, but you could also use roofing nails to pin down the hardware cloth.

It’s important to keep the edges straight and properly aligned with the wooden frame.

It’s also critical that you exercise extreme care when handling the wire. Safety glasses and gloves are a must!
Step 4: Attach Hinges
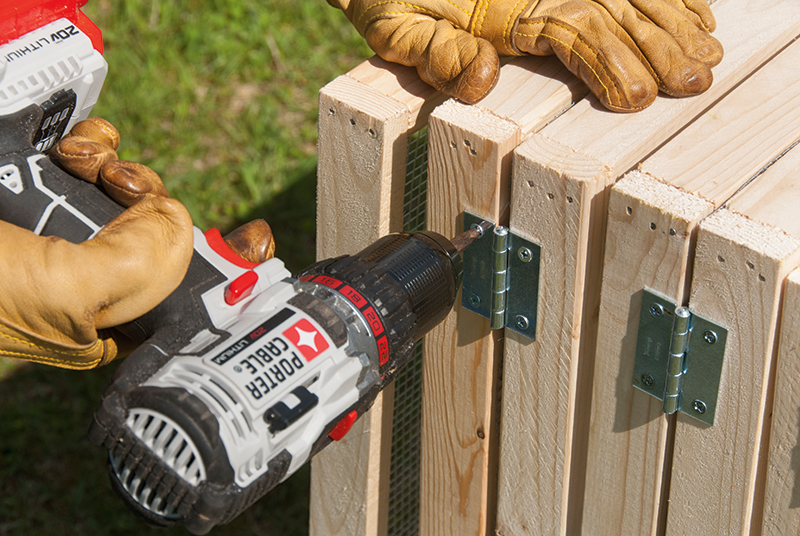
At this point, we can begin to fasten the finished panels together to create the chicken run. This can be a tricky step to do properly, as the hinges and the frames must be assembled the correct way to allow the pen to expand and collapse properly. Use two 2-inch hinges on each joint, and screw them in with the electric drill or screwdriver. It can help to predrill the screw holes here as well. Here’s an easy way to make sure that the panels will assemble in the correct manner:
- Create four pairs of panels, each with the hardware cloth facing “out.”
- Place all four pairs (a total of eight panels) side by side
- Attach hinges to each of the four pairs (shown in the photo at left).
- Go around to the other side
- Now attach hinges to the six inner panels, leaving off the two panels on each end (shown in the photo at left).
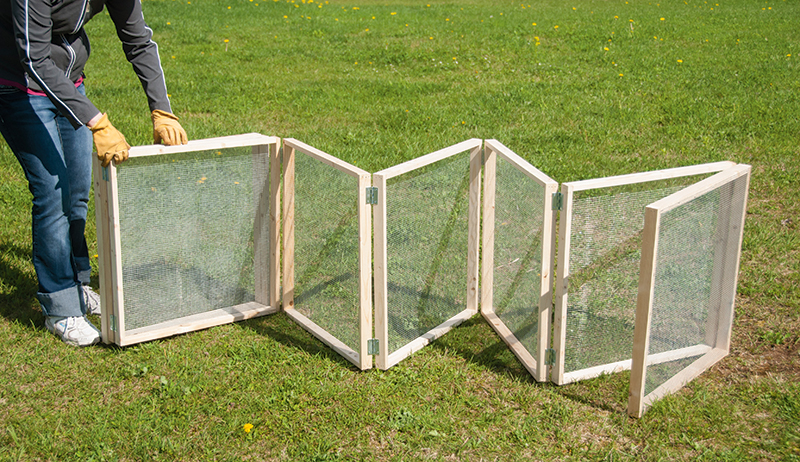
Step 5: Enjoy Your Chicken Run!
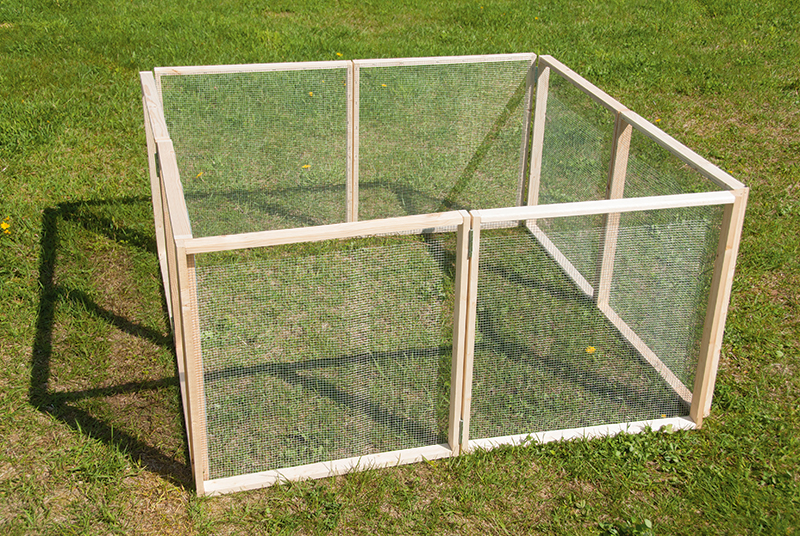
When assembled correctly, the pen should easily collapse into a lightweight and portable package that can then be quickly unfolded into a 4-by-4-foot movable run for your chickens.

Use two hook-and-eye latches at the top and bottom to secure the opening and you’re all set to go.

Predator-Proofing Pointers
Keep your birds safe while free-ranging in your new pen with these proofing tips.
- Half-inch hardware cloth may be available in a stronger gauge than 1§2-inch, which can help keep out predators. Don’t use chicken wire for this project, as predators can easily get past chicken wire. Hardware cloth is essential.
- If you’d like to create a roof for the collapsible run, you’ll need to make one large 4-by-4-foot frame and cover this with hardware cloth. The corners should then be temporarily screwed down during the day when the chickens are using the pen and removed at night.
- You can also use 2-by-2s (or larger lumber) instead of 1-by-2s for the basic frame; this will be make the run stronger, although using wood of a larger size like this will make the run heavier and more cumbersome to move and handle.
- Because this pen is lightweight and portable, it’s not a safe defense against digging or large predators. Your chickens should be kept in a digproof coop at night, and this pen should only be used during the day in a place where you can keep an eye on the chickens.
- Moving this pen around inside a larger area protected by electric fence may help keep predators away.
