


Whether you live in the ’burbs or out in the country, line-drying laundry is a smart choice that will save you money on energy costs, dryer sheets, and damage to linens and clothes.
Once relegated to the land of pure function, creative designs are available for anyone seeking a fashionably functional clothesline alternative.
Raising a Bracket
Amy Walker lives on 4 1/2 acres just outside Bear Valley Springs, Nevada. Despite her acreage and relative seclusion, homeowners-association guidelines restricted her ability to erect a traditional clothesline.
“Our HOA doesn’t allow visible laundry lines, so I had to get creative,” Walker says. “I designed it, and my husband made it for me. Although I wanted a traditional line out in the yard, the side of my garage was the only area that wasn’t visible. What I thought was a compromise worked out even better than my original plan.”
Bearing in mind that the line needed to be hidden from view and that it should be eye-pleasing, Walker came up with the idea of attaching brackets to the back of her garage that would support the lines and meld with the scenery.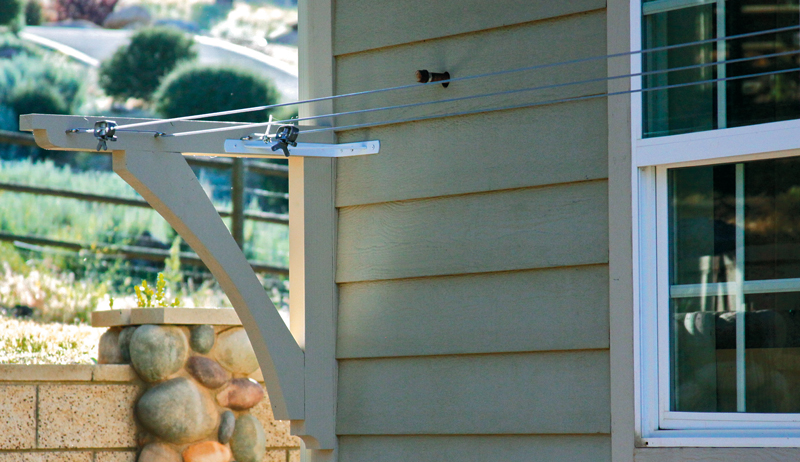
Researching other bracket-based clotheslines for support requirements and design ideas, she and her husband, Andy, constructed the 25-foot-long clothesline against the garage’s south-facing wall. There, their laundry could absorb the sun’s heat, be protected from cold northern winds and receive dappled shade during summer to protect clothes from fading.

As a bonus, the line is situated over a concrete patio, decreasing dust and debris. The location also makes it easier for Walker to access with her antique laundry cart.
For proper ventilation, the couple designed 4-by-4-foot brackets to allow for 9 inches air space between each of the three lines and 10 inches between the back line and the wall.
They mounted the brackets by drilling a hole and countersinking a bolt that they then covered with a wooden plug. They added L-braces to the brackets’ interior sides and the back wall to offer more stability once the line was tightened.
Standard eye hooks with clothesline ratchets hold the vinyl-wrapped galvanized cable taut.
This tutorial will help you build a simple but sturdy clothesline.
Teed Up
Even a traditional T-post-style line can get a facelift with a little creativity and vision. Consider painting the posts and adding decorative elements, such as cornice brackets or wooden lattice.
LineDry.com offers California residents in Sonoma and Marin counties an attractive means of landscaping and drying with a custom-trellis clothesline that can support climbing vines as well as break down for storage.
Your design is limited only by your imagination (and, in some cases, your homeowners association). Be sure to check your local zoning ordinances before you start.
If you’re installing T-posts, reinforce the base of each post with a concrete footing for stability. Because the footings make the posts permanent fixtures in your yard, you’ll want to consider your location carefully.
Print a Retraction
Avoid getting “clotheslined” while performing lawn-maintenance duties. Expand your line-drying options with a retractable line. These stow out of the way when not in use and can move indoors for year-round drying.
Easily incorporated into your landscape or interior décor, you can hang retractable clotheslines just about anywhere. Just attach the line to decorative-yet-sturdy hooks on porch posts, coat racks or any other well-secured item.
You merely consider the space required for your drying needs and secure the line at one end. Pull it out to attach at the other when in use and put it back when it’s not.
Vintage retractable-line systems are attractive options. But they might not offer the stability and durability you seek, so shop carefully.
That said, even the newest models come in varying degrees of quality. Keep your intended location and usage in mind when selecting a retractable clothesline. The casing (i.e., storage receptacle for the line) and lines can be fabricated using a multitude of materials suited to different exposures and weights.
New retractable systems also come in multi-strand versions with up to five strands. While multi-strand systems are stronger than single strands, heavy items, such as wet towels and rugs, might be too heavy for the lines, causing them to sag.
Push & Pulley
Another clothesline throwback worthy of consideration is the pulley line.
This ingenious little tool has an industrial aesthetic prevalent in today’s home-design trends. Plus, it saves you the task of dragging a laundry basket across the yard as you hang and remove laundry.
Whether you score a vintage cast-iron pulley at a local flea market or purchase a new modern pulley from an online or local retailer, you should look for a few key qualities.
- Make sure the pulley is waterproof (for wood) or rust-resistant (for metals). Plastic and aluminum pulleys are inexpensive but aren’t as durable.
- Check for weight limits. Also ensure there’s plenty of space between the pulley and hanging bracket for optimal movement.
- Because some brackets and pulleys, such as cast-iron units, are heavier than others, your mounting apparatus needs to be able to handle the unit’s weight in addition the laundry load.
No matter your design aesthetic, there’s a laundry line perfectly suited to your needs and taste. All that remains is for you to put it on the line.
Here are some tips to follow when line-drying your laundry.
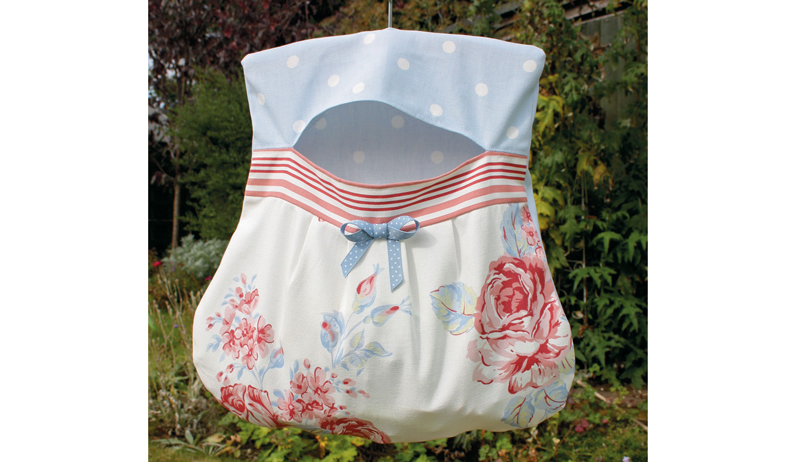
Sidebar: Pin-up Pouch
courtesy of Sandra Paul/Cherry Heart
Corral your clothespins with a handmade bag! With these basic instructions, you can create a peg bag suited to your needs.
My bag measures about 13 inches tall by 10 inches wide at the top (the same width as the hanger) and 13 inches at the widest point across the bottom. You can alter these measurements as needed.
- Draw the shape of the bag onto a template. Use an old peg-bag hanger or child’s wooden clothes hanger as a guide for the top width. To get a symmetrical curve on the bottom of the bag, fold the template in half vertically and trim.
- On the template, mark a 7-inch-wide opening about 3 1⁄2 inches from the top. Using the template, cut three pieces of fabric: one whole piece for the back; one front piece from the top of the template down to the opening; and one front piece from the bottom of the bag up to the opening, adding seam allowance for each.
- Sew the two front pieces together from the edge up to the opening on each side. Tuck the raw edges under along the opening and sew a seam. You will now have a front piece with an opening for pegs.
- Next lay the back piece faceup and the front piece face-down on top. Using the template to mark the shape, sew around the edge of the bag, leaving a small hole at the top for the hanger to poke through. Turn over the raw edge of the seams to neaten up inside.
Turn the whole thing right-side out, put the hanger in and hang.
This article appeared in Hobby Farm‘s Best of Hobby Farms Home 2019, a specialty publication produced by the editors and writers of Hobby Farms magazine. You can purchase this volume, Hobby Farms back issues as well as special editions such asBest of Hobby Farms and Living off the Grid by following this link.
