

Several years ago, my father—Don Adams, the co-author of this article—and I had arrived early to set up for our first do-it-yourself solar presentation. Looking at the rows of empty chairs, he asked, “How many people do you think will show up to this? How many would really be crazy enough to try this on their own?”
As the time arrived for our talk, though, it was standing room only. The convention organizers had us announce that our event was at capacity. The hallway traffic had stopped moving. People had trouble getting to other events.
Since then, we have given dozens of presentations and continue to get the same amount of interest, despite the fact that prices are considerably more affordable now.
I’d like to think that we’re good speakers and draw crowds. I believe, though, so many people attend because few topics speak so powerfully to self-sufficiency as energy independence.
We started in do-it-yourself solar because of the associated costs. When we began looking into a 6-kilowatt system, the average price, installed, was more than $45,000 (~$7.55 per watt). The salesperson couched the expense in terms of an “investment.” Over 14 years, it would pay for itself.
I wasn’t particularly interested, however, in that sort of investment, so we looked into building DIY solar panels ourselves. My father is an electrical engineer who builds and designs high-power transmission systems for TV stations. He is accustomed to dealing with power in the range of those systems, so he felt comfortable tackling this.

After seeing a listing on eBay for grade-A solar cells at $0.27 a watt, we were sold on the DIY route. For those with some basic soldering skills and electrical knowledge, this is a viable option.
Why DIY?
Again, it goes back to cost. The cost to construct our own DIY solar panels came to around $0.67 a watt, easily 10 percent of the cost (at that time) to purchase new and installed.
Prices have changed substantially since we started building our own panels. There are now some incredibly low prices on finished panels, and if you’re willing to watch for deals, you can purchase panels for less than it cost us to go the DIY route several years ago. DIY solar panels can still save you money, though, through bulk purchases and sourcing your materials.
If, after reading this article, you opt to just purchase the panels outright and not go DIY, that is perfectly acceptable. It’s a great time to get into solar, either way.
In this article, we’ll cover the design decisions we made and give step-by-step instructions on how you can do the same.
Solar Cells & Frame Size
We purchased our cells (6 kilowatts worth) from someone who had picked them up at auction. The cells were 3 by 6 inches and 0.5 volts at 1.8 watts.
It’s helpful to think of solar cells like batteries, with a positive and a negative. The negative connection end is on the front surface, and the positive connection end is on the back surface.
These can then be wired either in series or parallel. In series, the voltage adds, while the current stays the same. In parallel, the current adds, while the voltage stays the same.
We get the voltage we need—typically a 12- or 24-volt operation—with combined currents by connecting cells in series as well as parallel. We solder tabbing wire from one surface to the other for series—front to back—and paralleling strings together.
The size of the strings and number in parallel is determined by the size of the frame we use. Almost everything is based on 3-by-6-inch or 6-by-6-inch solar cells, and you can purchase smaller glass or frames.
Much of this is determined by what you can find on the cheap. For the frame, the critical part is the solar glass.
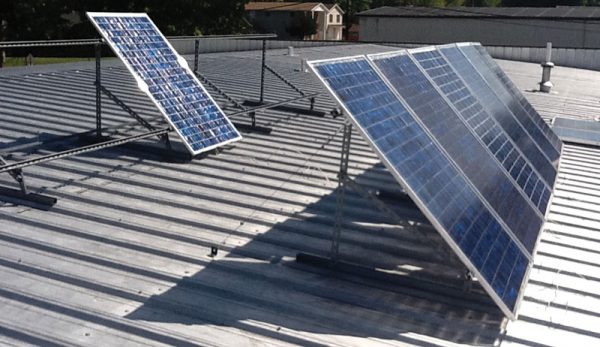
Once again, we did some searching and found someone selling them in bulk. (He had bought them in bulk and was looking to recoup some of the cost.) They were 3 by 5 feet, so we purchased enough to build out a 6-kilowatt system—30 DIY solar panels, at roughly 200 watts each.
Based on the size of the frame we planned to build, here is the layout we came up with:
- In our design, there were 108 cells total, which would produce 194 watts.
- The voltage operation was at 18 volts. It’s higher than the 12 volts we need to charge 12-volt batteries, so the controller sets the voltage.
- In order to build out the 6 kilowatts we had purchased, we’d construct roughly 30 panels.
- To put the amount of time in perspective, we connected 3,000 cells with about a half-mile of tabbing wire.
Building the Frame
When researching DIY solar, we had seen several people build wooden frames.
Don’t do this. If you spend the time to build your own DIY solar panels, use materials that will last. Almost all commercial units use aluminum frames.
We settled on 1⁄8-inch aluminum L – 1-by-½ inch as a trade-off of cost versus rigidity. We used leftover aluminum that we had in our shop, but you can find what you need from local metal suppliers.
In building the frame, we used tools you can find a standard shop. For cutting the frame, we used a band saw and constructed a jig to cut the angles.
Everything has been constructed with expansion in mind. So there is a 1⁄8-inch clearance around all of the cells (we’ll explain a little later how we get the 1⁄8-inch clearance) and 3⁄16 clearance of the glass to the frame.
Corner brackets were made using scrap aluminum angle. Holes were drilled and tapped for #8-32 stainless steel screws.
Once we assembled the aluminum frame, we ran a bead of silicone caulk on the inside edge. Make sure that the caulk is good for outdoor use, and don’t use caulk with sulfur. We learned the hard way that it will interfere with the encapsulation.
After caulking the inside frame, we placed the solar glass and followed that with another bead of silicone caulk on the top edge of the glass and frame.
We added some aluminum L material as cross braces to add some more rigidity. The aluminum L cross braces can be removed after the silicone has set to allow full access to wire in the solar cells.
Solar Glass
Solar glass is tempered glass with low iron, specifically made to be more efficient for light transmission.
Once again, we defaulted to eBay to find inexpensive options and found someone who was selling 3-by-5-foot sheets for $25 each. We’ve seen some folks choose plastic as an alternative to solar glass, but it’s not efficient, scratch-resistant or cheaper.
Soldering & Tabbing
For the soldering, you need a soldering iron that can accommodate a temperature of around 400 degrees Celsius.
This provides good heating using a chisel tip so that the pre-soldered ribbon wire adheres to the cells. Make a slow, steady swipe down the ribbon wire to melt the solder. That gives it a solid contact.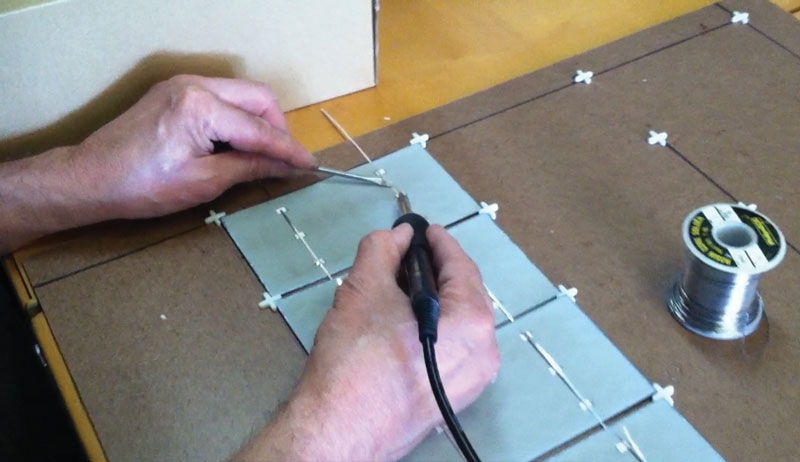
Start by attaching the tabbing wire to the fronts. Apply flux to the cells and the tabbing wire. The surfaces should be sticky and hold in place better.
You need a good way to provide the 1⁄8-inch spacing between the cells, and solder them together in a string.
We accomplished this by creating a jig using 1⁄8-inch tile spacers. This gave the cells the consistent 1⁄8-inch spacing we wanted.
Once you have enough cells to complete a string, put them in the jig and wire them front to back. After you’ve completed an entire string, test the strings with a voltmeter. We assembled a light table with shop lights underneath for this purpose.
Encapsulation
Commercially, a material called EVA film is used, and everything is laminated together.
That process requires an oven vacuum chamber, so we used a poured, clear, acrylic-like resin. A lot of these exist on the market, and we tried several. We wanted something that wasn’t too viscous—as we still wanted to move things around a bit and work air bubbles out—and didn’t set too quickly to give us time to correct problems. The Solar-Tite 384 ended up working best.
First, pour some encapsulant, then lay in the strings. Sixteen ounces of solution yields 29 cubic inches of area volume.
Two bottles should be enough to lay in 58 cubic inches of area volume. We use two to three bottles before laying in the strings. Once it sets, pour more on the backside.
After you lay in the cells, work out any air bubbles. The process is simple.
Gently press on the cells from the top, and watch from below to see that most of the air bubbles are worked out. These cells are like eggshells—they crack easily—so press very gently.
If the cells do crack in the corner, it can still work fine, so test it first.
After that is done, let everything set. Pour a couple of more bottles on the backside and let it set.
The cells should be fully encapsulated at this point.
In this article, we couldn’t cover every facet of building your own panels, but it covers enough for you to start your research.
Of course, there is a lot more to it such as wiring, diode protection, mounting and energy storage. Consider this article as a starting point to more DIY goodness.
Dan’s father, Don Adams—who is also an engineer—co-wrote this article, which originally appeared in the September/October 2019 issue of Hobby Farms magazine.
