


Whether you fence your farm with wood, electric or another type of fencing, traditional techniques generally require that you set fence posts directly into the soil, perhaps with the aid of concrete as backfill. For corner posts in particular, achieving secure contact with the ground is critical, especially when using tension fencing.
Unfortunately, soil conditions are not always ideal where posts are needed. Farmers and ranchers often find themselves challenged by conditions that are too muddy, sandy or rocky to set a post in the traditional method. Additionally, in regions with cold winters, it’s common for deep spring frosts to repeatedly push fence posts up from below, causing major fencing dilemmas. Clearly, a solution is needed in these instances; what can be done?
Enter the stone crib. A stone crib is essentially a wooden or wire cage filled with rocks that secures a fence post without having to set it into the soil. The stone crib simply rests on top of the ground, with a heavy load of rocks holding the fence post in position.
The instructions in this project are for an easy-to-build stone crib design that doesn’t take long to construct and requires a minimum of material. The exact size of the crib you build (and therefore the number of rocks it holds) depends on your location and needs.
A corner post under tension might require a larger number of rocks to hold it steady, while a simple line post (as shown here) needs fewer. Fortunately, it’s an easy matter to adjust the measurements in this project to increase the size of the crib; simply change the lengths of the (11) 2-by-6s from 20 inches to perhaps 24 inches, or even 36 inches for a very large crib suitable for heavy-duty needs. Treated lumber lasts longer.
Stone cribs are a wonderful little piece of rural ingenuity and a nice example of using what you have—in this case, using up those piles of rocks you’ve collected from plowing your fields and gardens. It’s easy and inexpensive, so why not give it try?


Materials You’ll Need
Cut List
- (11) 20-inch 2-by-6s
- (2) 16 1/2-inch 4-by-4s
- (1) 6-foot fence post (4-by-4, 4-by-6, 6-by-6 and so on—whatever you have handy)
Parts List
- (4) 3-inch angle brackets
- 1 pile of stones
Tools List
- circular saw
- chop/miter saw (optional)
- electric drill
- square
- tape measure
Step 1: Build the Crib Frames
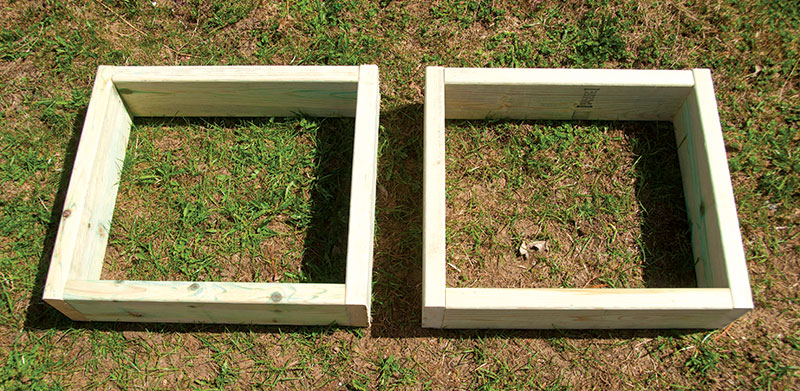
Using 3-inch exterior screws, combine four of the 20-inch 2-by-6s to create a rectangle. Use a framing square if needed to keep the corners accurate. Repeat this step so that you have two identical frames.
Step 2: Add Floorboards
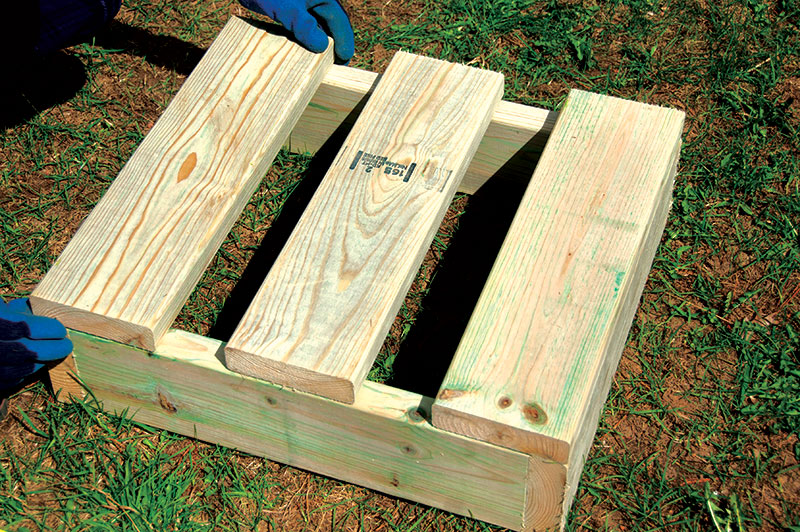
Add three additional 20-inch 2-by-6s across one of the frames, leaving a gap of 3 1/4 inches as shown in the photos. This is the bottom of the stone crib, but it is easier to build it “upside down” and then flip it over. Use 3-inch screws to attach.
Step 3: Attach Corner 4-by-4s

For added strength, short 16 1/2-inch 4-by-4s are used on two corners of the crib. Fasten these with 3-inch exterior screws on the sides and the bottom.
Step 4: Attach Second Frame
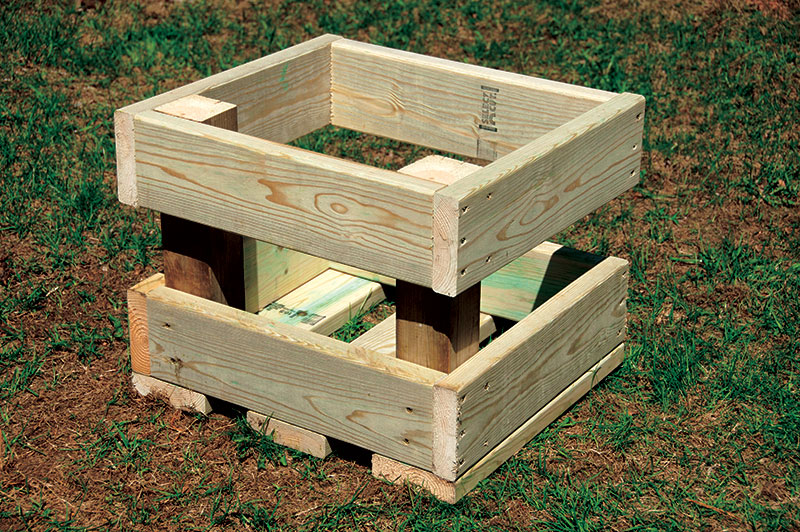
Using 3-inch screws, attach the second frame of 2-by-6s to the 4-by-4s. Leave a space of about 5 1/2 inches between the two frames.
Step 5: Fasten Fence Post

The stone crib is prepared to the point that you can attach the fence post it is designed to support. You can use whatever size fence post you have handy and that is large enough for the job; here we used a piece of 4-by-6-inch lumber.
The post needs to be shorter than most fence posts you’re accustomed to working with because it doesn’t go into the ground. (We cut ours to 6 feet.) Use 4-inch screws to attach the post to the crib. Be especially careful when working with the project at this point, because until the rocks are added for weight, the stone crib is top-heavy and can easily tip over.
Step 6: Add Angle Brackets
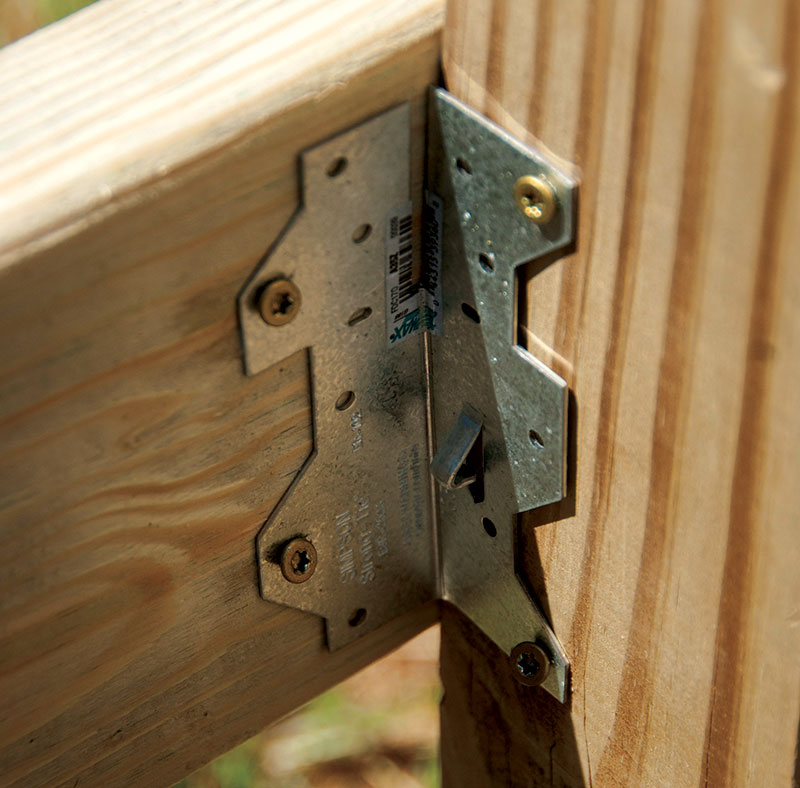
To increase strength, you can add four angle brackets to help hold the fence post to the stone crib as we did here.
Step 7: Fill With Stones

Move your empty stone crib into the location where you plan to use it, and then fill the crib with stones. The weight of the rocks sitting in the crib provides a solid and stable foundation to hold the fence post, all without any digging or setting into the ground.

This story originally appeared in the November/December 2018 issue of Hobby Farms magazine.
