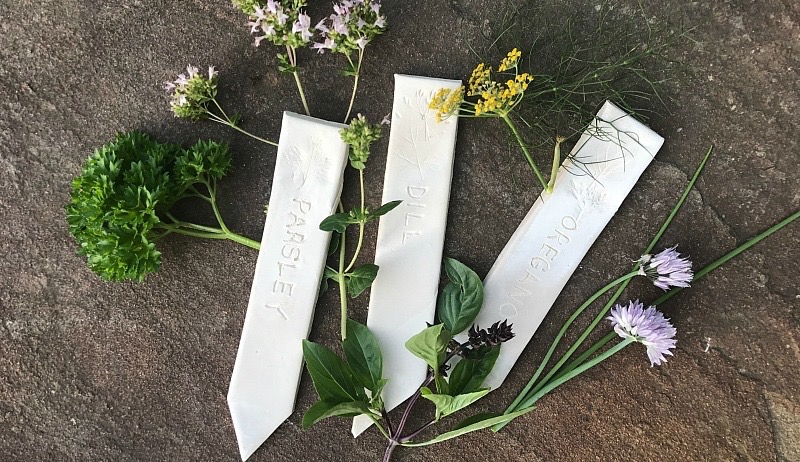
Are you tired of paying a lot for fancy plant markers to help you label the herbs in your garden? These cool DIY clay plant markers are inexpensive and fun to make—it’s a great rainy day project for kids and grown-ups alike! You can make dozens of markers for just a few dollars, and though this article teaches you how to make basic plant markers, you can spice them up by using colored air-dry clay, painting the finished product, or even by having your kids carve fun shapes and designs into the clay before drying. Let your imagination be your guide.
Materials

Jessica Walliser
- A tub of white, air-dry clay, 2 to 2.5 pounds
- Flat work surface
- Rolling pin
- 12-inch ruler
- Rolling pizza cutter
- Herb leaves
- Chopstick or pointed wooden skewer
- Wax or parchment paper
- Cookie sheet or another flat drying surface
- Butter knife
- Spatula
Step 1: Knead The Clay

Jessica Walliser
Begin making your clay plant markers by opening the package of clay and kneading a good-sized piece of it on a hard surface until it’s pliable and smooth.
Step 2: Roll Out The Clay

Jessica Walliser
Once the clay is softened, use the rolling pin to roll it out into a flat sheet, about 1/2″ thick.
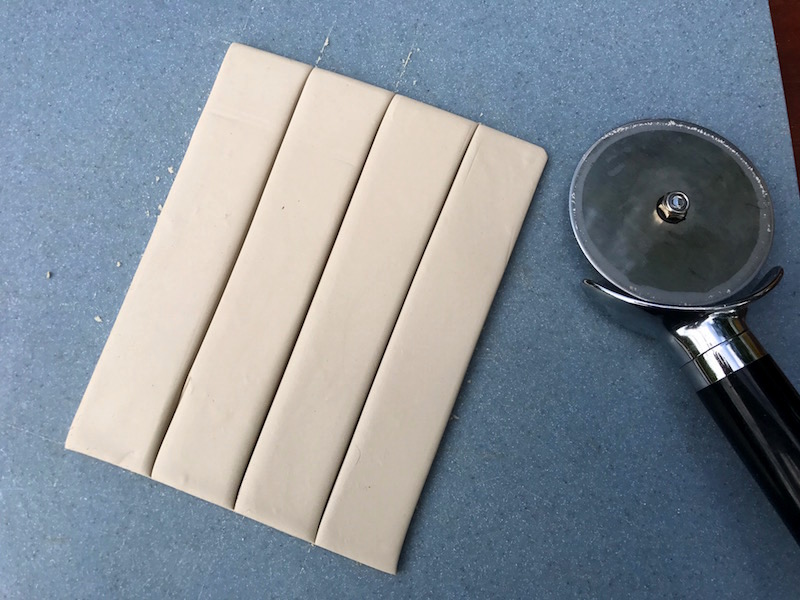
Step 3: Cut The Clay

Jessica Walliser
Place the ruler on the clay and use the pizza cutter to cut around the outside of the ruler, making a 12-inch long rectangular piece of clay. Then cut each 12-inch length in half, making two 6-inch rectangles.
Step 4: Place On Drying Surface
Jessica Walliser
Once you’ve cut out the desired number of rectangular markers, use a spatula to carefully scoop them up and place them on a wax or parchment paper-covered cookie sheet or another flat drying surface.
Step 5: Cut The Ends Into Points

Jessica Walliser
Once all the markers are on the flat drying surface, use the butter knife to cut the bottom end off at an angle, making a sharp point at one end that will be easier to insert into the soil.
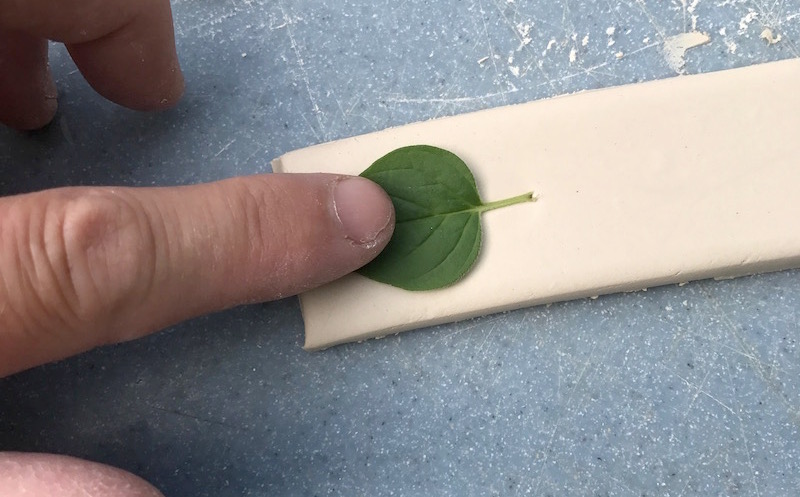
Step 6: Make Leaf Imprints
Jessica Walliser
Take an herb leaf and place it on the flat, upper end of one of the markers. Use your fingertips to gently press the herb leaf into the clay to make an imprint of the leaf, then peel the leaf away. Repeat with each different herb leaf until all the markers have been imprinted.
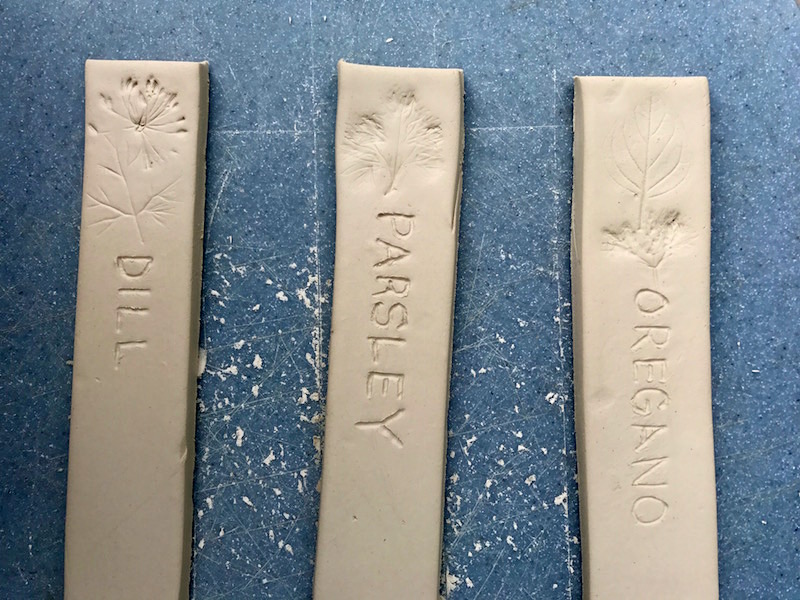
Step 7: Write Herb Names

Jessica Walliser
If you’d like, you can also use the tip of a chopstick or wooden skewer to carve the name of the herb into the clay beneath the leaf impression.
Step 8: Let Them Air Dry
Jessica Walliser
Let your homemade clay plant markers dry undisturbed until the clay fully hardens, about three days.
Your plant markers are now ready to be used in the garden.
One word of caution: Do not leave your homemade plant markers in the garden over the winter if you live where freezing temperatures are the norm. Collect and store them indoors before cold temperatures arrive.


