


When frost threatens and the growing season comes to an end, many gardeners despair at having to pull up and discard their favorite frost-sensitive annuals. But, instead of tossing these colorful plants onto the compost pile, many of them can be overwintered by taking stem cuttings. Use this cool, DIY propagation box, made from an old drawer, to root lots of cuttings of your favorite annuals. Once they’ve formed roots, lift them out of the box and pot them up into plastic or ceramic pots, and enjoy them indoors until spring arrives when you can plant them outdoors again.
What You’ll Need
- 1 old wooden drawer
- 1 bag sterile, soilless potting mix
- 1 bottle rooting hormone
- annual plants from which you’d like to take cuttings
- clear, plastic dry cleaning bag
- cordless drill with a 1/2 drill bit
- pair of sharp, clean pruning shears or scissors
Step 1

Use the cordless drill to make three to five 1/2-inch drainage holes in the bottom of the drawer.
Step 2

Fill the drawer with the potting mix, removing the air pockets by gently tapping the drawer on a flat surface a few times. It should be filled to within 1 inch of the top rim.
Step 3
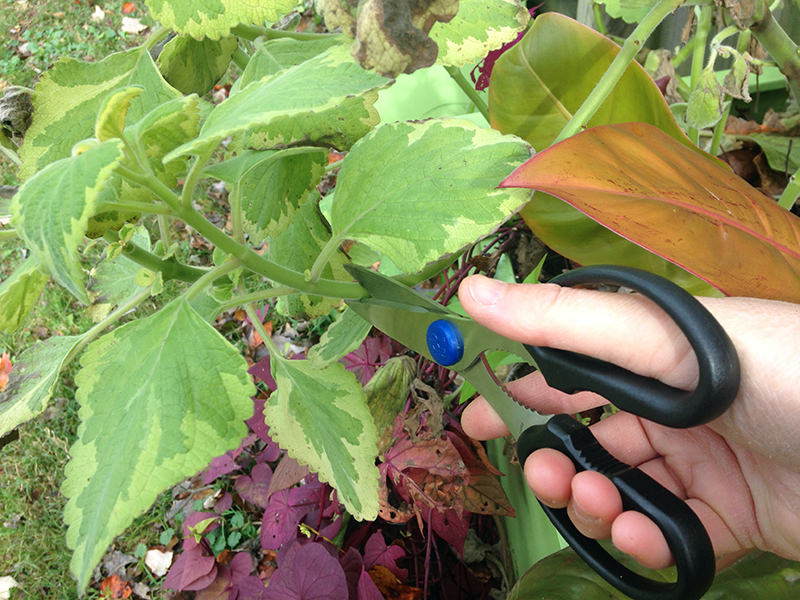
Gather eight to 10 stem cuttings. Use the pruning shears to snip off a terminal portion of the stem of whatever plants you’d like to propagate. Each cutting should be 2 to 3 inches long and have three to five leaves. Harvest the cuttings quickly so they don’t dry out.
Step 4

Pull all the leaves off the cuttings with the exception of the top-most one. Then, dip the bottom inch of the cutting into a bottle of rooting hormone.
Step 5

Insert the bottom of the hormone-dusted cutting into the potting mix in the drawer, making sure the soil is in firm contact with the stem. Repeat until all the cuttings have been inserted, spacing them about 3 inches apart. Water your cuttings in with a gentle stream of water from a watering can or hose.

Step 6

Slide the entire drawer into the dry-cleaning bag, and then gather the open end of the bag in your hands and fasten it closed with a twist tie. Try to keep enough air inside the bag to keep it from collapsing onto the tops of the cuttings. If necessary, you can prop the bag up by inserting pencils or skewers into the soil to hold the plastic bag up off the plant tops.
Step 7

Place your propagation tray in a sunny window, but keep it out of direct sunlight to keep from burning the cuttings. The plastic bag keeps the humidity high, so you’ll only need to water the cuttings occasionally, but make sure the potting soil never dries out. Take the drawer out of the bag to water it, but then return it to the bag immediately after.
Don’t worry if the remaining leaf on each cutting yellows and dies off. This is not a big deal. Within four to six weeks, the cuttings will have developed a whole new root system. Give them a gentle tug, and if there’s resistance, the root system is growing well.
Step 8
Once the roots are formed, remove the plastic bag and continue to regularly water the propagation tray. When the cuttings are between 6 and 12 weeks old, dig them out of the drawer and repot them into 4-inch pots, using new potting mix. Continue to grow your new plants as houseplants through the winter months and then gradually move them outdoors next spring, when the threat of frost has passed.
