Scarecrows have been around since Squanto taught early New England settlers how to guard corn as well as grow it. Styles have changed, but homemade scarecrows are still some of the most effective around. Today, they’re growing in popularity because their bare-bones construction offers an inexpensive and environmentally acceptable deterrent against pesky predators.
Here’s a step-by-step plan to help you build a scarecrow or any size garden, often by using farm materials you’ve been storing away or stepping over.
Materials
- bright clothes, buttons and other accessories (wardrobe)
- 2×2 stick, at least 8 feet in length (anchor pole)
- 5-foot-long stick (crosspiece)
- wire or twine
- shiny ribbon or tin pans
- hatchet
- screwdriver
- 3- to 4-inch screws

Hemera/Thinkstock
Step 1: Gather Scarecrow Garb
Scarecrow appearance is important. The attic or closets are good sources for a suitable scarecrow wardrobe. Old shirts and jackets, forgotten jeans, discarded dresses, and bib overalls are basic scarecrow garb. Also consider clothes that are in good condition but ugly—like last year’s Christmas tie or old party hats. Brighter is better. Crows, black birds and starlings, for example, are sensitive to the color red.

Rachael Brugger
Step 2: Site the Scarecrow
Select a relatively permanent spot for your scarecrow. It’s usually too floppy and disjointed for much moving around. Choose a strategic area in your garden, such as a blueberry patch, cherry trees or a sweet-corn patch: These spots are on the hit list for many feathered freeloaders. If yours is a sizeable garden—say 100 by 200 feet—consider putting a homemade scarecrow at both ends.
Step 3: Build the Frame

Rhoda Peacher
Sharpen one end of the anchor pole with a hatchet, and pound it 2 feet into the ground to give your homemade scarecrow a sturdy backbone. Before attaching the crosspiece, pull one pant leg down over the top of the anchor pole, leaving the other leg to dangle, or run the anchor pole through a slit in the crotch of the pants, leaving both legs free to move in the wind. This center-anchor approach is a good choice for free-standing lady scarecrows with stuffed skirts, as well.
Attach the crosspiece 1 foot below the top of the anchor pole by drilling screws through both poles. Scarecrow arms don’t bend, so a 5-foot-long board will allow you to pull on a shirt or jacket without ripping the sleeves. Bind the crosspiece to the anchor pole with baling wire or twine, then add the shirt. Attach wire suspenders to the pants to ensure they stay put. Run the wire from the belt-line under the shirt to the crosspiece. The lady’s skirt or gentleman’s jeans can be held in place with safety pins.
Step 4: Stuff the Scarecrow

Rhoda Peacher
Use wire or twine to tie the arm and leg ends closed.
Strategically place stuffing to fill out your scarecrow. Grass clippings, hay, wood chips, leaves and rags are standard stuffing material. Paper, however, can become soggy and shapeless after summer showers. Use straw and other coarse material to fill the larger cavities; leaves, sawdust and grass clippings work better in gloved extremities. Birds are perceptive with their sharp eyes and high vantage points. As my neighbor once put it, “Birds have a healthy respect for a lady scarecrow that has the stuffing in the right places. And it helps to put a broom in her hand.”
Step 5: Add a Head

Rhoda Peacher
Gourd heads are easy to work with, but many builders prefer to attach a stuffed burlap bag to the top of the anchor pole. A stuffed burlap head makes a good anchor for inserting corn cobs for the nose and mouth or for putting a pipe in the scarecrow’s toothy grin. Use beads, bottle caps or golf balls to make eyes and add spectacles to reflect the sun. Big, bright scarecrow eyes have a fearsome human quality that puzzles birds. For a strictly functional head, impale a dirt-filled bucket right-side-up on the anchor pole. One-gallon plastic milk jugs are another great choice—they’re plentiful, weatherproof and their smooth surface is ideal for grim or grisly facial features.
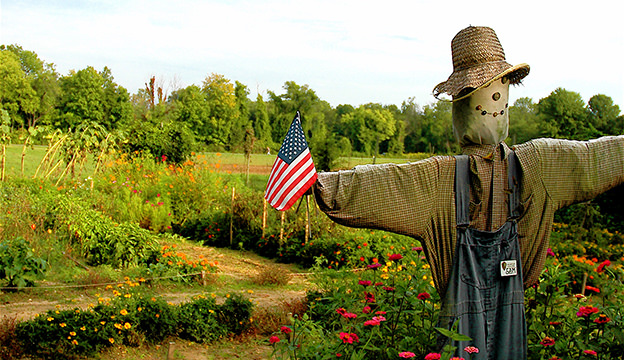
Step 6: Dress to Impress (and Scare)
")
Getty Images/ Thinkstock
Top off scarecrow wardrobes with straw hats, discarded Easter bonnets or seed corn caps. Tie a red bandana on Sam Scarecrow’s collar, and add plastic flowers to the hat. Aluminum pie tins or bright-colored ribbons attached to the hands give the sentry more scare power. Tie reflective or shiny ribbon to your scarecrow to add movement and reflect light.
Homemade scarecrows are seasonal. Wind, rain and sun take their toll by whipping and fading colorful costumes, so construction often becomes an annual affair. Store scarecrow survivors in the garage or shop after the first frost. (Unless the stuffing weathered poorly, you can leave it in the scarecrow during storage and reuse it the following season.) Next spring, dress your faithful servant in a spiffy new outfit to frighten another batch of garden bandits.
This article originally appeared in the September/October 2010 issue of Hobby Farm Home.


