

Green roofs on houses are becoming more common, but as valuable as they are in terms of insulation, pollinator habitat and storm-water reduction, being on top of the house makes them difficult to see and even more difficult to maintain. Putting one on a small backyard structure, such as a chicken coop, however, makes it easier to maintain and adds beauty that you can actually see.
Go Green
With basic carpentry skills and tools, you can easily install a green roof on a chicken coop, doghouse or a well house. Any small, sound structure, with 2-by-4-inch rafters supporting as short a span as found on a coop, is likely strong enough to hold the weight of a green roof after a heavy rain: about 30 pounds per square foot.
If an adult of about 180 pounds can stand on the coop roof without it sagging, it should be strong enough to support a 3- to 4-inch layer of wet, soilless media, plants and mulch. If the roof sags, stiffen it with a layer of 3/4-inch pressure-treated plywood. Your supplier may be able to cut the plywood onsite to match the dimensions of the existing roof.
Get Started
A green roof plan for a modern building looks complex, but for our purposes, I’ll break the idea into three simple yet familiar concepts—a sandbox, a water garden and a container garden—to guide each step of construction.
Sandbox Stage
To keep it simple, I’ll only talk about a shed roof, which has one flat surface. Once you understand the principles, you can apply them to a gabled roof, which has two flat surfaces that meet in the middle at a peak. A shed roof has a lower eave where the rainwater drops off, a top eave (or peak) and two side eaves. The roof should have a smooth surface, be it made of planks, plywood or shingles.
You’ll create and install what looks like a sandbox of rot-resistant 2-by-4s made of cedar, redwood or pressure-treated wood that have been screwed together to make a frame to hold the soilless media, just as a sandbox holds sand. Your sandbox should rest on the outermost edges of the shed roof so the outside dimensions of the box should match the outside dimensions of the shed roof.

Attach the sandbox with 2-inch screws spaced every 4 to 8 inches coming up through the underside of all four eaves. This way, the sandbox will be firmly attached, but there won’t be any penetrations of the roof over the coop.
Water Garden Stage
Now, as if you were creating a water garden, line the inside of the sandbox with one piece of rubber pond liner that’s big enough to flow over all the top edges of the sandbox frame. This will keep water from reaching the original roof. Run the liner over the top edge of the sandbox while folding the corners flat. Use 1/2-inch staples to attach the liner on the outside edge of the sandbox. Don’t staple the bottom of the liner because that would create leaks into the coop.
Next, use a sharp knife or scissors to cut off any excess liner beyond the staples. Eventually, the spreading plants in your green roof will flow over the edge of the sandbox and cover the line, making it less visible while also making the roof more attractive.
Container Garden Stage
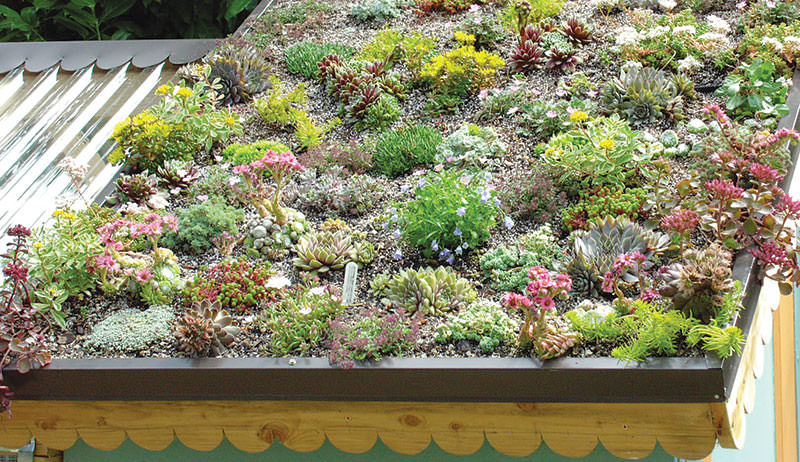
Now you can see that a green coop roof is essentially like a wide, flat container for potted plants, except it doesn’t have a drainage hole. But that’s OK, because the best plants for a green roof are sedums. (If you want to grow a wider range of plants, you’ll need to allow for drainage, but that’s beyond the scope of this article.) Strangely, these evergreen succulents can handle growing in soil that is either very dry or very wet. The wide-ranging conditions will also inhibit most—but not quite all—weeds. If you want to try other plants that can’t handle long-term wet conditions, plant them near the high side of the roof.
Next, spread a 3-inch layer of soilless media composed of one part compost, one part sand and two parts PermaTill, which is a lightweight expanded slate that holds water, air and nutrients. If you can’t get PermaTill, use an equivalent amount of composted pine bark or charcoal.
Install sedums 8 to 16 inches apart. Some vendors carry sedums in sheets, which can be planted along a roof’s top edge; eventually, they’ll migrate downhill to cover the roof. Mulch plants with an inch of organic material that won’t float away in the rain, such as shredded hardwood bark mulch. Keep sedums watered for the next six to 12 months until established.
A Word About Plants
The standard plant choices for green roofs have been nonnative, low-growing sedums because they can handle drought and flooding; are evergreen; can take full sun; and rarely have pest problems. I used strawberry begonia (Saxifraga stolonifera) in addition to native Sedum ternatum for a shaded doghouse I built in North Carolina. Both have taken well to these tough conditions. Obviously, plants chosen for green roofs need to survive with minimal maintenance, but a green coop roof that can be tended from the ground without having to bend over could be gardened with a wider range of plants.
A Word About Chickens
Some chickens will eat sedums and will scratch up the plants and damage the roots if allowed to get on top of the roof. To keep them grounded, make sure there isn’t anything that would act as a ladder or ramp to the roof. You might also consider clipping their wings once a year. The green roof is mostly for your benefit and not for the chickens. They’re better off enjoying a green floor of plants and bugs anyway.
This article originally ran in the March/April 2017 issue of Chickens.
