Needle felting has become a popular craft for creating small, sculpted animals, ornaments, and decorative objects from wool. The process appears almost magical to anyone seeing it for the first time—simple fibers gradually transform into firm, detailed shapes through repeated needlework.
As interest in handmade fiber arts grows, many crafters are discovering needle felting for its accessibility and charm. It requires minimal space, only a few basic tools, and offers quick, satisfying results for beginners and experienced makers alike.
This rise in popularity leads to a common question: What exactly is needle felting? Is it a new crafting trend or a time-honored technique with deeper roots? The answers may surprise you.
The History and Modern Appeal of Needle Felting
Needle felting has its roots in centuries of wool crafting. Traditional felting was primarily functional—large sheets of felt were made for clothing, rugs, or insulation rather than decorative items. This long-standing wool-crafting tradition laid the groundwork for today’s creative fiber arts.
Modern techniques emerged in the 1980s, offering a way to sculpt wool into detailed, three-dimensional forms. The craft quickly gained popularity because of its versatility: crafters can create animals, ornaments, dolls, and other 3D felted creations with relatively simple tools and small amounts of wool.
Understanding the Needle Felting Process
Needle felting, often called dry felting, is a fiber-arts technique that uses a barbed or notched needle, wool fibers, finger protectors, and a small foam or wool pad. By repeatedly inserting the needle into the wool, the barbs catch and tangle the fibers, gradually compressing them into a dense piece of felt. This controlled friction is the foundation of many beginner needle felting techniques and 3D wool sculptures.
A second felting method, known as wet felting, combines hot water, soap, and agitation to bond fibers into a solid sheet. Wet felting is typically used for larger or flatter projects such as bags, coasters, or wall art. In contrast, needle felting is ideal for shaping small, three-dimensional forms, detailed figures, or decorative ornaments.
The two processes also create different textures. Wet-felted pieces are generally smoother and more uniform, while needle-felted items have a slightly more textured surface that works well for sculpted animals and other miniature designs. Because it excels at shaping tight details and small components, needle felting remains the primary method for crafting the popular felted animals and characters seen in today’s fiber-arts community.
Needle Felting Project Ideas: Endless Possibilities
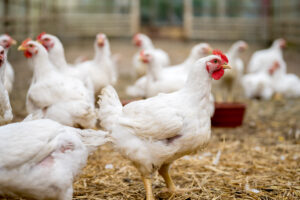
When it comes to felting projects, the only limit is your imagination. While larger items like hats, bags, or blankets are typically created with wet felting, dry needle felting excels at producing small, detailed, and three-dimensional objects. Beginners and experienced crafters alike can create a wide variety of figures, from woodland animals such as foxes, rabbits, hedgehogs, and owls, to pets like cats, dogs, and even farm animals like goats, sheep, and horses. Decorative items like flowers, mushrooms, trees, pumpkins, and houseplants are also popular, as are whimsical creations including fairies, dolls, and snowmen. Needle felting is perfect for crafting miniature keychains, ornaments, and unique gifts. Even insects, birds, turtles, and frogs can be sculpted with patience and practice. By layering wool, blending colors, and shaping fibers carefully, nearly any subject—real or imaginary—can come to life as a charming 3D wool sculpture.
Needle Felting Project Ideas: Quick List
Animals: Bears, Beavers, Bees, Birds, Cats, Dogs, Foxes, Frogs, Goats, Hedgehogs, Horses, Llamas, Mice, Owls, Penguins, Rabbits, Sheep, Snails, Spiders, Turtles
Plants & Nature: Cactus, Flowers, Mushrooms, Trees, Pumpkins, Houseplants, Fruits
Whimsical & Decorative: Dolls, Fairies, Snowmen, Ornaments, Keychains
Essential Felting Tools and Supplies
One of the reasons needle felting appeals to beginners is its simplicity. The craft requires only a few basic supplies, making it easy to set up a dry felting workspace even in small areas. Most beginner needle felting kits include everything needed to start shaping wool into small figures or decorative pieces, but supplies can also be collected individually.
A compact toolkit fits neatly into a small box or container, which makes needle felting ideal for crafters with limited storage or work surfaces. Whether choosing a complete kit or assembling items separately, the following needle felting tools form the core of any successful project.
Choosing the Right Needle for Needle Felting
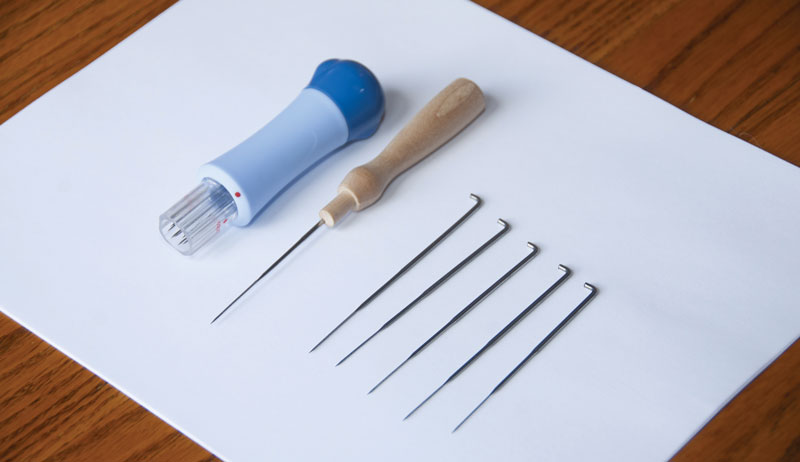
Of course, we must start here. The needle is as essential as the wool itself. But not just any needle—you’ll need a notched needle especially for needle felting.
These needles are sold in a variety of sizes with different gauges ranging from 32 to 42. Lower numbers equal bigger needles, and the size/gauge of the needle will have a direct effect on the result of your project in terms of appearance.
Protecting Fingers During Needle Felting
These are important! The rapid movement of the needle during the felting process is mesmerizing to watch, but also somewhat dangerous to any fingers that may be nearby.
Protect your vulnerable fingers with finger protectors made of leather, rubber, silicone or another protective material. And once you have the finger protectors, don’t forget to wear them!
Safety first! Needles are sharp, so don’t get hurt or poke yourself. When you’re hurriedly poking the wool, it’s easy to slip.
Using a Felting Pad for Safety
You might not think of this immediately, but as soon as you begin needle felting, you’ll quickly realize the need for a protective pad between your project and the table underneath. Needle felting pads are usually made of foam or of felted wool, and they provide a helpful barrier that gives you a sturdy work surface and protects your table or countertop.
Selecting Wool for Felting Projects
The type of wool you use can make a big difference in needle felting. While many kinds of wool can be felted, some fibers are easier to work with than others. Carded or combed wool—often labeled as roving, tops, slivers, or batts—is ideal for most projects. These forms are cleaned, aligned, and ready for shaping into detailed 3D figures or ornaments.
Finer wools, such as Merino, are silky and soft, but can be trickier for beginners because the fibers are more prone to slipping. Coarser wools, such as Jacob or Icelandic wool, provide more friction, making shaping and layering easier.
Obviously, if you have a flock of sheep, you’ll want to try spinning wool and felting with wool from your own sheep, regardless of their breed. But if you don’t have sheep, there’s no reason you can’t hop online and order yourself some wool, especially for felting.
Other wool types may be used strategically:
Raw wool is unwashed and not recommended for felting.
Scoured wool has been washed but may still require preparation before use.
Core wool can serve as filler for larger projects where the interior is hidden.
Synthetic fibers are also an option, providing an affordable way to experiment with needle felting before investing in natural wool.
Tip: When creating 3D wool sculptures, start with a larger shape than needed; wool compresses as it is felted. Layer and blend different colors gradually to achieve subtle shading or realistic textures.
From Wool to Finished Project
Once you have your needle felting tools and wool ready, the next step is turning fibers into a finished creation. Needle felting is a process of shaping and compressing wool, building form layer by layer until the desired figure emerges.
Form the Base Shape
Begin by shaping your wool into a rough outline of the object you want. For example, an animal’s head might start as an egg or oval shape. Remember that wool compresses as you felt, so start slightly larger than the final size.Felt the Core
Using repeated needle pokes, compress the wool to create a firm structure. Core wool or less expensive fibers can be used for hidden areas to conserve higher-quality colors.Add Color and Detail
After establishing the basic shape, layer your chosen wool colors over the core to create the final appearance. Smaller details—like facial features, paws, or ears—can be sculpted separately and attached by felting extra fibers at the joining points.Blend and Shape
Mixing colors for shading is simple: layer different fibers and gently pull or felt them together. Continue repeated needling until fibers are firmly interlocked and the surface is smooth yet textured as desired.Final Touches
Adjust proportions, refine edges, and add tiny details until your 3D wool sculpture is complete. Patience and repetition are key—needle felting is a craft that rewards careful, consistent work.
Today, needle felting is celebrated for being both accessible and endlessly creative. From beginner projects to intricate designs, the process allows for experimentation with shapes, textures, and color blending. Whether for personal enjoyment or handmade gifts, modern needle felting projects continue to inspire fiber artists around the world.
This article was written for Hobby Farms magazine. Click here to subscribe.