


Sometimes, novice chicken-keepers find themselves frustrated when trying to find an ideal feeding-and-watering system for their new birds. Tipped feeders and soiled waterers are common complaints. If this sounds familiar, experiment with building your own spill-and-mess-resistant chicken feeder and waterer. These are easy projects within the abilities of almost any DIYer, and they’re built out of common materials that don’t cost much.
There are many varying ways to tackle this project, but most DIY feeders and waterers are just variations on the same theme. In this project, we’ll show you how to assemble one version each of a nonspill, easy-clean feeder and waterer, but keep in mind that these directions are easily adaptable for your own situation. You may want to lengthen or shorten certain components to make them fit into your coop or to suit your number of chickens, and you can add components to fill them from outside the coop.
Because of the way these dispensers are constructed, making adjustments can be as easy as purchasing additional sections of PVC—just adjust the height and lengths of the pipes to fit your situation and needs. There are no magic lengths, though longer pipes will hold more feed and water, which is important if you have a large flock. The lengths shown here are just for illustrative purposes.
Materials
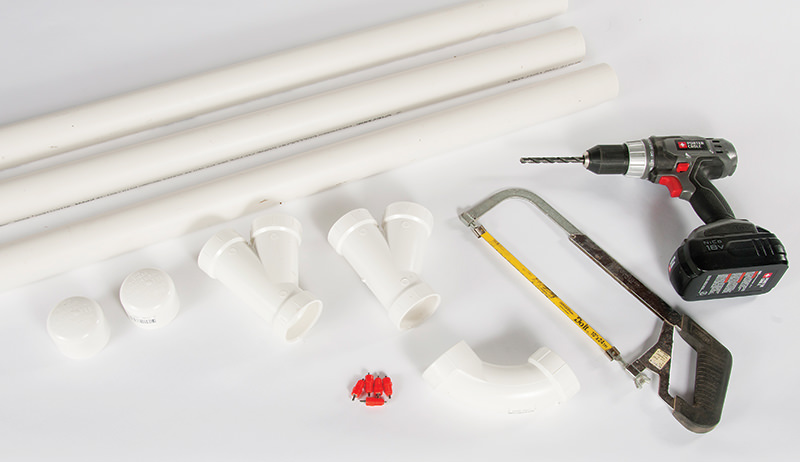
Feeder
- 1 4-foot length of 2-inch PVC pipe
- 2 2-inch PVC Wye adapters
- 2 2-inch PVC end caps
- assorted PVC fasteners/brackets
Waterer
- 1 2-inch PVC 90-degree elbow joint
- 2 5-foot lengths of 2-inch PVC pipe
- 5 chicken waterer nipples (adjust number to your flock)
Tools
- pencil
- hacksaw
- chalk line
- electric drill
- 1 1/32-inch drill bit
- 11-mm socket or nut driver (This was the size for the water nipples we used; yours may need a different size.)
Building The Feeder
Step 1
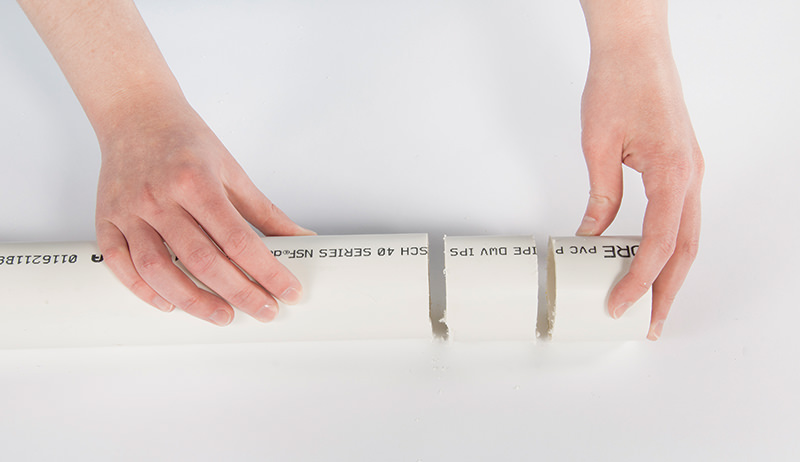
Start by making cuts to the 4-foot PVC pipe. You’ll need two 2-inch pieces of PVC to serve as spacers, so measure and cut two of these with the hacksaw. You’ll also want to modify the remaining 44 inches of pipe to whatever length works for you and your coop; we shortened it to 38 inches.
Step 2
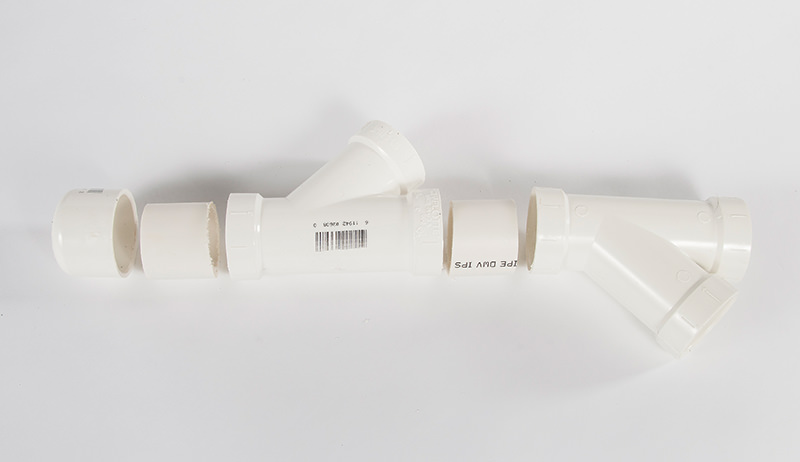
Next, assemble the lower section of the feeder, which is the part the chickens will actually eat out of. Combine a PVC end cap, a spacer, one PVC wye section, another spacer and another wye, as shown in the photo. You shouldn’t need any glue or PVC cement; the pieces should all fit together snugly on their own.
Step 3
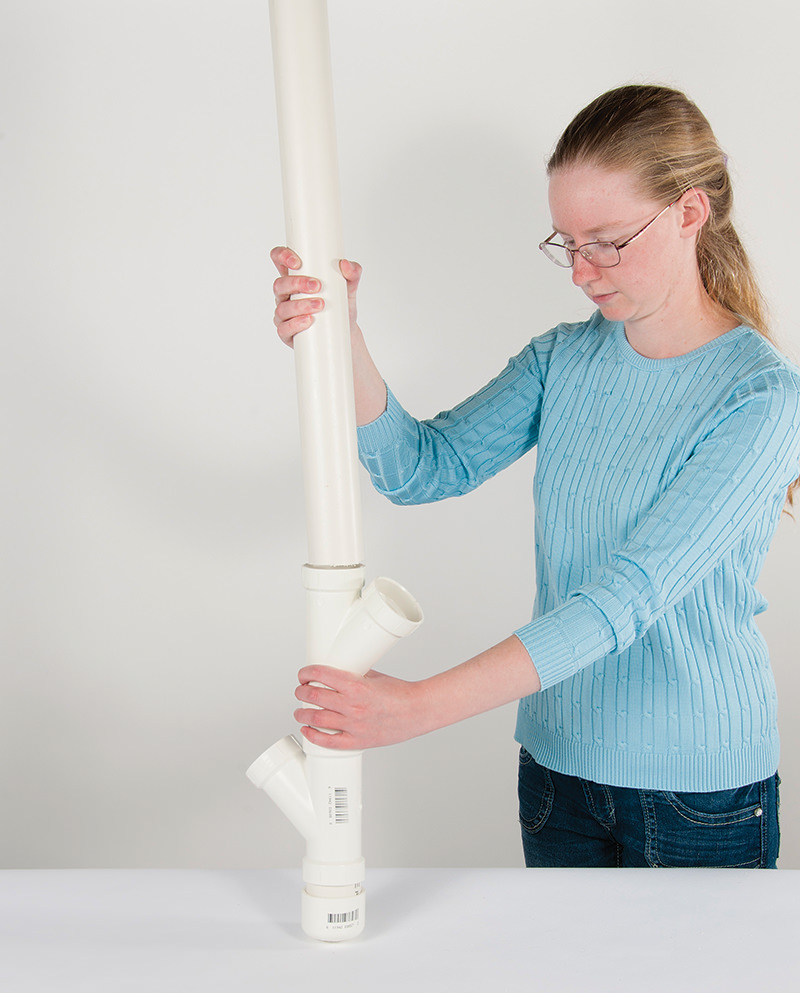
The upper section of the feeder acts as feed storage. Add the remaining long length of PVC pipe to the lower section you already built, and then use another end cap for the top. You’ll remove this end cap each time you want to fill the feeder.

You’ll need some way to attach the feeders to your specific coop situation; this will vary depending on your setup, but purchasing a selection of PVC brackets/fasteners is probably a good starting point.
Building The Waterer
Step 1
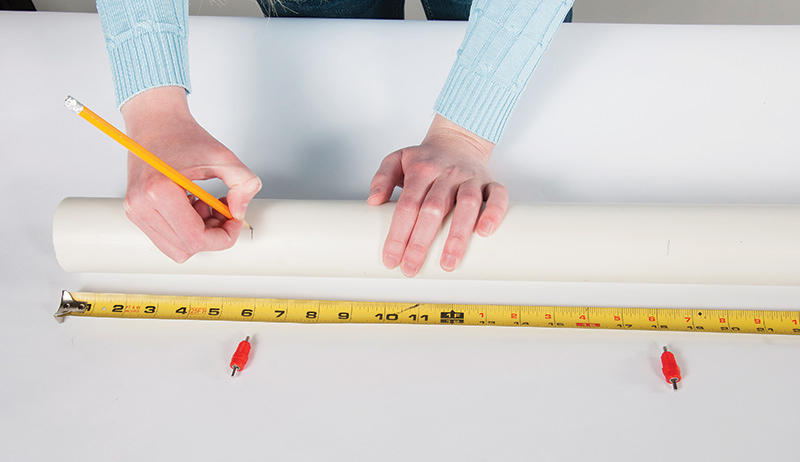
Begin by marking a series of holes into one of the 5-foot PVC sections; these will be for the water nipples. The number of holes you choose depends on your flock, with approximately one nipple needed per one to three birds. For this sample project, we went with five.
To prevent leakage or dripping, it’s important to make sure that the water nipples hang vertically —not at an angle—when the waterer is finished, so the holes need to be straight. To help, use a carpenter’s chalk line. Space the holes evenly; we went with 12 inches apart.
Step 2
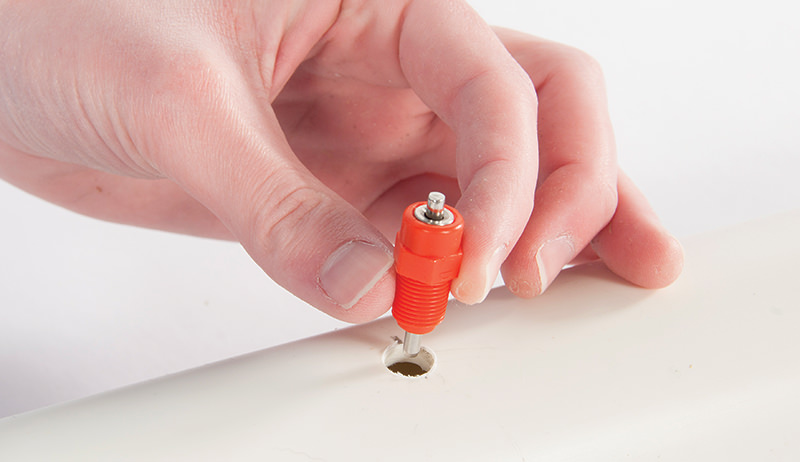
Once you have marks, drill them out with whatever drill bit size is required for your water nipples; ours needed an 1 1/32-inch drill bit. PVC is tough, hard and a little slippery, so take care drilling into it. A vise can help hold the pipes steady.
Follow the installation directions that come with your water nipples; some have a rubber seal built into them to prevent leakage, while others require a bit of thread sealing tape. Getting the nipples to thread into thick PVC can be a challenge. Once you’ve got them started, use a ratchet or a nut driver to tighten them all the way down.
Step 3

To finish, add an end cap and the 90-degree elbow joint to each end of the 5-foot PVC, then add the other 5-foot length of PVC to the elbow joint. This vertical PVC section is for the water storage, and like the feeder, you can place another end cap on the top of it when you’re not filling it.
The chickens should be naturally curious of the red color of the water nipples, and they may discover on their own that water comes out. If not, you may need to attempt to demonstrate how they work.
Don’t remove your chicken’s current feed or water sources until you’re positive they are using the new systems.
This article was written with the help of Samantha Johnson. Daniel and Samantha are a brother-sister writing team and have collaborated on several books, including How to Build Chicken Coops (2015).
This article originally ran in the July/August issue of Chickens.
