


Growing herbs in pots just a few steps from the kitchen door is smart. It makes it easy to step outside and harvest a handful of homegrown herbs whenever you need them. Plus, growing in pots is not just convenient, it saves space and looks beautiful. This attractive and fun DIY tiered herb planter takes the convenience of growing in containers one step further by adding a vertical element.
DIY Tiered Herb Planter
With this planter, you can grow dozens of herb varieties in a small corner of the yard. And, the bigger the pots you use, the more herbs the finished planter can hold. This tiered herb planter requires only a few inexpensive materials and takes just minutes to set up. Once you have the materials on-hand, you’ll be ready to grow only ten minutes after starting the project.
Materials You’ll Need
- 1 10-foot piece of 1/2-inch steel EMT (electrical metallic tubing) conduit pipe
- 4 to 5 pots of graduated sizes (I used terra cotta; 18-inch, 14-inch, 12-inch and 8-inch diameters; make sure the pots each have a 1/2-inch or larger drainage hole in the bottom)
- enough potting soil to fill each of the pots to the top
- herb plants
Tools You’ll Need
- mallet
- tube cutter or hacksaw
- level
- step ladder
Building The Tiered Herb Planter
Step 1: Select A Location

Because most herbs need a minimum of six to eight hours of full sun to perform their best, select a sunny spot to build your tiered herb planter. Because the planter is vertical, you won’t need a very large space, but you should also make sure it’s easily accessible for watering and harvesting.
Step 2: Take Measurements And Cut The Pipe

Measure the height of each of your pots then add the measurements together. Then, add 18 inches to that measurement. This is how long to cut your EMT conduit pipe. Use the tube cutter or hacksaw to cut it to the correct length.


Step 3: Set The Pipe

Position the pipe vertically where you’d like your tiered herb planter to be located. To ensure the pipe stays straight, hold or tape the level to the side of the pipe and check it frequently as you hammer the pipe into the ground with the mallet. Make sure the pipe goes about 18 inches into the ground.
Step 4: Add The Base Pot
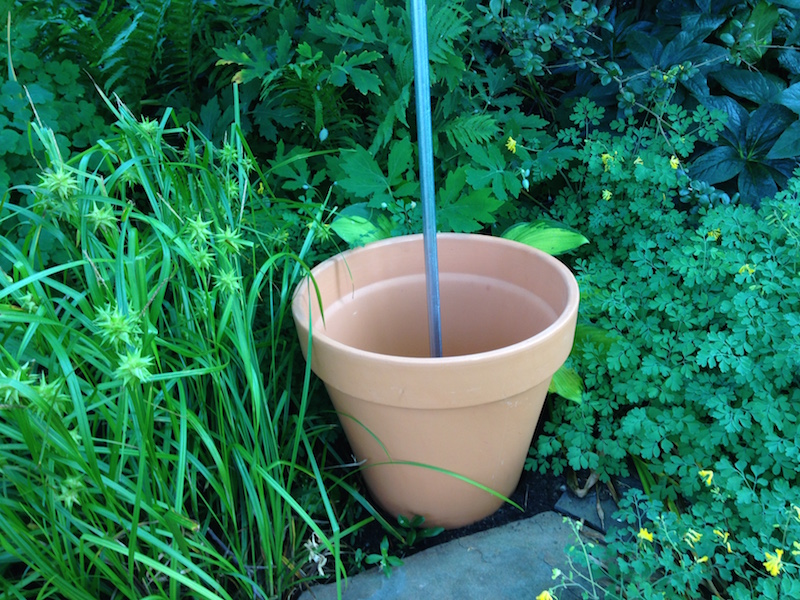
Once the pipe is set, it’s time to slide the largest pot over the top of the EMT conduit pipe through its drainage hole. Slide the pot all the way down the pipe until its bottom sits level on the ground.
Step 5: Fill The Base Pot With Soil
Fill the large pot now on the pipe with potting soil all the way to the top. Because the potting soil will settle upon planting and watering, make sure you fill the pot completely.
Step 6: Add The Next Tier
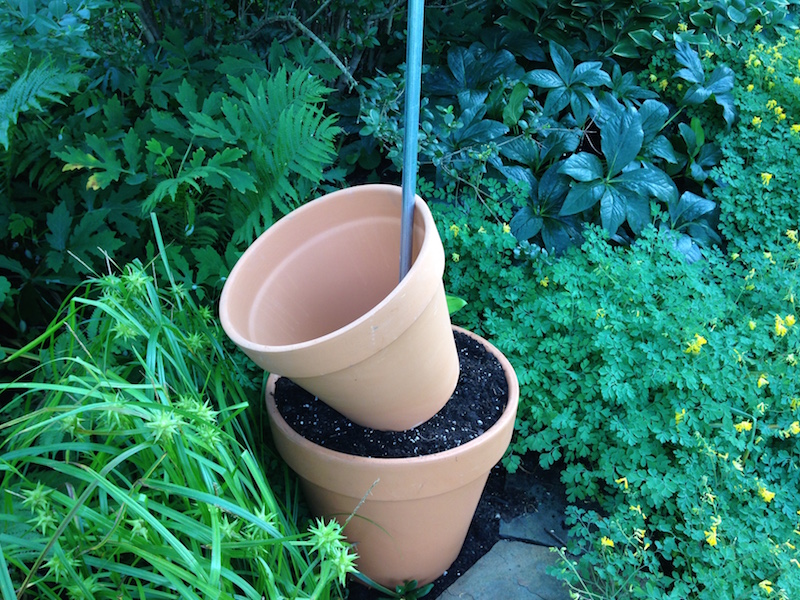
Slide the next largest pot down over the pipe until it rests on the potting soil filling the largest pot. Then, tip the second pot toward its side, so the pipe is resting against the side of the pot and the pot is cockeyed. Fill the second pot with soil.
Step 7: Add The Other Pots One At A Time
Continue sliding on each pot, cocking it to the side, and then filling it with soil until the top pot is in place.
Step 8: Plant

Fill each of the pots with several herb plants. You can also include a few flowering plants to add color and interest, too. Do not overstuff the pots, and make sure that, after planting, there’s a bit of head-space in each pot to collect irrigation water and help it soak into the potting soil instead of running off.
Extra Tips For Your Tiered Herb Planter
Here are a few additional considerations to keep in mind.
- The smaller pots toward the top of the planter will dry out more quickly than the larger pots at the bottom. Because of this, they’ll need to be watered more frequently.
- For added interest, you can paint the pots before creating your tiered herb planter. Use bright colors, paint the names of the herbs on the pots, or let your kids take the reins and paint them however they’d like.
- Be sure to fertilize your tiered herb planter twice a month with an organic liquid fertilizer.
