


Beeswax is a wonderful, natural ingredient you can use to make your own salves. On its own, beeswax isn’t a moisturizer, but when mixed with other ingredients, such as shea butter and natural oils, it acts as a moisture barrier on your skin, protecting it from drying out and allowing the oils in the salve to soak in.
A few drops of essential oil can be added to your salve mixture for scent or therapeutic purposes. You can also infuse oil with fresh herbs of your choice to use in your preparation.
Materials
- 2 ounces beeswax
- 1 ounce jojoba oil
- 7 ounces infused olive oil (see “Oil Up” later in this post)
- 1 ounce coconut oil
- molds (as big as 3 ounces in size)
The Right Ratio
A general rule of thumb when making salves is to use one part beeswax to three to five parts oil. If you’re adding a substance that’s solid at room temperature, such as shea butter, it can affect your ratio, so a little experimentation might be in order.
If you’re unhappy with the consistency of your finished salve, you can remelt it and adjust the ratio of beeswax to oil. More beeswax makes a thicker, more solid salve, while less gives the salve a creamier consistency. In winter, you might prefer a creamier salve because room temperatures are generally cooler and the salve will harden, while in summer, you might want a more solid salve to compensate for warmer room temperatures. Feel free to experiment.
Here are several carrier oils that are useful for moisturizing and mixing with beeswax.
- Jojoba Oil: is an excellent moisturizer. A little bit goes a long way, so use it sparingly. One ounce of jojoba oil is usually enough for a salve mix.
- Almond Oil: is another good moisturizer, but you should avoid it if you have nut sensitivities or allergies.
- Olive Oil: has been used as a moisturizer since ancient times. It contains antioxidants and won’t clog pores.
- Coconut Oil: also has been used as a moisturizer for centuries. Be sure to purchase virgin coconut oil, which isn’t processed with harsh chemicals that could negatively affect the oil quality.
Zinc-oxide powder can also be added to your salve to block UVA and UVB light.

Essential Details
When choosing essential oils to add to your salve, it’s important not to use ones that are phototoxic, meaning they’ll increase skin’s sensitivity to UV light and might increase your risk of sunburn. Most citrus-based essential oils are phototoxic, and others that could be problematic include angelica, bergamot, cumin, dill, tagetes and yuzu. Research carefully before adding any oil to your salve.
Each essential oil has unique properties. Here are some examples of just a few of them.
- Eucalyptus: congestion relief
- Lavender: antiseptic and calming
- Peppermint: relief for tired muscles and congestion
- Rosemary: relief for tired muscles
- Tea Tree: antiseptic
Step 1: Melt Wax
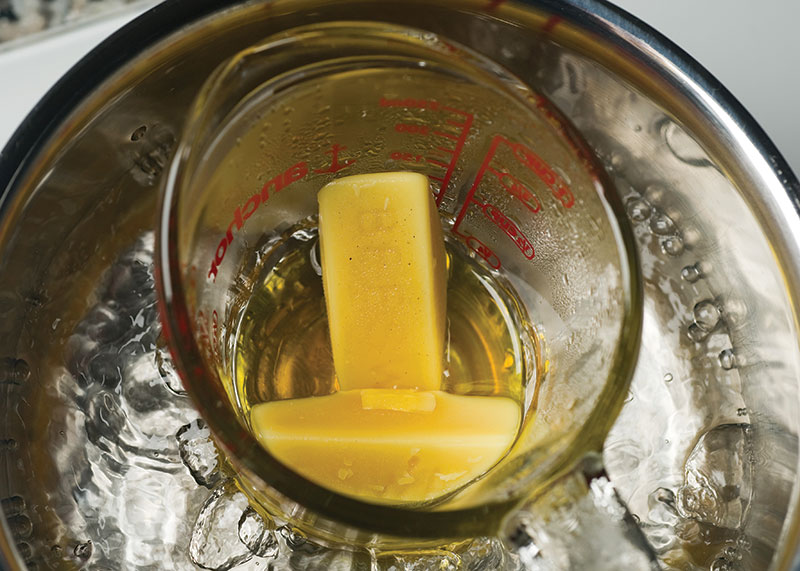
Melt beeswax in a double boiler or small, glass measuring cup set in pan a of boiling water. Beeswax is flammable and should never be placed in pot directly on flame.
Step 2: Combine

When the wax has melted, stir in your carrier oil.
Step 3: Fill Molds

Place empty containers on top of newspapers, pour liquid salve mixture into them, add essential oils at this point if using, and let cool overnight before screwing on tops. There should be enough salve to fill four 2-ounce containers and one 1-ounce container.
Oil Up
Use any of these three methods to create herb-infused oils for your homemade salves. Be sure the herbs are completely covered with the oil in all methods.
- Slow Cooker: Place fresh herbs in a slow cooker and cover with oil. Cover and let cook on the lowest heat setting for five hours.
- Sunny Window: Put fresh or dried herbs in a glass jar and cover with oil. Screw on lid tightly. Leave the jar on a sunny windowsill for at least two weeks.
- Oven: Put fresh or dried herbs in a glass jar and cover with oil. Screw on lid tightly. Place jar in a pan and fill pan with water to halfway up jar. Put pan with jar in the oven and cook for four to five hours on the oven’s lowest setting. Check on your oil periodically to ensure it isn’t burning or scorching (in which case it will be smoking).

Beeswax Lip Balm
Another useful item to make with beeswax is lip balm. It’s similar to salve, except the proportion of wax is higher.
Ingredients
- 1 ounce beeswax
- 4 ounces herb-infused olive oil
- 1 tablespoon honey
- 1 teaspoon zinc-oxide powder
- 18 to 24 lip-balm tubes
Preparation
Melt beeswax in a double boiler or small, glass measuring cup set in a pan of boiling water.
Stir in oil. When wax and oil are well-combined, stir in honey and zinc-oxide powder. Using spoon, remove small amount of mixture and set aside to cool. After it’s cooled, check for firmness. If balm is too firm, reheat and add more oil to mixture; if it’s too soft, add more wax.
Once you’re happy with the texture, pour liquid into lip-balm tubes placed on newspapers to catch drips and make cleanup much easier.
Fill lip balm tubes to within 1/4 inch of top, let cool for a few minutes and top off with more liquid.
Once you’ve experimented with making your own beeswax salves and balms customized to your preferences, you’ll never go back to the mass-produced ones. You’ll save money, and your skin will be healthier and happier. Just remember: When adding essential oils to your mixes, a few drops go a long way.
This article appeared in Healing Herbs, a 2018 specialty publication produced by the editors and writers of Hobby Farms magazine. Aside from this piece, Healing Herbs includes articles on herbs that can help with pain relief, sleeplessness and stress relief; herbs for teas; how to cut and dry herbs; preparing and preserving herbs; foraging for medicinal herbs; and becoming an herbalist. You can purchase this volume, Hobby Farms back issues as well as special editions such as Living Off the Grid and Best of Urban Farm by following this link.
