


One great thing about living close to the land: The outdoors can feed your creativity, not only through its inspiration but by providing the materials to make your project ideas come to life. Our back 40 is loaded with grapevines, which have piqued my crafting interest. While wild grapes are native to where I live, they aren’t necessarily the best thing for our young stands of deciduous trees. Our local forester recommends cutting them off at the base to impede their growth, so I don’t feel bad about playing around with this wildcrafted material, in this case to make a wreath.
This is an easy place to start with grapevine crafts, and I’ll show you how. You can turn these hoops into any number of decorations, including door wreaths adorned with foraged natural items, dreamcatchers or even the base of a DIY chandelier. You can make them large or small, thin or thick—let the vines be your guide, and have fun.
Step 1: Prepare the Vine
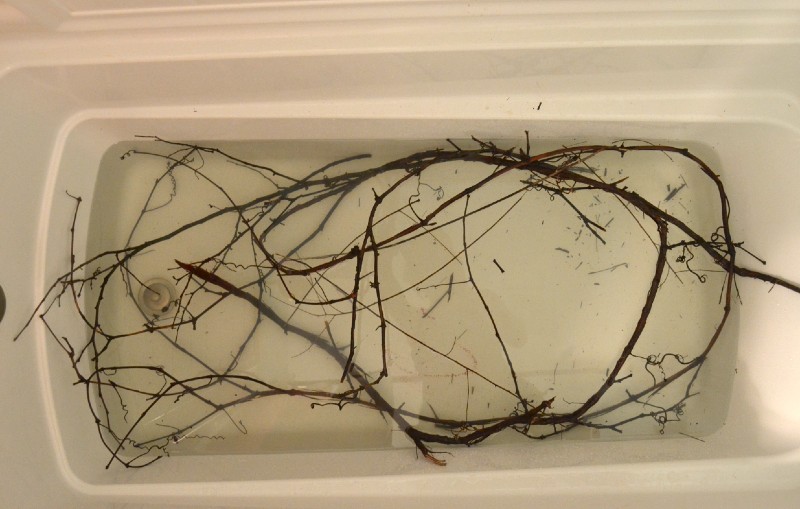
If your grapevine is brittle, you might need to soak it before working with it. We have experienced a lot of rain this winter, so it has been easy to find vines that are quite pliable, but in most cases, you need to soak your vines in warm water for at least an hour before starting on your wreath. I used the bathtub for these vines, but you can use a bucket or large trough depending on the size of vines you’re collected.
Step 2: Create the Wreath Foundation


Select a length of vine appropriate for the size you want to make. A 3-foot length makes a cute, smallish wreath and is an easy length to manage if you are a beginner. Hold it with both hands to identify its natural curve. Working with this curve, cross the ends of the vine around each other as if tying a shoe, and wrap an excess around the hoop you have formed. This is your foundation.
Step 3: Build Up the Wreath

If you’re making a small wreath or simple hoop for a dreamcatcher, you might skip to Step 4. However, if you want to make a more substantial wreath, continue to wrap lengths of grapevine around your base hoop to build up the width. Tucking the ends of each vine piece you use into the wreath might be sufficient in keeping it together, or you can secure the vines with floral wire.
Step 4: Trim if Desired

As desired, trim any awkward pieces of vine that are sticking out. I prefer a wild looking wreath, so I keep many of the vines curls in tact.

Step 5: Hang the Wreath to Dry

Hang the wreath in a location with good airflow for a few days to a week to allow it to dry.
Step 6: Add Whatever Decor You Like

Using thinner pieces of vine, floral wire or ribbon secure your adornments to the wreath. You might use feathers, pinecones, pieces of evergreen—I’ve even seen crafters include small bird nests. Have fun with this part, and again, let nature provide the inspiration.
Once you’ve mastered the wreath, let your imagination soar. Make wreaths into the shapes of hearts or stars, or go three-dimensional and use grapevines to make globes, baskets or “Christmas trees.” We’re even using a large grapevine in our home to as a decorative rod for hanging plants. With this plentiful resource, there’s so much room for experimentation.
