


I love this time of year. Here on my hobby farm in the Pacific Northwest, pears plump and apples blush, berries and grapes hang ripe for the picking, and the garden brims with beans, cucumbers, herbs, peppers, squash and more. Marveling at this abundance of healthy food, I feel proud, self-sufficient and oh-so-lucky. There’s only one stressful little problem. What in the world am I going to do with it all?
Because this fresh, lovely produce won’t stay that way for long. To avoid a fuzzy, wasteful death and compost pile burial, it must be eaten or dealt with soon, but my husband and I can only eat so much right now. Of course, some surplus will go to friends, relatives and our local food bank. As for the rest, I’ll haul out the canning kettle and jars, the dehydrator and twine, the freezer containers and pectin. My mission? Preserve as much as I can—forgive the pun.
So I’ve compiled a list of 15 ways you, too, can preserve your hard-earned harvest so you can enjoy it during the meager months ahead.
1. Fresh Storage
Given the right conditions, a number of garden-fresh crops last a surprisingly long time in storage—no processing necessary. Carrots, cabbage, kohlrabi, onions, potatoes, winter squash and apples fall into this long-lived category, lasting anywhere from one to six months, depending on the crop.
Proper storage, however, is essential: Some produce does best kept under cold, humid conditions—think root cellar (an example of which is pictured above)—while others last longer in cool, dry environments, such as a garage. All need protection from nibbling rodents. Certain varieties keep better than others, and when evaluating candidates for storage, pick good fruits and vegetables free of blemishes, nicks and bruises. No bad apples allowed!
2. Freezing
The freezer is a marvelous modern invention, capable of putting foods in the no-rot zone for months. Proper freezing of fruits and vegetables tends to maintain their color, flavor and nutrients better than other preservation methods. Don’t just toss those fresh-picked beans in the freezer, though: To kill bacteria and inhibit the action of flavor-altering enzymes, vegetables must undergo a quick boiling water bath treatment called blanching before they’re frozen.

Fruit prep for freezing ranges from a simple wash/drain/pack to blanching and packing in sugar syrup. Caution: Avoid freezing raw produce with a high water content, such as salad greens, cucumbers, cabbage and watermelons. Upon thawing, you’re likely to end up with a soggy mess on your hands.
3. Freezer Jam
If you’re just getting into preservation, making freezer jam with berries is a fun and easy way to start. Quicker than preparing cooked jams, this method tends to yield fresher-tasting and more vividly hued jams with a softer set. All you need to begin: sugar, pectin, ripe berries, freezer containers and some basic kitchen equipment. You can find instructions for making various freezer jams and jellies included with boxes of pectin. For those trying to cut back on sugar, there is pectin for making low or no-sugar jams, too. These jams will last up to a year in your freezer.
4. Pesto

Say “pesto,” and most people think of that saucy Italian mingling of basil, pine nuts, garlic, Parmesan cheese and olive oil. But when your garden has become a lush kale jungle or you’re faced with a whiskey barrel crammed with use-it-or-lose-it cilantro, it’s time to step outside the classic pesto box. Other leafy greens and herbs can substitute for basil in pesto recipes with tasty results, including kale, arugula, spinach, cilantro and parsley. With a good blender, food processor, or even a mortar and pestle, making several fresh pesto batches—basil or otherwise—takes no time at all. Pesto freezes well for up to a year; try freezing it in ice cube trays to add to soups or vegetables, or in larger containers for speedy, fragrant pasta dishes. Hint: Save money by switching out pine nuts for walnuts.
5. Water Bath Canning
A cupboard gleaming with harvest-packed glass canning jars warms a farmer’s heart. Whether filled with vibrant cooked jams, tart applesauce or sugar-sweetened pears, they seem to epitomize self-reliance—and unlike freezer-preserved edibles, they’ll weather an extended power outage just fine. Proper preparation and processing of berries and other high-acid fruits, such as apples and pears, in a boiling water bath canner will make them safe to store on the shelf for up to a year.
To get started, you’ll need at minimum a large canning kettle with rack and lid, jar-lifter, wide-mouth funnel, jars, and self-sealing lids/rings. Look for beginner’s kits and the latest edition of that indispensable canner’s bible, The All New Ball Book of Canning and Preserving (2016). Tip: Try asking an experienced canner friend or relative to give you a lesson, or see if your local community college offers classes. You’ll stress less and have more fun.
6. Salsa
If your garden glows with an abundance of tomatoes, tomatillos and peppers, then salsa-making should step to the head of your harvest-time task list—no dance lessons required. As a bonus, many salsa recipes incorporate surplus cilantro, onions and garlic, too. First, I suggest putting on some peppy music: Salsa preparation requires plenty of chopping (or food processing) of ingredients—tomatoes for red salsa, tomatillos for green, and pepper varieties based on the recipe and how hot you like your salsa.
Next, add any recommended seasonings plus an acidifying agent, such as vinegar or lemon juice, because tomatoes vary in their spoiler-fighting acid content. After some simmering, you’ll have a vibrant, spicy concoction to ladle into jars and process in your water bath canner. Salsa can also be frozen in containers for several months.
7. Pickling
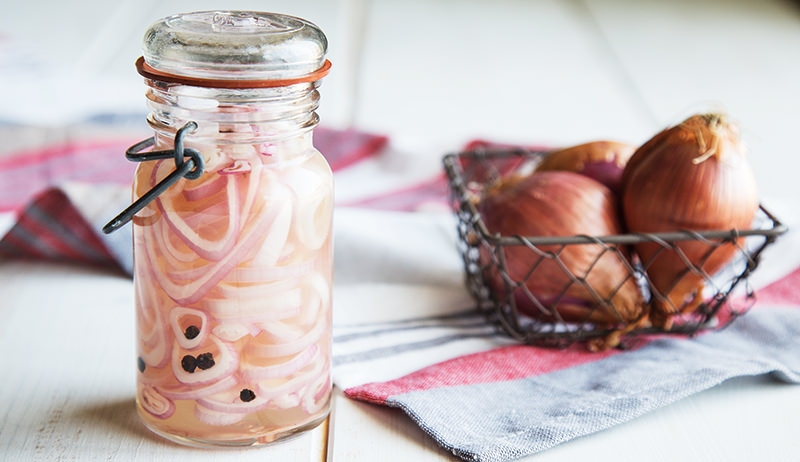
What would a burger be without pickles or a hotdog without relish? Once you’ve embraced the water bath canner, it’s not difficult to harness vinegar’s preservative powers to transform surplus veggies and fruits into shelf-safe pickles, relishes and spicy chutneys (or pickled shallots, pictured above). Unlike fermented vegetables—No. 13 on our list—fresh-pack pickled foods don’t require a long fermentation period before canning, though their taste does benefit from curing for about four to six weeks. Pickling instructions vary with the food being pickled, but you’ll find plenty of recipes to play with, from plain old dill pickles to green tomato relish. Suggestion: Still got monstrous zucchini lurking in the garden? Make a dent in their population with zucchini pickles or sweet relish.
8. Pressure Canning
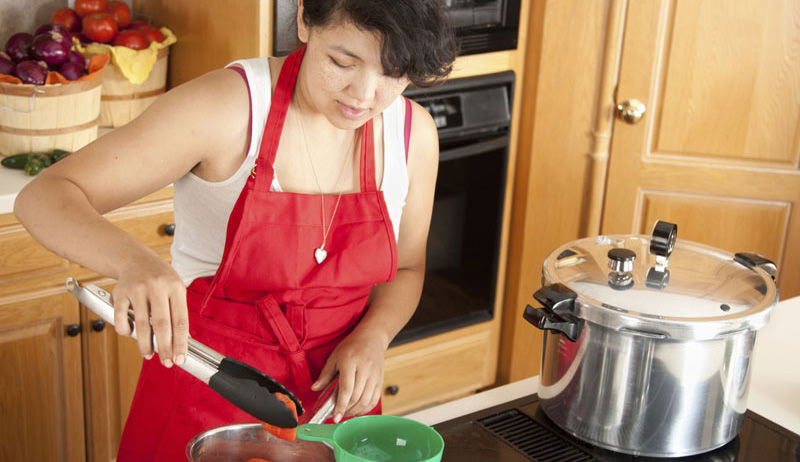
Unlike acidic fruits or vinegar-pickled veggies, low-acid foods, such as corn, beans and carrots, require careful processing in a pressure canner to make them safe for long-term shelf storage. This is because the bacteria that cause botulism live in the soil and on our produce, and at room temperature, they can generate toxins in anaerobic, low-acid environments. Boosting the temperature of foods to 240 degrees F and higher—and keeping it there for a specified amount of time—destroys these pathogens.
While today’s weighted-gauge and dial-gauge pressure canners are safer to operate than older models, they can still be pretty complicated and intimidating. Your best bet for a safe and successful pressure canning experience is to find a class or an experienced canner to show you the ropes.
9. Dried Herbs

To treat yourself to herbs’ aromas and tastes all year, tie clean, unsprayed herb stems into bundles with floss or string. Then, hang them upside down in a dark, dry, ventilated area, such as a pantry or closet with the door ajar. If you’re worried about dust or discarded leaves, enclose them in perforated paper bags. Wait a few weeks or so—drying time will depend on the herb and your home’s humidity—and voilà, you’ll have your own dried seasonings or the makings of a soothing cup of tea. Tightly bottled and stored in a dark place, they keep for up to a year. Herbs that retain their flavor well when dried include oregano, rosemary, tarragon, thyme and mint. Dry hot peppers and garlic this way, too.
10. Vine-Dried Beans
High in fiber and protein, beans have a well-deserved reputation as a super-healthy food. They also happen to be one of the easiest crops to grow—not to mention one of the simplest to preserve by drying. Given a stretch of sunny weather, you can just let the mature pods wither on the vine until they’re brown and the seeds rattle inside, and then get busy shelling. If rain threatens before this stage, pick them anyway. You can finish drying them inside, either on trays or in your oven/dehydrator; just be sure to shell them first.
To kill pests, shelled beans should be placed in bags in the freezer for two days before storage. If you grow heirloom varieties, don’t forget to save some for planting next year, too.
11. Dehydrating

The oldest preservation method around, dehydration prevents and delays spoilage by removing most of a food’s water content. The result? Incredible shrinking grapes, tomatoes, berries and more, compact and light enough to pack on a hike or a trip. With proper pretreatment, such as blanching veggies or immersing apples in a solution to prevent browning, you can safely dehydrate most fruits and vegetables. While it’s possible to dry them in an oven or even in the sun, you’ll get more dependable results using an electric dehydrator. These nifty appliances with tiered drying trays provide a controlled temperature—hot enough to dry the food without cooking it—and contain a fan to circulate air and remove moisture. Keep in mind that drying times can vary according to the food, how it’s prepared and other factors. Consult the manual that comes with your dehydrator.
12. Flavored Vinegar
 Usually made from water and a mix of fermented corn, apples or wine, vinegar’s spoiler-busting acetic acid content make it a crucial ingredient in canned salsa, tomato and pickled vegetable recipes. This tart preservative can also be infused with cleaned herbs, spices and/or fruits to make flavored vinegars (such as pesto vinegar, shown above). The process usually involves letting a combination of the vinegar and flavoring ingredients steep in canning jars or a covered glass bowl in a cool, dark place for three to four weeks. After straining, the vinegar can be bottled and kept in the fridge or processed in a water-bath canner before storing. Use flavored vinegars to liven up salads or steamed veggies.
13. Fermenting
If you’re scratching your head over oodles of cucumbers or cabbage, you may want to try your hand at fermentation, another ancient means of preservation. Submerging cucumbers along with spices in a salt water solution, then storing them in a cool place for a few weeks, leads to the formation of lactic acid, a preservative. The same thing happens when you layer shredded cabbage with salt, pack it into a pickling container, then cover it with brine and let it ferment for about three to six weeks. At the end of this period, you’ll have tangy pickles and sauerkraut to jar up and process in a water-bath canner. Bonus: Traditionally fermented foods are rich in good-for-your-gut probiotics.
14. Alcohol Infusions
Preservation doesn’t get much easier than this: Pack a sterilized canning jar with washed cherries, plums or other fruit, and pour in brandy, vodka or another high-proof alcohol to cover. Add some sugar to sweeten things up, screw on the lid and shake. That’s it. Alcohol is an excellent preservative, but to be on the safe side, store your “drunken” fruit in the fridge as you wait several weeks for the flavors to meld. Then, try savoring them on desserts or even neat—in moderation, of course.
15. Craft Wine & Cider

I’ll be up-front here: Making good wine and cider is an art form, one that requires quality ingredients, the right equipment and proper know-how. It also takes patience because the yeast-driven fermentation process does its sugar-to-alcohol magic over several months. But a well-crafted batch of sweet blackberry wine or effervescent apple cider is so worth the wait and a wonderful way to enjoy the surplus fruit of your labors. In fact, it’s possible to make wine out of a surprising variety of produce, including apricots, carrots and rhubarb.
Wine-making equipment basics include primary and secondary fermenters, an air lock, food-grade tubing, and glass bottles and corks, plus bottle corker. For cidering, you’ll also require a cider press—or access to one. You can find beginner’s kits, essential ingredients, instruction books and invaluable advice at wine-making supply shops. Cheers!
