

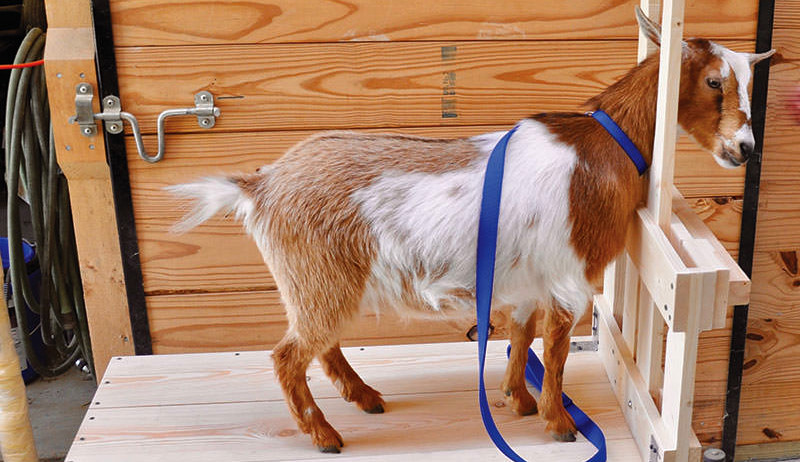
A goat stanchion is an important piece of equipment for dairy goat owners, particularly when the goats are being milked. A stanchion restrains the goats, making hoof trimming, clipping and medicating them easier, but it’s almost essential when the milking time rolls around: When a doe is on a stand, her udder is easily accessible.
Steel or aluminum stanchions are readily available from commercial suppliers, but they can be expensive. Alternatively, you can make your own durable, sturdy milking stand from lumber for less. It takes just a few tools and about a day of effort. The goat stanchion featured here was designed for standard-size goats, but I also use it for my smaller Nigerian Dwarf goats.
Tool, Cut & Hardware Lists
Tools
- electric drill
- 1⁄8-inch drill bit
- 11⁄32-inch drill bit
- 13⁄16-inch drill bit
- Phillips drill bit
- hammer or pneumatic finish nailer
- jigsaw
- sander and sandpaper
- saw
- square
- tape measure
Cuts
When purchasing lumber for building this goat-milking stanchion, nonpressure-treated lumber is recommended to avoid possible milk contamination from chemicals used to pressure-treat lumber.
- (1) 8-foot 2-by-4 (See note on A leg length in Step 1.)
- (3) 10 foot 1-by-4s
- (1) 6-foot 2-by-2
- (1) 10-foot 1-by-8
Hardware
When assembling the various portions of the goat stanchion, it’s important to tack the pieces together first (using the 1-inch finishing nails) to make sure the assembly is correct and square. After verifying everything is assembled correctly, use the 1⁄8-inch drill bit to predrill holes for the screws near the spots used to tack the lumber together. Then use the 2-inch exterior deck screws to screw everything together and finalize construction of each section.
- (1) box 1-inch finish nails (for tacking)
- (1) box 2-inch exterior deck screws
- (4) 3-inch exterior deck screws
- (1) 1⁄4-inch-by-#20-by-2½-inch, slotted, round head bolt
- (1) 1⁄4-inch-by-#20 hex nut
- (2) 1⁄4-inch flat washers
- (1) 4-inch hook-and-eye latch
Also Read: Miniature Dairy Goats Are Perfect For Small Farms!
Step 1
Cut lumber to the sizes described below. Note: The legs of the goat stanchion can be made a different length depending on your breed. I built this stand for Nigerian Dwarf goats and wanted the legs to be long so my small goats would be higher. I later shortened the legs to 12 inches instead of 21 inches because my goats had trouble getting on the stand when they were pregnant. Lesson learned: Starting with a shorter leg length (12 inches for dwarf or 14 inches for standard breeds) is more reasonable, or you could also shorten the legs later.

A (legs): 2-by-4 cut into (4) 21-inch pieces
B (end pieces): 1-by-4 cut into (2) 20½-inch pieces
C (sidepieces), J1 and J2 (neckpieces): 1-by-4 cut into (4) 36-inch pieces
D (bracings): 2-by-2 cut into (3) 20½-inch pieces
E (deckings): 1-by-8 cut into (3) 36-inch pieces
F1 and F2 (head gate guides): 1-by-4 cut into (2) 18½-inch pieces
G (head gate supports): 1-by-4 cut into (4) 21½-inch pieces
H (head gate feeder supports): 1-by-4 cut into (2) 4½-inch pieces
Step 2

In this step, we’ll put the legs and endpieces together. Tack two A legs and one B endpiece together so that the legs are even with the top of the endpiece and square to each other as shown in Step 2 photo. Repeat the process for the other two legs and endpiece.
Step 3

Tack C sidepieces to leg-and-endpiece assemblies.
Step 4
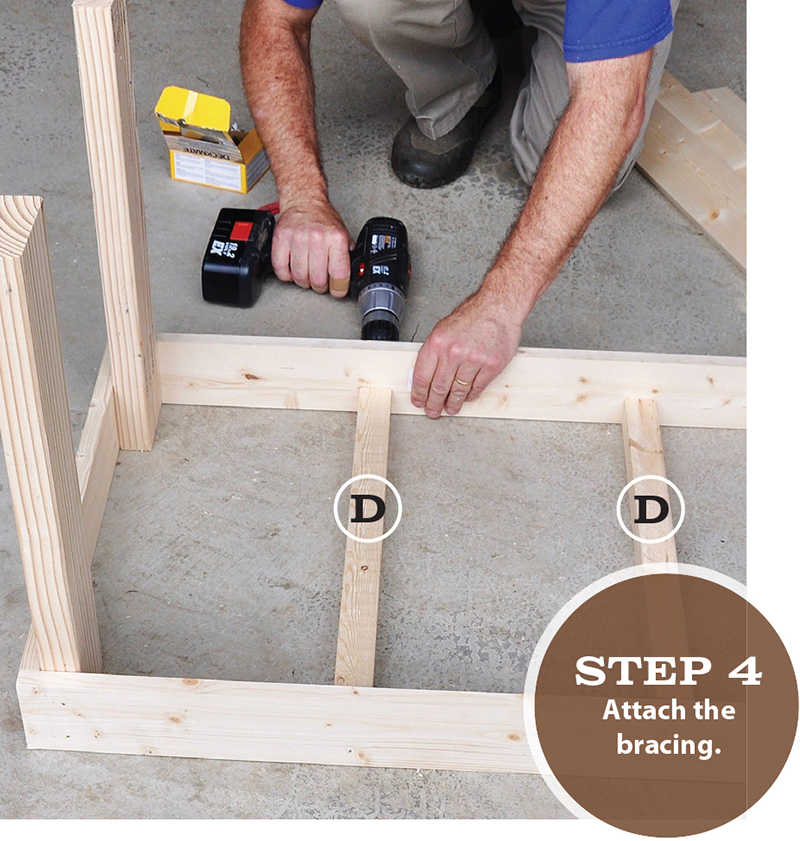
Tack two D bracings to the sidepieces with centerlines spaced 12 inches apart.
Also Read: Breed Profile – Angora Goats
Step 5
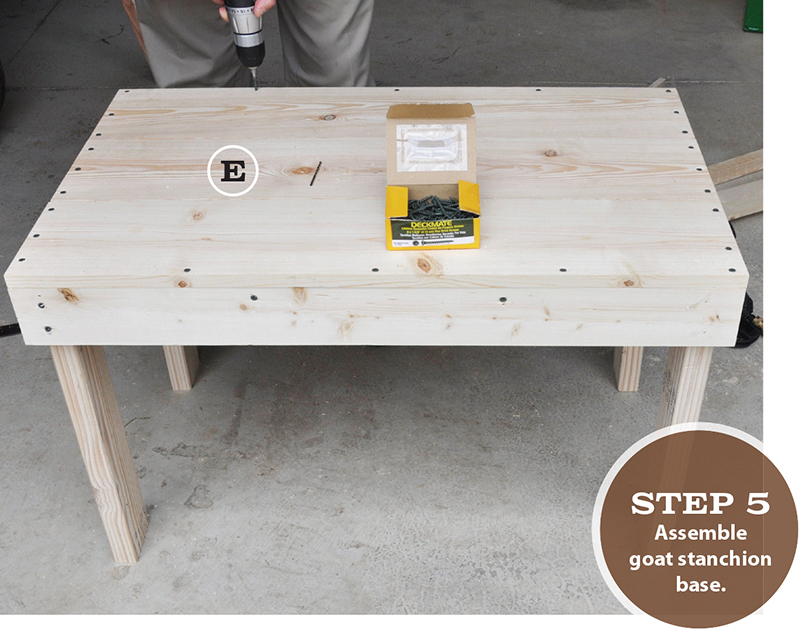
Tack three E deckings to the top of the assembly as shown in the Step 5 photo. Make sure the assembly is square, then predrill holes using the 1⁄8-inch drill bit near all tacking locations. Use the 2-inch deck screws to screw the assembly together.
Step 6
Take the head gate guide labeled F1 and measure at the top from one corner over and mark at 3 inches. Then measure down the side from the same corner to 5½ inches and mark again. Draw a line from the first mark to the second and cut this angle with your saw.
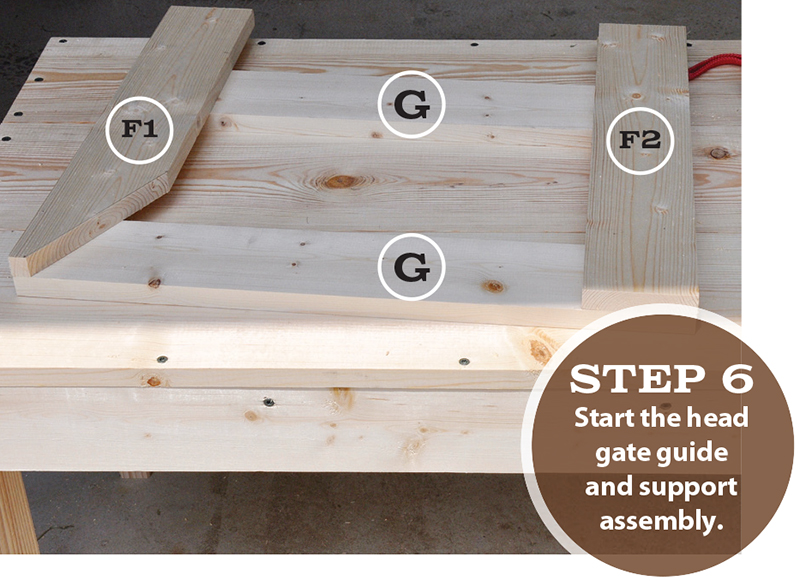
Take both head gate guide pieces and position two head gate supports across, with the top G piece even and bottom G piece 4 inches from the ends of F1 and F2 as shown in Step 6. Tack in place with finish nails.
Step 7
Turn the assembly over, and tack the remaining two G pieces in the same location as the first two so that the F1 and F2 pieces are between the G pieces as shown in Step 7. Predrill holes and use the 2-inch deck screws to screw the assembly together from both sides. Avoid hitting screws coming from the first side when screwing together the second side.

Create the neck hole in J1 and J2 neckpieces by using the jigsaw to cut starting 4 inches down from the top and ending 17 inches from the top. Cut each to a depth of 1½ inches, and curve the cut at the top and bottom as shown in the Step 7 photo.
Measure from the inside corner of J1 across 3 inches and make a mark. Then measure down from the same corner 4½ inches, and make a mark. Draw a line connecting the two marks, and cut this angle in J1.
Sand all corners and surfaces of the neckpieces, particularly J1, as this is the movable portion of the head gate and will need to move freely.
Step 8
Position J2 between the G pieces, and align it vertically 1⁄2-inch off the centerline of G pieces and 4 inches below the bottom. Tack in place. Position J1 between G pieces and align it vertically 1 inch away from J2 and 4 inches below the bottom G piece as shown in Step 8. Verify J1 has been sanded sufficiently to allow it to freely move within the head gate and that the angles on F1 and J1 are in the right orientation.
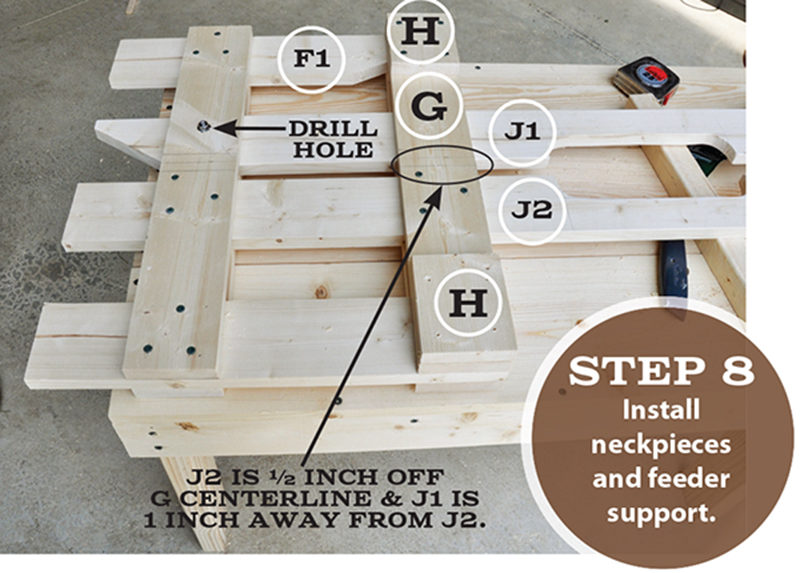
Use the 11⁄32-inch drill bit to drill a hole through the lower G pieces and J1. Switch to the 13⁄16-inch bit, and countersink the hole on each side to a depth of 1⁄4 inches to allow the slotted round bolt and hex nut to recess within the assembly. Place one 1⁄4-inch washer on the round bolt, insert through the drilled hole, place another washer on the bolt, add the hex nut and tighten.
Place H feeder supports on the upper G piece aligned with the end of G, and tack in place. Make sure the assembly is correct, and square and then drill starter holes (using the 1⁄8-inch bit) near the locations where the assembly is tacked together. Screw the assembly together with the 2-inch deck screws.
Step 9

Place the remaining D bracing centered over H as shown in Step 9. Predrill holes and screw in place with the 3-inch deck screws. Adding the bracing this way allows a removable feeder to be placed in the head gate. Inexpensive removable plastic feeders can be purchased at animal-supply stores and used to feed the goats grain while they are being milked.
Step 10
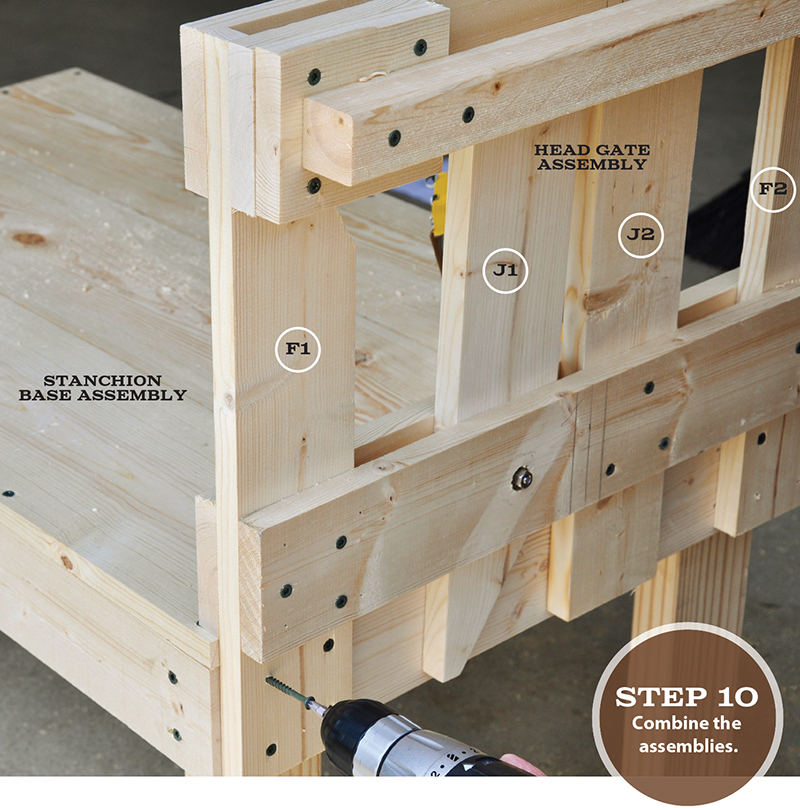
Sand all surfaces of the goat stanchion so that they are smooth, and round all corners so they are not sharp. Place the head gate assembly (with the feeder support bracing facing away from the stanchion base) so that the bottom of G sits on top of E. Attach the head gate assembly to the stanchion assembly by predrilling holes and then using the 2-inch deck screws to screw F1, J2 and F2 to the stanchion base. (Do not screw through J1.)
Step 11
Attach the two corner brackets and the hook-and-eye as shown in step 11. Extra eyes can be added so that the tops of the J1 and J2 do not touch when the hook and eye are closed, if goats with thicker necks will be using the stand.

Now that you have a completed goat stanchion, you just need to add an animal! If you are looking for a strong, long-lasting goat-milking stanchion, this design provides just that. The stanchion shown in this article was built in 2010, and it’s still going strong today!

