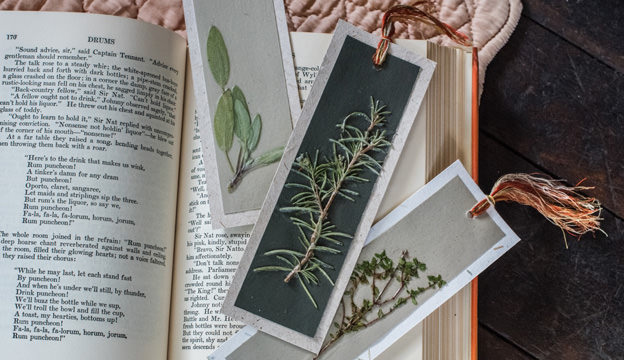
Winter has finally taken its grip, and it’s time to curl up with a good book and a cup of tea.
Your novel deserves more than a scrap of paper torn from a nearby magazine to mark your place. If you have a few pressed herbs left from fall preservation or have pots of herbs on your windowsill or in the greenhouse, it’ll be easy to craft these pretty bookmarks. They make lovely gifts along with a favorite book to share.
What You’ll Need:
- herbs (pressed or fresh)
- heavy card stock
- heavy handmade paper
- embroidery thread
- Mod Podge glue/sealer
- heavy books or weight
- brush
- wax paper
- hole punch

Patricia Lehnhardt
Step 1: Press Your Herbs
Choose a sprig of your favorite herb that will fit on a bookmark: no longer than 6 inches and no wider than 2 inches. Lay out the herbs on a blank piece of paper, spreading out the leaves to avoid overlapping. Press in a flower press or between the pages of a heavy book with several more books on top for weight. Let dry and flatten for a week or so.
Step 2: Design The Herb Card
Patricia Lehnhardt
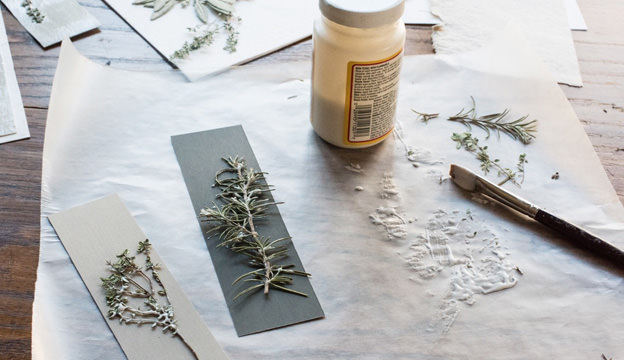
Cut heavy cardstock into strips, approximately 7 inches by 2 inches.
Lay the herb sprigs on a sheet of wax paper and coat with a Mod Podge. Flip over the wax paper and position it on the cardstock. Cover with another sheet of wax paper, and weigh it down using something heavy (I used an old iron), so that the herb adheres to the paper. Let dry for about 20 minutes, and then remove the weight and wax paper on top. Continue to allow it to dry for several hours.
Step 3: Add Texture

Patricia Lehnhardt
Coat the bookmark with a thick layer of Mod Podge to thoroughly cover the herb, and let it dry overnight. Follow up with two to three more coats, using a stippling action to create a rough finish. Let dry several hours or overnight between coats.
Step 4: Add A Backing

Patricia Lehnhardt
Cut a piece of heavy handmade paper, 1/4 inch larger on each side of your herb card, and glue the herb card in the center. Press with a weighted object, and let it dry for several hours. The herb card will have buckled a little from the moisture, and the weighted object will flatten it nicely.
Step 5: Add Embellishments
Cut eight lengths of six-ply embroidery thread 8 inches long. Punch a hole in the top of the bookmark. Fold the thread in half and draw it through the punched hole. (A crochet hook is handy for this.) Pull the ends of the thread through the loop. Comb the threads with a dog brush or cotton carder and trim.