


We have a massive poplar tree in our backyard, and for years, I struggled to get anything to grow beneath it. I tried hydrangeas, hosta, Solomon’s seal, and many other shade-loving perennials and shrubs, but their roots just couldn’t compete with the tree’s.
I decided that if I wanted a garden under the poplar, I was going to have to do it in containers, but purchasing big, decorative pots was way too expensive. So as soon as the weather warmed this spring, I set about making six unique, repurposed planters to line the fence around the tulip poplar. I made them out of old filing cabinets.
Step 1: Source The Filing Cabinet

If you don’t have an unused, metal filing cabinet sitting around at home or the office, ask friends and family if they happen to have one. You can also find them at:
- swap meets
- construction recycling centers
- flea markets
- used office-supply stores
- junk yards, scrap yards
- Freecycle.org
- Craigslist
I found all six of mine at a yard sale for $5 each. Look for cabinets that are free from rust, dents and dings, and be sure the bottom is enclosed.
Step 2: Remove The Drawers & Drill Drainage Holes

Pull out the drawers and metal liners. If you don’t want to send them to the landfill, the drawers and liners can be sold for scrap. Once the drawers are out, use an electric drill to make six to 10 1/2-inch drainage holes in the back of the filing cabinet. This will be the base of the planter.
Step 3: Paint The Cabinet
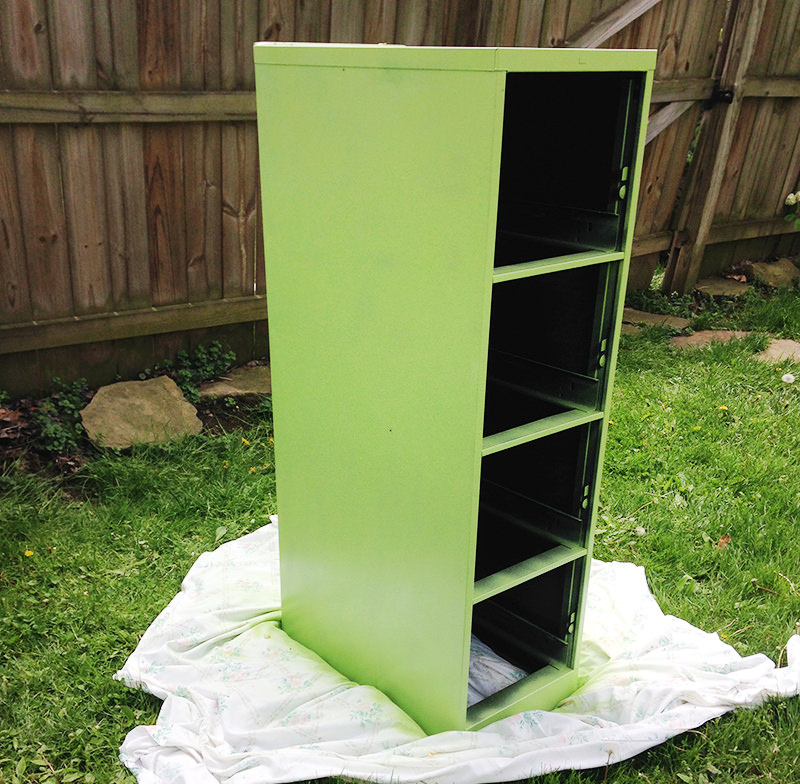
Apply two coats of a rust-fighting spray paint to the outside of the cabinet, making sure to cover all edges and corners thoroughly. I chose light green for my planters, but you can make them any color you’d like. Let the kids have at it if you’re looking for something creative. Paint the entire inside of the cabinet with two coats of black, heavy-duty, anti-rust spray paint.

Step 4: Site Your New Planters
If you’re using the planter on a patio or deck, there’s no need to elevate it, but if it will be placed on grass or soil, raise the planter on bricks or rocks to help prevent rust. Try to keep it level, if possible. In my situation, I had to choose between leveling my planters with the fence line or keeping them true-level. I chose true-level.
Step 5: Fill The Planter With Soil

Use a 50/50 blend of compost and high-quality potting soil to fill your new filing cabinet planter. This is by far the most expensive part of making this planter, but you can reduce the cost by purchasing the potting soil in a compressed bale rather than in bags. Toss in a few cups of organic granular fertilizer as you fill the planter.
Step 6: Plant!

I chose to use a combination of shade-loving annuals and perennials in my planters, but you can fill your new filing cabinet planter with herbs, vegetables, ornamental grasses or whatever you’d like.
Step 7: Maintain Your Planter

The metal will eventually begin to rust, so you’ll need to add a new coat of anti-rust paint to the exterior whenever necessary. As the plants grow, the nutrients in the soil mix will be depleted, so you’ll need to top the planters off with a few inches of fresh compost every year. There’s no need to replace the soil mix if you also mix in 2 to 3 cups of organic granular fertilizer before replanting them every spring.
