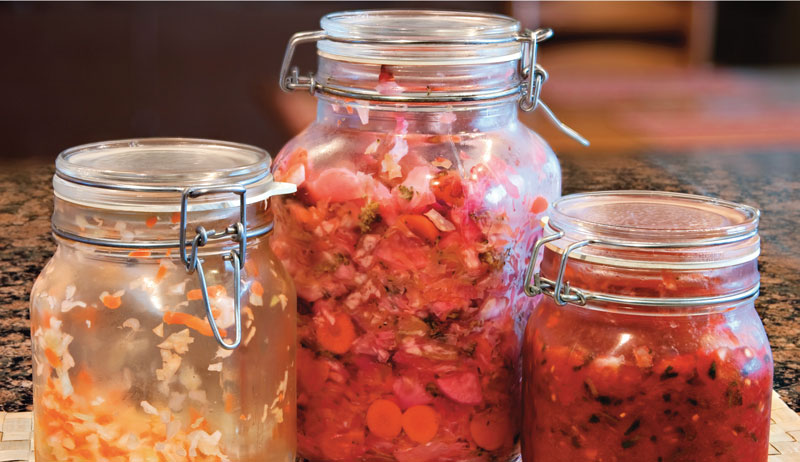
Better immunity, detoxification and a stronger digestive system: When it comes to a health booster, it’s tough to beat fermented foods.
Sandor Katz, author of Wild Fermentation and The Art of Fermentation, points out that the process of fermenting foods is as old as humanity. It has been used as a way not just to preserve a range of items, from vegetables to milk, but also to make those foods more nutritious.
Basically, the fermentation process preserves nutrients. But it also breaks them down into more easily digestible forms. For example, soybeans contain complex proteins that release valuable amino acids only through fermentation.
“Fermentation powerfully aids digestion, thanks to the way the process transforms food and protects against disease,” Katz says. “Our guts are suffering from the constant onslaught of chemicals from antibiotics, antibacterial cleaning products and also residue in milk, meat and water. Many places around the world combat all this through fermentation.”
The process is an “everyday miracle,” he believes, and it can also be quite fun. Playing around with fermented foods is like becoming a bit of a mad scientist and an artistic gourmet at the same time.
Although Katz has seen plenty of projects fail, he considers the missteps to be part of the adventure, too. In his first book, he wrote that fermentation was an “effervescent path, well-trodden for thousands of years, yet largely forgotten in our time and place, bypassed by the superhighway of industrial food production.”
Here are 10 tips for introducing more fermentation into your preservation mix:
1. Get Inspired
Most food-preservation efforts come from dealing with abundance. For example, you can make pickles when there are bushels and bushels of cucumbers all ready to harvest at the same time. With fermentation, the same inclination applies.
Katz began his love affair with fermentation after moving to Tennessee and keeping a garden. All of his cabbages were ready at once, so he began making sauerkraut.
“Very quickly, I became obsessed,” he says with a laugh. “What started as a way of saving my vegetables turned into a lifelong pursuit.” Since nearly all foods can be fermented (even fish), preserving your harvest is usually just a matter of finding the right process to follow.
Learn how to ferment any fruit with lacto-fermentation.
2. Start With Vegetables
It’s tempting to jump into fermentation with some of the more exotic efforts, such as acarajé, an Afro-Brazilian ferment of black-eyed peas, or an Indonesian soybean ferment called tempeh. But Katz recommends a simple vegetable ferment, such as sauerkraut, as a starting point.
“With these types of ferments, there’s no special equipment, you don’t need to obtain cultures like you would for something such as cheese, and you have everything you need on hand, as long as you have water and salt,” he says. (See Katz’s sauerkraut recipe below.)
3. Get Salty
Usually, the main difference between vegetables that are left to rot and those that are fermented is salt, Katz notes, which draws water out of the vegetables.
The combination of water and salt creates brine. This keeps harmful microorganisms from forming and promotes the growth of good bacteria called lactobacilli.
In terms of the type of salt to use, Katz uses sea salt or pickling salt and advises against the kind of supermarket salt that contains iodine and anticaking agents.
Because iodine is antimicrobial, it could inhibit fermentation. You can use coarse, kosher salt, but because of the larger grains, you may need to use more of it and tweak your recipes accordingly.
Also, Katz says, the size of the salt grains can make it more difficult to dissolve them in room-temperature water. So you may need to boil the water to dissolve them properly.
4. Consider Your Water
In most cases, tap water is fine for fermentation. But if your projects are struggling, you may want to tweak your water source to see if that’s the issue.
Many times, chlorine can be the culprit. Some municipalities use the chemical to kill microorganisms, but that means that it will also prevent fermentation.
In that case, boil the water and allow it to cool before use or utilize bottled water.
5. Find Good Equipment
There are some types of ferment—particularly in beer and wine—that require specialized equipment.
For many others, though, equipment needs are simple. Katz favors old-fashioned, heavy, ceramic crocks. But these can be expensive and easy to crack.
Still, if you happen to come across some that are affordable and intact, snap them up because they’re often perfect for fermentation.
Beyond crocks, Katz ferments many foods in wide-mouth glass jars. However, he doesn’t prefer them because he’s found that a cylindrical shape is better.
Another option is food-grade plastic buckets. Avoid metal containers, though, because they can react poorly with the salt as well as acids produced by the fermentation process.
Considering that some cultures used vessels such as gourds or animal membranes in traditional fermentation, it’s likely that even less-than-ideal containers will work fine.
6. Experiment
Unlike baking, where exact measurements usually guarantee success, fermentation is more about playing around with ingredients and time until you get the taste you want.
For example, when he makes sauerkraut, Katz sometimes includes other vegetables, such as onions, garlic, turnips, beets and even seaweed. Or he throws in some apples, dill seeds or juniper berries.
Part of the fun with fermentation is making each batch into its own distinct creation based on whatever happens to be on-hand that day.
There are numerous recipes that give guidance on the amount of salt, vegetables, dairy products or grains to use. But keep in mind that these are just guidelines.
Throwing in a handful of additional garlic, hot peppers or blackberries can give any fermentation an “anything goes” feel that’s tough to resist.
“Deviate from the recipes,” Katz says. “Incorporate your own favorite ingredients, or those most abundantly available to you. Find out what flavors really appeal to you.”
Here are 7 reasons you should ferment your harvest.
7. Taste as You Go
Because fermentation is an inexact process, it’s greatly influenced by a number of factors, such as placement of fermentation crock, season and duration of ferment.
For example, the taste of sauerkraut gets stronger as time passes. What one person considers delicious and tangy another might find too sour. Tasting as the ferment proceeds is important, too, because of temperature changes due to weather.
Adrienne Logsdon, owner and founder of Minneapolis-based Kiss My Cabbage, discovered this principle recently during one summer’s intense waves of humidity, followed by a cool spell. Although the letup in heat helped her as a farmer, her fermentation business had to adjust.
“My ferments were moving really fast and then, all of a sudden, they were taking twice as long,” she says. “It’s fine in terms of flavor. But it’s not easy if you’re trying to create a certain amount on a schedule.”
8. Savor Differing Flavors
Part of the fun of fermentation is that one batch can be different from another, even with the same ingredients. But this can also be frustrating for those who like a uniform flavor.
“Every batch will have its own personality and flavor,” Logsdon says. “I learned long ago not to stress out because my product won’t taste the same from one week to the next. Still, it can be difficult if there’s one batch that you love and then the next batch doesn’t taste like that.”
For those who make kombucha (fermented tea), this can be a common situation. Personally, I’ve made the drink for years and even with the exact same temperature conditions, glass containers, sugar-to-water ratio and brand of black tea, the ferment tends to vary in terms of time and flavor.
One way to get closer to consistency is to take good notes, and mark down what happens when you ferment for an extra few days, for example.
But even with all the variables noted, it might be best to take Logsdon’s advice: Don’t stress out over variations in flavor with different batches.

9. Keep the Juice
Fermentation enthusiasts often find that retaining the juice from a ferment such as kimchi or sauerkraut yields a powerful drink for combating illness.
Although it might take some time to get used to slugging down a fermented beverage like that, the health benefits are formidable, believes Maureen Diaz of the Weston A. Price Foundation, a nonprofit dedicated to “restoring nutrient-dense foods to the American diet through education, research and activism.”
“If you have any kind of intestinal bug or pathogens in the gut, that type of juice will tend to knock them out,” she says. “You have all that beneficial bacteria, plus the antimicrobial properties of ingredients such as daikon radish, garlic or ginger. Even if you’re not sick, the juice can inoculate you against problems down the line.”
This type of tonic is powerful stuff, and many fermenters drink it regularly to prevent illness. For Angelica Hollstadt, who has a fermentation business in Elmwood, Wisconsin, called Angelica’s Garden, keeping the juice is a way of eliminating waste in her ferment processes and maintaining her family’s health.
“Not everyone is going to be gung ho about drinking a glass of kimchi juice,” she says with a laugh. “But, believe me, once you start, you begin to crave it when it’s gone.”
10. Dive Into Other Cultures
Once you have a handle on basic fermentation, it’s fun to explore other options. And that usually means traveling the world—from within a recipe, at least. Every culture has its fermentation favorites, from Korean kimchi to Japanese nuka bran pickles and African cassava to Eastern European borscht.
“All of these different cultures throughout time have embraced fermentation for a reason,” Diaz says. “It cleanses your system, keeps you healthy, rebuilds you if you get sick, and as the biggest bonus of all, provides some of the most delicious foods available.”
Sandor Katz’s Sauerkraut Recipe
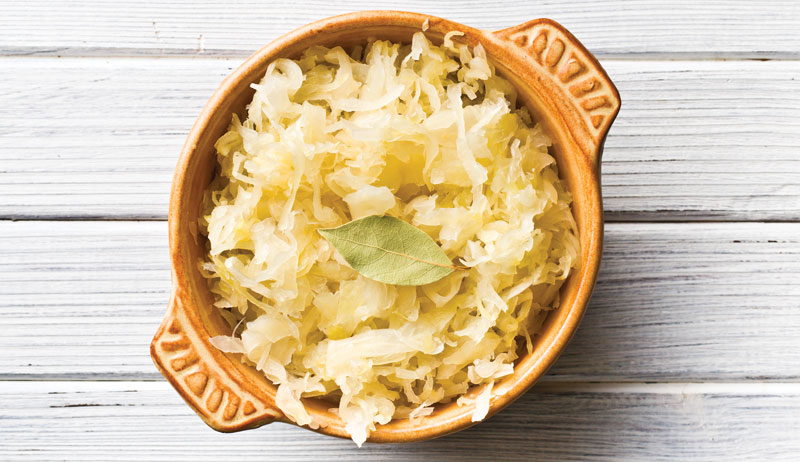
Jiri Hera/Shutterstock
Use the following directions to make Sandor Katz’s sauerkraut.
Ingredients
- cabbage, chopped or grated
- salt (3 tablespoons for every 5 pounds of cabbage)
Equipment
- large bowl
- grater
- ceramic crock or food-grade plastic bucket (1 gallon or larger)
- lid that fits snugly inside the crock/bucket
- weight (such as a glass jar filled with water)
- cloth
- transfer storage container
Preparation
In a large bowl, chop or grate cabbage. Sprinkle salt on the cabbage as you go. Pack into a ceramic crock or food-grade plastic bucket; tamp down hard using your fists or other sturdy kitchen implement as you go. This pressure packs the kraut tight in the crock and helps force water out of the cabbage.
Cover with a plate or some other lid that fits snugly inside the crock. Place a weight (which can be anything, such as a glass jug filled with water) on the cover; this forces water out of the cabbage.
Place a cloth over the crock or bucket to keep dust and insects out.
Periodically (ideally, every few hours) press down on the weight to help force more water out of the cabbage. The salt will also draw out water, but if you find that the brine doesn’t rise above the level of the plate by the next day, add enough salt water to bring the level up. The ratio is about 1 tablespoon of salt to 1 cup of water.
Leave the crock to ferment. A cool place will result in a slower ferment, but it will preserve the kraut for longer. Check the kraut every day or two; the volume should reduce as the fermentation process happens.
Skim off any mold that appears, and don’t fret: The kraut itself is protected by the brine, and the mold won’t change the taste.
Taste the kraut; generally, it begins to be tangy after a few days, and the taste gets stronger as time passes.
When the kraut reaches the taste you want, transfer to another container and place in the refrigerator.
Sidebar: Troubleshooting Tips
Here are some typical problems people face when fermenting foods.
Problem: Mold is growing on the surface of a ferment.
Solution: Usually, skim off the mold and continue the ferment. The vegetables, fruits or grains should be submerged and therefore protected. Mold only grows because of exposure to air, and it won’t affect the flavor or safety of what you’re fermenting.
Problem: Fermented foods taste “off” even before going through fermentation process.
Solution: Check all the variables. First, smell the water to see if it’s chlorinated, and make sure you’re not using table salt. Before the next batch, sterilize all equipment, such as crocks or plastic buckets, by cleaning them with boiling water. Make sure to use ingredients that aren’t bruised or moldy.
Problem: Fermentation process taking longer than usual.
Solution: Be patient. Often, a change in temperature is the cause, especially if the seasons have shifted to cooler weather or if you’ve positioned the ferment in a cooler place. If you want a faster ferment, put the covered container in the kitchen, which tends to be warmer than the rest of the house.
Problem: There seem to be an abundance of bubbles in the ferment.
Solution: Relax. This is a normal part of the fermentation process, and unless there’s an issue with taste, there’s no need to worry about the bubbles.
This article appeared in Living Off the Grid, a 2019 specialty publication produced by the editors and writers of Hobby Farms magazine. Aside from this piece on renewable energy, Living Off the Grid includes stories on permaculture, growing plants without seeds and long-term produce storage. You can purchase this volume, Hobby Farms back issues as well as special editions such as Best of Hobby Farms and Urban Farm by following this link.


