When harvest season arrives, the many months of hard work that gardeners and farmers have put in throughout the year finally come to fruition. As autumn approaches and the temperatures drop, it’s time to collect the crops before the season changes yet again.
Nothing is better than cooking up wholesome meals for those you love, sharing the abundance of homegrown goodness with friends and family and donating the excess to those in need. However, don’t forget to preserve a bit of the harvest, too.
Preserving allows you to enjoy food at its peak flavor, all throughout the year. Preservation is a smart solution to avoiding food waste. And preserving stocks the pantry with nutritious food for months to come.
Not to mention, homemade preserves make a unique and special heartfelt gift!
Different Methods
There are several safe ways to preserve food from the comfort of your own home, including the most popular methods: cold storage, freezing, dehydrating, water bath and pressure canning, curing and smoking, and fermenting.
- Cold storage is an effective way to store root crops, such as beets, turnips, carrots and potatoes as well as many other fruits, vegetables and other food. Cold storage keeps the temperature cool and the environment humid.
- Freezing is ideal for fresh vegetables, fruits and meat. It can extend the life of the food by up to a year, if packaged properly.
- Dehydration is an excellent option for drying herbs, fruit, vegetables and meat. Removing moisture from the food so that it can’t spoil preserves the food.
- Pressure canning is used for preserving low acid food with a pH above 4.6, such as meat and vegetables.
- Water bath canning is the method used for preserving pickles and fruit, and other acid food with a pH of 4.6 or lower.
- Curing & smoking is most commonly used for making cured meats, such as ham, salami and bacon (also often smoked). Curing primarily uses salt or sugar to draw moisture from the food. Once cured (or brined), the food is then cold or hot smoked, which requires specific temperature control for extended periods of time.
- Fermentation preserves food, makes it more nutritious in many ways and offers healthy-belly bacteria, commonly known as probiotics.
Here are 20 of my top tips for preserving the harvest this year.

kuvona/Shutterstock
Keep Clean
Before preserving with any method of food preservation, always clean your food prep space and supplies with warm water and soap. Pull your hair back and change into clean clothes.
Be aware of cross contamination when handling food. Food borne illnesses are completely avoidable when the proper precautions are taken.
Jams & Jellies
When making jams and jellies, a good tip is to use 1⁄4 underripe fruit and 3⁄4 fully ripe fruit. Underripe fruit has a bit more pectin and acid than fully ripe fruit. Pectin is naturally occurring in fruit, and pectin is what helps gel the preserves.
This tip is especially helpful if you don’t want to add commercial pectin to your jam.
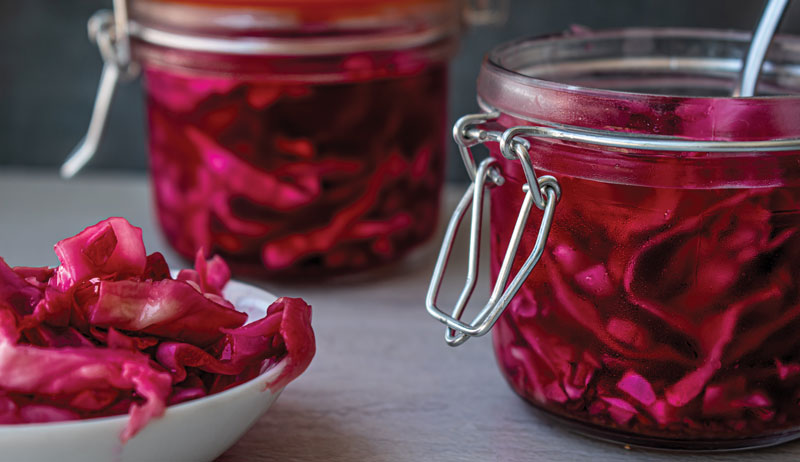
Pickles
To make crunchy pickles when canning or fermenting, use freshly harvested produce and preserve within 48 hours of harvest. The sooner the better.
Also, cucumber varieties specifically grown for pickling keep crunchier once pickled. For optimal crunch, use pickling cucumbers 3 to 4 inches (or smaller) in size.
Read more: Preserve your pepper harvest with this simple recipe for pickled jalapeños.
White Vinegar
To help prevent mineral build-up on the interior of your canning pot and keep the white powdery residue off your canning jars after processing, add a couple tablespoons of white vinegar to your water bath canning pot when heating it up. The white powder that sometimes accumulates is simply mineral deposits from the water.
It’s totally harmless and will rinse right off once jars are fully cooled, though it can be avoided with a little splash of white vinegar. The same trick works when preserving with pressure canning as well.
Wash Your Produce
When water bath or pressure canning produce, be sure to scrub the produce well to remove any debris and peel the veggies (if applicable). It’s important to remove as much dirt and bacteria as possible to lessen the risk of spoilage.
Gauge the Gauge
When using pressure canners with dial gauges, remember to check the gauge annually for accuracy. Dial gauges can usually be checked at the local hardware store or local extension office. Otherwise, you can send the gauge to the manufacturer for an inspection (varies by brand).
Weighted gauges don’t need to be tested.
Before pressure canning, also check the control valve or petcock and steam pressure gauge to make sure the steam can vent and clean it out if need be. Additionally, always remember to inspect the rubber seal to check for damage, stretching or shrinkage. Replace if needed.
When Pressure Drops
When pressure canning, if the pressure ever drops below the required level, turn the heat back up to the target pressure and reset the timer for the full processing time. Even if the pressure drops at the end of the directed time, you must start completely over, get to the target pressure once again and reprocess for full time per the recipe.
No Tilt!
Despite what you see all over the internet, it’s not recommended to tilt your canning jars when adding them to the canner or removing them after processing. Jars should be kept upright, as tilting the jar could cause food to spill into the sealing area of the lid, which could ultimately lead to the jar not properly sealing and ultimately spoiling.
Also, be sure not to touch the lids or rings of your hot jars. I see this all too often, where people are eager to wipe away the water from the jar lid or want to test if the lid has sealed, and accidentally push down the canning lid.
That’s a big no-no. Leave the jars to completely cool, without touching them for 12 to 24 hours, as directed per the recipe you are following.
Study Salinity
When fermenting vegetables, occasionally recipes will reference the salinity of the brine. To figure out the salinity, a quick method is to weigh your water in grams, then multiply it by the salinity desired.
For example, if I were trying to obtain 3 percent salinity with 1 cup of water (approximately 236 grams), I would multiply 236 grams by 0.03, which equals 7.08. I’d need to add approximately 7.0 grams of salt to my one cup of water to obtain 3 percent salinity.
Below the Brine
When fermenting produce, it’s important to keep the fruits and vegetables below the brine level. Anything above the brine is susceptible to mold. As long as everything is held below the brine (usually with assistance of a fermentation weight or other food-safe weight alternative), it will be safe in the anerobic environment.
Through the process of lacto-fermentation, also known as wild fermentation, small air bubbles are created which can push the produce above the brine level. This is common when fermenting sauerkraut.
Therefore, it’s very important to check on your ferments every couple of days to make sure everything is still submerged below the brine. If not, use a clean utensil or a washed hand to push it back down below the brine.
Read more: Start fermenting with this easy recipe for onion pickles!
Grab Some Grape Leaves
A couple fresh grape leaves added to your pickles when fermenting will help to retain the crunch. Grape leaves (as well as horseradish leaves, bay leaves, oak leaves, raspberry leaves and black tea leaves—just to name a few) contain tannins.
Tannins are naturally occurring and help inhibit the enzymes that soften the pickles. Only one to two leaves is recommended per quart jar of pickles. Adding too many leaves can have the adverse effect and make the pickle soft.
Note: Different leaves offer different flavors to the outcome of your pickle ferment. For leaves that do not add additional flavor, use grape, oak or raspberry leaves.
Stay Current
Current approved methods for safe home food preservation are always changing. Be sure to reference the National Center for Home Food Preservation website for revisions and the most current approved methods for preserving food.
Rings & Jars
Before storing homemade canned goods, remove the canning ring and clean the jar to remove any food particles. Label the jar contents and date when it was made. It’s not recommended to leave the rings on the jars or stack the jars when storing.
The reasoning is because if a jar of food were to spoil by leaving the ring on or stacking the jars, you are forcing the lid on and therefore would miss signs of spoilage.
If the ring is removed from the jar and they are not stacked, on the off chance that something spoils, the lid would be able to push off the jar and you’d immediately know to discard the jar of food.
Be Cool
Store canned goods in a cool, dry, dark space for best food quality. Keep out of direct sunlight. Light could cause discoloration and damage the quality of the preserve.
According to the National Center for Home Food Preservation, the best temperature to store your canned goods is between 50 to 70 degrees Fahrenheit. A basement, pantry, bottom level of a kitchen cupboard or even the bottom shelf of a closet would be ideal.
I’ve even heard of people storing their canned goods under their bed.
Stay Cool
If you have the space, freezing is a great alternative to canning food for preservation. Freezing food retains much of the original flavor and preserves most of the nutrition.
One tip to minimize ice crystals on your frozen food is to chill the food in the refrigerator prior to freezing. Remember to always label and date packages prior to freezing.
Humidity Control
If storing fresh produce in the refrigerator, keep in mind that vegetables require higher humidity conditions than fruit. If your refrigerator has crisper drawers with controls, adjust them accordingly for optimum storage.
Have a root cellar for storage? Straw, hay and wood shavings are great options for insulation. However, avoid any materials that have been treated with pesticides.
Dry Herbs
Herbs are quick and easy to dry and store for year-round use. Not only are dried herbs terrific for cooking with, they’re also great for making homemade teas, soaps and salves.

Yala/Shutterstock
Harvest herbs when they are young and tender. They will have more flavor and aroma.
Drying can be done in a dehydrator or in an oven, or can even be air dried. When air drying, hang small bundles of clean herbs in a dry, airy place, out of direct sunlight. Herbs are sufficiently dried and ready for storage when they are crisp and brittle.
Two Is Better Than One
Two thermometers should always be used when smoking meat. One thermometer monitors the smoker temperature. The other monitors the temperature of the product you are smoking.
Nothing is more satisfying to me than spending an afternoon in the kitchen preserving. It’s especially meaningful when a friend or family member offers to lend a hand. We make memories, share stories, and teach future generations invaluable life lessons through the process.
Happy Preserving!
More Information
Handle Pressure
Always preserve with safe recipes that are written based on tested USDA-approved methods for preserving food at home. When water bath canning, always remember to adjust your timer based on your altitude.
Atmospheric pressure is lower at higher altitudes, so water boils at a lower temperature. Therefore, time will need to be adjusted per the altitude you are at. When pressure canning, higher altitudes will require an increase in the pressure.
Reference the altitude adjustment charts included in your recipe books.
Dry Salting
When fermenting vegetables, dry salting refers to massaging or mixing salt into fresh produce to draw out the liquid from the produce naturally. The liquid that is created through dry salting is the natural brine you will ferment with.
To make a brine when fermenting refers to dissolving salt in water, which will be used to submerge the produce in. Starter cultures are living microorganisms that help to kick off fermentation, usually called for when making dairy ferments such as yogurt or cheese.
Starter cultures are not required when fermenting vegetables. You may use various types of salt when fermenting. Just reference a salt conversion chart to see how different grains measure.
This article originally appeared in the September/October 2021 issue of Hobby Farms magazine.


