Many of us have enjoyed dried foods: dried fruit in trail mix, raisins, many types of spices or herbs, and jerky in various flavors. Dehydrating is also a very easy and economical way to preserve your harvest, and it takes up much less space than canning or freezing. It’s one of the oldest forms of food preservation and you don’t need a fancy food dehydrator to do it. There are several low-tech and low-energy dehydrating options.
Dehydrating preserves food by removing moisture. Without moisture, the organisms that cause spoilage cannot grow. The food can be stored in jars, but to extend the shelf life even further, add an oxygen absorber to the container or use a vacuum sealer. Food can either be eaten dry (I make a large assortment of veggie chips to snack on) or rehydrated by soaking in a little liquid before cooking.
The process is very simple. Food is prepared and placed on trays. Food should be cut into thin slices to aid the drying process and can be prepped with spices. Use any seasonings sparingly—a little flavor goes a long way when dehydrating. Some foods require blanching before drying.
There are several different techniques for dehydrating food, and many are low-tech and low-energy. Successful drying requires low heat (usually between 120 and 150 degrees F), low humidity and air circulation. Three techniques are to use an electric dehydrator, air-drying (in a shed or attic) or sun-drying.
I tried each of these, and have compiled some of the good, the bad and the ugly for each. I dried both green beans and some banana peppers. I wanted to get the seeds from the green beans, and hoped to dry the peppers to preserve for a later meal.
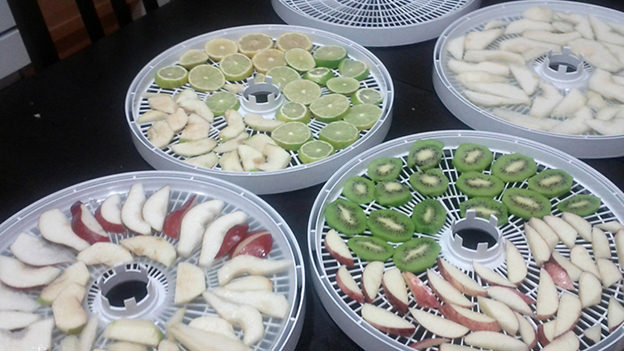
1. Using an Electric Dehydrator
Procedure: Prep the food by washing it, thinly slicing it and adding any desired spices. Spread the slices on the dehydrator trays, select the appropriate temperature setting (consult your user manual for this), and turn on the machine. Most dehydrators have settings for different types of food, with herbs and spices being the lowest and meats the highest. Different foods will require different drying times, and it is a good idea to check the food periodically to ensure it doesn’t over dry.
The Good: Using a food dehydrator is the fastest way to dry food, and it’s the process in which you have the most control. The dehydrator turns off and on at your command, and sunny or rainy days do not matter to the electric dehydrator. There’s also a lesser chance of insects than for some of the other methods. You also have some options to do more complicated projects, such as turning fruit purée into fruit leather.
The Bad: This is the more expensive option, as you have to purchase the dehydrator, which ranges in price from about $35 for a Presto or Nesco brand to over a $100 for an Excalibur. The dehydrator can also take up a lot of kitchen space, which in my house, is at a bit of a premium.
I found using a food dehydrator was overkill for drying green beans. The beans shriveled and dried too close to the bean, making it difficult to remove the bean. Because I wanted to use them for seed, I did not need them in any type of time frame, so it was also a waste of electricity. The peppers, however, turned out well. Both products were ready in a few hours.
2. Air-Drying
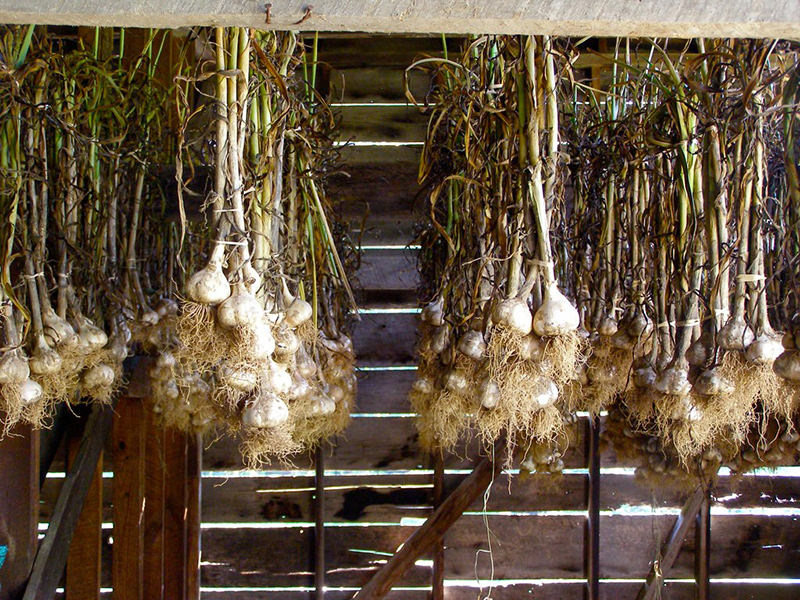
mystuart (on and off)/Flickr
Procedure: For the peppers and the green beans, I used a large needle and fishing line to string them. I tied a loop at the end of the line, threaded the needle, and strung each vegetable onto the line, pushing the needle up near the top. When I was done, I hung up each string in our shed.
I also accidentally did another method of air-drying: I left some of the green beans in a paper bag on my counter and they somehow were pushed behind the microwave. I found them a week later, and they had dried beautifully!
The Good: This cost is very little: The materials I used were things I had on hand, and I used no electricity to dry the food. After a week, the green beans had dried very well, and it was very easy to collect the seeds.
The Bad: Time. The peppers were not completely dry to the point I felt they were shelf stable after a week. The longer the food takes to dry, the greater the chance it will mold or spoil. Not all spaces are good for air-drying. If a room has high humidity, the food will not dry properly.
3. Sun-Drying
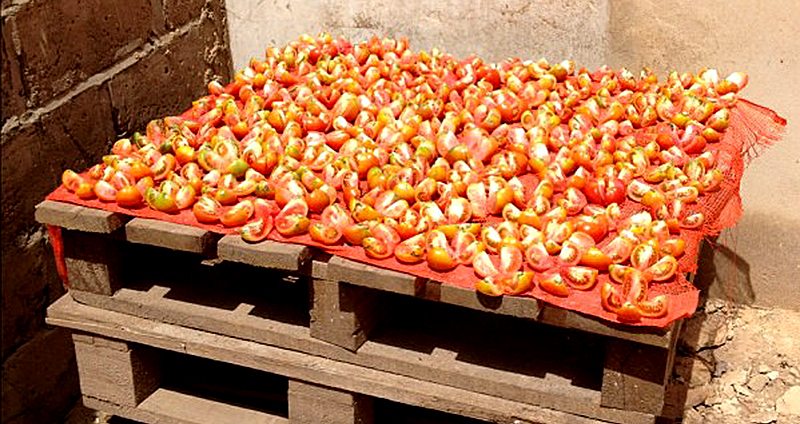
joyce s. lee/Flickr
Procedure: Slice the food thinly, then place on trays, such as a cookie sheet. The food should be placed in full sun, but special care has to be taken for foods, like fruit, to keep insects away. Some people use their cars for sun-drying, as it’s a more controlled environment: The food can be placed on trays in the front window of the car. Sun-drying should take three to five days and requires days of consecutive sun, a high temperature (over 90 degrees F) and low humidity.
The Good: Sun-drying is another low-technology and low-electricity option, and it’s quicker than the air-drying method. You have all of the equipment in your house, and it leaves your kitchen free for other projects.
The Bad: There are a lot of variables to sun-drying, and not all climates are suitable to this method. In southern Virginia, where I live, we have had a very wet summer and we always have a high humidity. The green beans were still able to dry, but the peppers had to be tossed after several days of unsuccessful drying. However, if you live in a very hot, dry area, this could be a great option.
Those of us who have been preserving food for a while know that one size does not fit all. Some foods are better frozen; others are delicious canned. The same is true for dehydrating. Different methods may be more appropriate for different vegetables. The green beans I was working with dried beautifully using the air-drying method, but the banana peppers did best using the electric dehydrator. Some foods, such as tomatoes, would be difficult, if not impossible, to air-dry. In addition, the climate of the area is always a factor in dehydrating. Part of the fun in food preservation is the experimentation, however, so get a little adventurous and add dehydrating to your food-preservation repertoire.


