There’s nothing more satisfying and fun than making basic dairy products that can normally be purchased from the grocery store. Whether you have fresh, raw milk from your own animals or from a local dairy or if you are a city dweller with little to no access to local dairy, you can make your own butter, buttermilk, crème fraiche and ricotta cheese from scratch, right in your own kitchen. These dairy products require very few ingredients (three or less for each recipe) and rely on items that are readily available in your home pantry.
As the aforementioned city dweller, I lack access to raw milk; in fact, it is illegal in my state except through a CSA, so I will focus on making these products using organic, pasteurized non-homogenized milk purchased from a grocery store. It’s important to note that all milk purchased at the grocery store is pasteurized, meaning it’s heated to eliminate harmful bacteria. You should note, however, that most milk on your grocery store dairy case has been “ultra-pasteurized,” or heated to 280 degrees F for at least two seconds in order to increase the shelf life of the milk. These ultra-pasteurized milks are difficult to impossible to utilize for these projects because the high heat destabilizes the whey proteins in the milk and prevents it from forming proper curds. For the best results, choose non-ultra-pasteurized, non-homogenized milk or cream.
The first three projects: cultured butter, buttermilk and crème fraiche are made with fresh whipping cream. Ricotta cheese is made from whole milk.
Cultured Butter And Buttermilk
Making butter at home likely conjures thoughts of wooden butter churns, rosy-cheeked milk-maids and hours of strenuous work. Luckily, this process is much easier and faster with a stand mixer. Sweet cream butter is made by simply whipping cream in a stand mixer until it “breaks” or separates into butter curds and buttermilk.
Sweet cream butter lacks complexity and flavor, so for this recipe, we introduce lactic acid bacteria to the cream in the form of plain yogurt before churning it. Culturing the cream will result in butter with a subtle tanginess and more complex flavor.
You will need:
- 4 cups whipping cream
- 1/2 cup plain yogurt
- 1/4 to 1/2 tsp. sea salt
In a glass or ceramic bowl, whisk the whipping cream with the yogurt and cover the bowl with a clean kitchen towel. Place the bowl in a warm, draft free area for 18 to 36 hours. The mixture should thicken and have a pleasantly sour taste.
After the cream has cultured, place the mixture into the refrigerator until it reaches 60 degrees F. Drape a double-layered piece of cheesecloth over the rim of a clean bowl and set it aside. Make sure the cheesecloth hangs over the bowl.
After the cream reaches 60 degrees F, pour it into the bowl of the stand mixer fitted with the wire whisk attachment and whip on high speed.
As the cream whips, it will first appear like whipped cream, white and fluffy. As the cream continues to whip, the mixture will break, and the yellow curds will separate from the buttermilk. It’s a good idea to drape a clean kitchen towel over the mixing bowl during this stage, as the buttermilk tends to splash.
Once yellow curds form, pour the mixture into the cheesecloth-lined bowl. The butter curds will be left in the cheesecloth and the buttermilk will drain into the bowl. Gather the ends of the cheesecloth and gently squeeze all the buttermilk from the cloth.
Place the butter in a bowl with ice water and with your hands or with a wooden spatula, knead the butter a few times to squeeze out any remaining buttermilk. Rinse the butter under cold, running water until the water runs clear. This is an important step, as the cleaner the butter, the longer it will remain fresh. Allow the butter to drain and pat dry. Sprinkle the butter with the sea salt, knead to combine, and then shape the butter into a log. Wrap your butter in parchment or wax paper and keep refrigerated.
Now that the butter has been churned, pour the buttermilk into a clean glass container fitted with a lid and refrigerate. The buttermilk can then be used for baking and also for making crème fraiche and ricotta cheese.
Crème Fraiche
Crème fraiche is a French cultured cream product that is similar to sour cream, but is less tangy and has a higher fat content. Because of its higher fat content, crème fraiche is perfect for thickening soups and hot dishes as it doesn’t curdle when heated. The buttermilk reserved from the cultured butter may be used to make the crème fraiche; however, commercial buttermilk yields a more consistent result.
You will need:
- 2 cups whipping cream
- 2 T. commercially cultured buttermilk
Combine the ingredients in a saucepan. Gently heat the cream until it reaches 85 degrees F, and then pour into a glass container. Cover with a clean tea towel and allow it to sit at room temperature (65 to 75 degrees F) for 8 to 24 hours or until the cream has thickened. Place the thickened cream in the refrigerator at least 24 hours prior to use.
For a simple and elegant dessert, stir in a little honey or maple syrup and a splash of vanilla and top with fresh berries in the summer or poached pears in the fall.
Ricotta Cheese

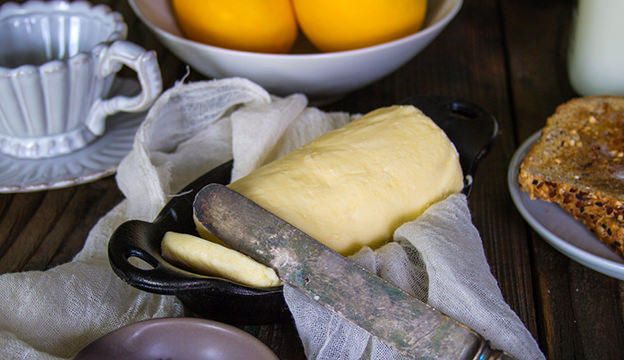
iStock/Thinkstock
A “mock” version of ricotta cheese is made by acidifying whole milk, allowing it to form curds, and then draining it. True ricotta cheese is a byproduct of the cheesemaking process and is made by heating acidified whey to a high temperature, then draining off the curds. This mock ricotta cheese (aka queso fresco or paneer cheese) has a larger yield and can be used in the same way you would use a true ricotta. And because you’ve made it at home, it won’t contain the additives and stabilizers commonly found in commercial ricotta cheeses. The ricotta cheese can be used in recipes like lasagna or ravioli filling or simply spread on a slice of crusty bread with a drizzle of olive oil.
There are several ways to make mock ricotta cheese. The most common method is by heating whole milk to a temperature of about 175 degrees F, then adding either lemon juice or vinegar. This method results in a firmer curd and grainier texture.
You can also make ricotta cheese by combining the milk with the cultured buttermilk leftover from the butter-making process. This method produced a creamier ricotta with a softer curd.
For the first method:
- 1 quart whole milk
- 2 T white vinegar or lemon juice
- 1/2 tsp. salt
Heat the milk in a heavy-bottomed pot over medium heat until the milk reaches 165 to 180 degrees F. Remove from the heat and add the vinegar or lemon juice and stir with a figure-8 motion until curds form.
Using a slotted spoon, transfer the curds into a cheesecloth-lined sieve placed over a bowl and drain for up to two hours, depending on how firm you prefer your cheese to be. If you prefer soft, almost runny ricotta cheese, drain for 10 minutes or less. Stir in the salt and serve. Makes approximately 1 cup of ricotta cheese.
For the buttermilk method:
- 1 quart whole milk
- 1 cup reserved buttermilk leftover from making butter
- 1/2 tsp. salt
Mix the milk and the buttermilk in a heavy-bottomed pot and heat over medium heat to 165 to 175 degrees F, stirring occasionally until curds form. Transfer the curds into a cheesecloth-lined sieve and drain. Sprinkle with salt and stir to combine.
Store in a sealed glass container for up to five days.
Preparing these dairy staple products at home is not only a fun project for the entire family but also a useful way of using fresh dairy products that are susceptible to spoiling. If you’ve ever purchased more milk than you can drink in one week, turning it into ricotta cheese will extend its life for another week. The buttermilk from making butter can be used in numerous recipes in the kitchen, and the leftover whey from making ricotta can be used for baking bread, feeding farm animals or for drinking, so that nothing goes to waste.