Dehydrating, or drying, requires a simple process that preserves a surplus of fresh foods for use when those ingredients are long out of season. It has been a common method of preserving throughout history. Today, though, it’s more often associated with making snacks.
Whether you want to make your family healthier, homemade fruit leather or your own beef jerky for a weekend camping trip, an at-home food dehydrator can help you create it.
What is often overlooked is how dehydrating foods expands tastes and textures when cooking at home. Once fully dried, some foods can be used to deepen the flavor of simmering soups while others can be used as crunchy toppings when serving the soup.
Keys to Success
The most time-efficient tool for dehydrating foods is an electric food dehydrator. An affordable and compact option that costs less than $100 is fully capable of doing the job. These appliances allow for optimal temperature and time control. They also promote appropriate air circulation, which plays an important role in dehydrating.
Success requires a temperature that is low enough to gradually remove all of the moisture from the food but not so high that it cooks during the process. Removing moisture is the key to shelf-stable dehydrated foods that don’t grow mold or rot.
The ideal temperature for dehydrating is 140 degrees Fahrenheit. Most food dehydrators have multiple temperature settings. You’ll find many recipe instructions for foods with varying temperature suggestions.
Feel free to follow tested recipes and their suggested temperatures. But there really isn’t a need for so many fluctuations in temperature settings.
Over time, you’ll become familiar with your model of dehydrator. You’ll likely find a consistent temperature for dehydrating and learn the ideal time that results in foods dried to your liking. I find that staying just under 140 degrees at the 131-degree setting on my machine to be effective for drying most fruits and vegetables. It’s the temperature setting used for all the foods we’ll discuss here.
Times & Temps
Dehydrating requires patience. But the good news is that it’s a fairly hands-off process. Once the food is prepped and placed in the dehydrator, you can often leave it overnight and the food will be ready in the morning.
Some manufacturers do suggest rotating trays for better air circulation while the dehydrator is at work. Do some research based on your needs before deciding on a model that is right for you.
Many foods will fully dehydrate in 4 to 8 hours at temperatures between 131 and 140 degrees. Drying times are always approximate due to the impact of humidity. In a more humid environment, foods will take longer to dehydrate.
Foods that Dehydrate Well
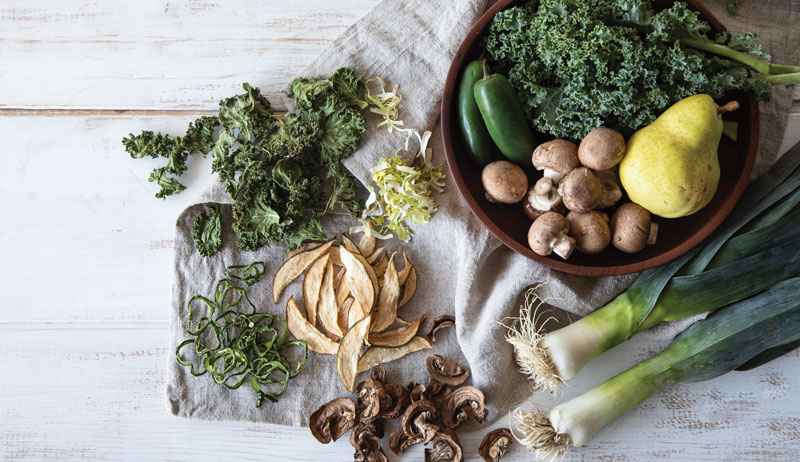
The more moisture content a food contains, the longer it will take to dry. Most fruits and vegetables, however, can be dried with an electric food dehydrator.
Berries, stone fruits, apples and pears make ideal candidates for snacking and adding to baked goods. Fresh herbs also dehydrate well—especially dill, thyme and rosemary. Delicate, leafy greens such as lettuce aren’t the best for drying due to their high water content. But kale, fennel fronds and peppers are good options for drying to cook with later.
When experimenting, it’s important not to expect the same results from all home dehydrating as you get when buying dried, packaged foods. Many commercially dried foods have additives or use methods to make them crisp. It’s often not possible to achieve this at home, especially with many high-moisture fruits.
Read more: Don’t forget the dehydrator when preserving garden produce!
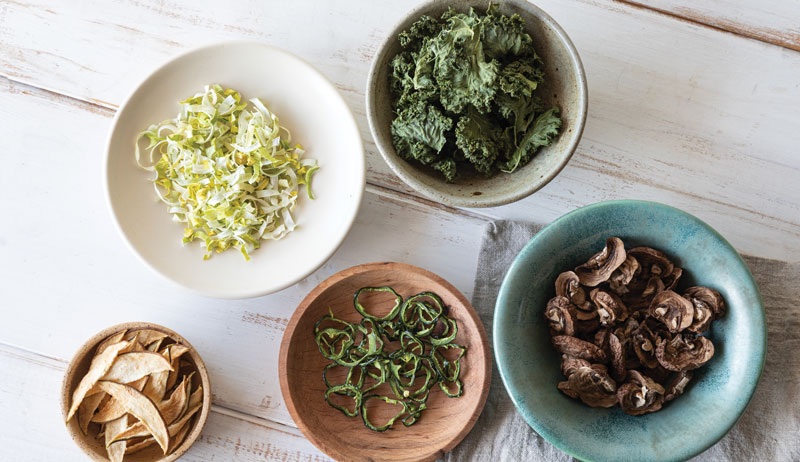
Five to Try
The following five foods are fun and easy to try, once you’re ready to start your dehydration journey.
Mushrooms
These can sometimes go bad quicker than you can use them up, which makes dehydrating them the best option to extend shelf life. Dehydrated mushrooms can be added directly to soups, stews and stir-fry during cooking. You can also slice them very thin before drying, and then use them as a pizza topping.
Wipe any dirt from the mushrooms. Slice into 1⁄4-inch pieces. Arrange on the dehydrator trays with about 1 inch of space between each piece. Dehydrate at 131 degrees for 6 to
8 hours. They should be crisp around the edges and crisp to very slightly chewy inside.
Leeks
Once you dehydrate leeks, you’ll pass on the jar of store-bought dried onion you have in the pantry. These pungent slices become very crispy, making them ideal to sprinkle into soups while cooking or onto pizzas before baking. You can easily crumble them into finer pieces to mix into biscuits, omelets and savory scones.
Trim the top greens and the root end from the leek. Cut in half lengthwise, then slice each half into 1⁄4-inch-wide pieces. Separate each of the layers of the slices. Rinse in a bowl of water to allow any dirt to fall to the bottom. Rinse and dry.
Most dehydrators come with a mesh screen or sheet for drying herbs. You’ll need to use this for leeks to prevent the small pieces from falling through the slats of the tray. Spread in a single layer. Dehydrate at 131 degrees for 4 hours. They should be crisp.
Jalapeños
Crunchy dehydrated jalapeño rings are a must for topping nachos and tacos. They add a little heat and crisp bite to sandwiches, too. Use larger jalapeños to prevent them from falling through the slats of the trays or you can use the same mesh screen recommended for drying leeks.

Wash and dry the jalapeños, then remove the stems. Cut off the bottoms, and use a pairing knife to circle around the inside of the peppers, removing the seeds and ribs. Slice thinly into rings, 1⁄8-to-1⁄4-inch wide. Place on the drying rack at least 1⁄2-inch apart.
Dry at 131 degrees for 6 hours. They should be crisp.
Kale
Dehydrating kale makes an ideal way to use up an abundance from the garden. Curly leaf kale gets especially crisp in the dehydrator, creating a vegetable chip that can be packed along for afternoon snacking. Kale chips also make a crunchy substitute for crackers or croutons when used to garnish soups.
Wash and dry fresh, unwilted kale leaves. Remove the stems, and cut or tear the tender leaves into 1-to-2-inch pieces. The pieces can be arranged more closely together, nearly touching, on dehydrating trays due to their delicate nature and quicker drying times.
Dehydrate at 131 degrees for 4 1⁄2 to 5 hours. They should be crisp, nearly shattering when you take a bite.
Read: Try this recipe for tasty dried apple slices!
Pears
When it comes to drying fruit, pears are often passed over for bananas and apples. But their intense sweetness and gritty texture make them both a delicious snack and garnish when dehydrated.
Slices can be added to trail mixes and cereals. Their unique shape makes the slices an attractive topper for rolls, biscuits and breads before baking.
Wash and dry pears, then core and slice about 1⁄4-inch thick. Leave an inch between the slices on the tray to allow for better air circulation for the moisture-rich fruit. Dry at 131 degrees for
6 hours. They should be crisp around the edges and crisp to very slightly chewy inside.
More Information
Storing Dehydrated Foods
Once foods are dehydrated, let them cool before storing in airtight containers. Each time a container is opened it presents the opportunity for air and moisture to get in. Consider storing the dried goods preportioned, such as 1 cup of dried fruit to add to a trail mix or 2 cups of kale chips for a family snack.
Glass jars, such as those used for canning, are ideal for storage. But any airtight storage container will work. Store dehydrated foods in a cool, dark place. While some can last for up to a year, it’s best to use them within 4 to 6 months for optimal flavor.
It’s also important to check on your dehydrated foods regularly when you begin experimenting with dehydrating. Because humidity and temperature can affect drying, you’ll want to inspect them well for mold growth. This is another reason why glass, see-through containers work well for storage. You can see the food inside without opening the lid, exposing the foods to air and moisture.
Once you become familiar with the right drying times for your environment, you’ll gain confidence in dehydrating and better understand your ideal maximum storage times.
This article originally appeared in the September/October 2022 issue of Hobby Farms magazine.