I have an awesome fall project for all my gardening friends that will enable you to have a full salad bowl through most of winter: a quick and easy cold frame. Start this building project now, and you’ll be up to your elbows in cool-season greens for months to come.

Step 1
Select a site for your winter garden. I suggest a 6-by6-foot or 8-by-8-foot area with no tree roots and plenty of sun.
Step 2
Dig a 1-foot-deep hole that covers the entire area. Put the soil that comes out of the hole onto a tarp or into a wheelbarrow until you are ready to use it.
Step 3
Line the inside of the hole with a row of cement blocks, then stack another row on top, essentially building the exterior walls of your mini-greenhouse. Don’t use cinder blocks, as they are often made of fly-ash that could contain heavy metals or other contaminants. If you don’t have cement blocks, you can use straw bales, though they’ll take up more room.
")
Step 4
Using wood or PVC piping, construct a central roof-line support across the middle of the block frame so that it sits just on top of the cement blocks. An even smarter idea (though more difficult to build) is to angle the bed 30 degrees from back to front, making sure the slant is south-facing to maximize sun exposure during the winter.
Step 5
Shovel 6 to 8 inches of horse, poultry or cow manure into the framed bed, then cover it with some of the soil on the tarp until it’s level with the outside soil surface (the layer of decomposing manure helps heat the cold frame through the winter.
Step 6
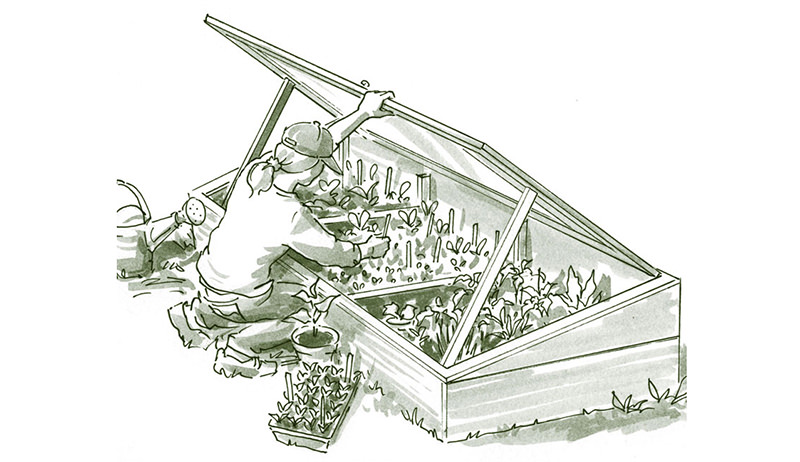
Prop old storm windows or doors or double-paned acrylic sheeting between the roof support and the cement blocks. It should slightly slant down to the edge from the center support. This is your roof.
Step 7
Plant your seeds. You can plant lettuce, tat soi, radish, kale and other greens through the rest of this fall and into the early winter.
Keys to Success
Remember to remove or vent the roof on very warm days and replace the manure each fall before planting your crops.
Cold frames are also a terrific way to get a jumpstart on spring growing. I move all the seedlings I grow indoors under lights out into my cold frame to harden them off every spring. They spend a good two weeks in the cold frame before being transplanted into the garden. I leave the roof off during the day, but I put it back on at night, when the temperatures drop, to protect the seedlings from frost. It helps them better acclimate to the conditions of the garden when planting time arrives, and it saves me from lugging the flats back indoors every night.
If you aren’t interested in building your own cold frame, you can also purchase kits through several different gardening websites. Many of them easily construct with just a few common tools and will last for many years.
More fall gardening tips from HobbyFarms.com:
- 4 Tips to Keep Your Garden Producing Into Fall
- 18 Vegetables for Your Autumn Garden
- 6 Winter Ground Covers You Never Thought to Grow
- 3 Autumn Chores for a Healthy Lawn
- 5 Cover Crops for Your Small-Scale Garden
« More Dirt on Gardening »