
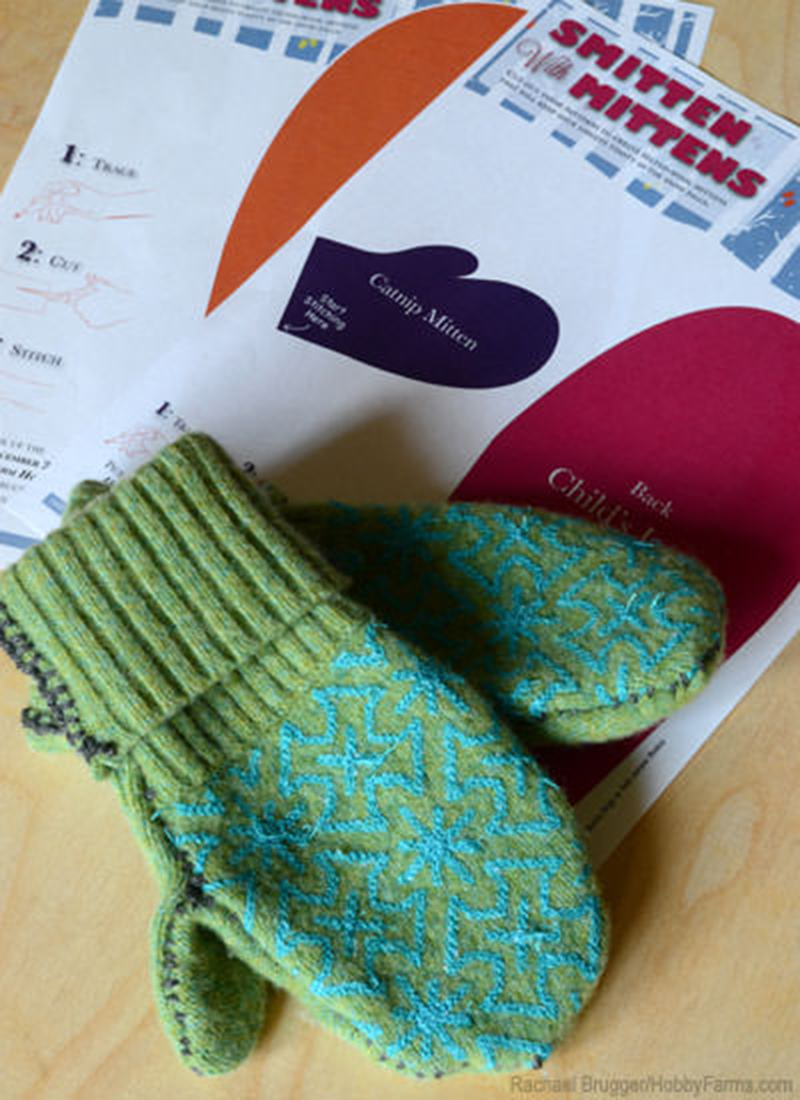
Sweater mittens are a simple and cozy winter craft, perfect for beginners. Using a 100% wool sweater, you can create warm, durable mittens with minimal sewing skills. This DIY project is a great way to repurpose old sweaters and make practical handmade gifts.
With just a few basic materials and printable patterns, you can transform a felted wool sweater into mittens in about 1½ to 2 hours of active crafting. These mittens are perfect for keeping hands warm during cold weather, and the project works well for both children and adults.
Using printable mitten patterns, crafters can cut and sew each piece with ease. The result is a cozy, handmade accessory that’s perfect for winter wear or gifting during the holiday season.
Materials and Supplies for Sweater Mittens
- 100-percent wool or 100-percent Shetland-wool sweater
- Washing machine and dryer
- Laundry detergent
- Fabric or felt shears
- Scissors
- Straight pins
- Steel yarn needle (size 16)
- Worsted-weight yarn (length varies by pattern: approx. 5 feet for child, 7½ feet for adult)
- Printable mitten pattern in the desired size
Step 1: Select a Sweater
Choose a flat-knit, 100% wool sweater for thick, durable mittens. Thicker sweaters produce mittens with more warmth, while Shetland-wool sweaters create thinner, more flexible mittens.
Avoid sweaters with rolled hems at the sleeves or waistband, as these can interfere with cutting and shaping the mitten pieces. Ribbed waistbands can be used creatively for wristbands on adult mittens, and sleeves may be suitable for child-sized mittens.
Step 2: Machine-Felt the Sweater
Felt the sweater by washing it in hot water on the washing machine’s normal setting, using a proportional amount of detergent. The combination of heat, agitation, and detergent causes the wool fibers to shrink and tighten, creating a dense, durable fabric ideal for sweater mittens.
Dry the sweater on high heat. The resulting felted wool should be noticeably smaller, thicker, and tighter-knit, providing a sturdy base for cutting mitten pieces.

Step 3: Trim Sweater Seams
Using fabric or felt shears, cut along the sweater’s seams to create flat, manageable pieces of felted wool. These pieces will serve as the material for the mitten patterns, making it easier to arrange, pin, and cut the shapes for each hand.

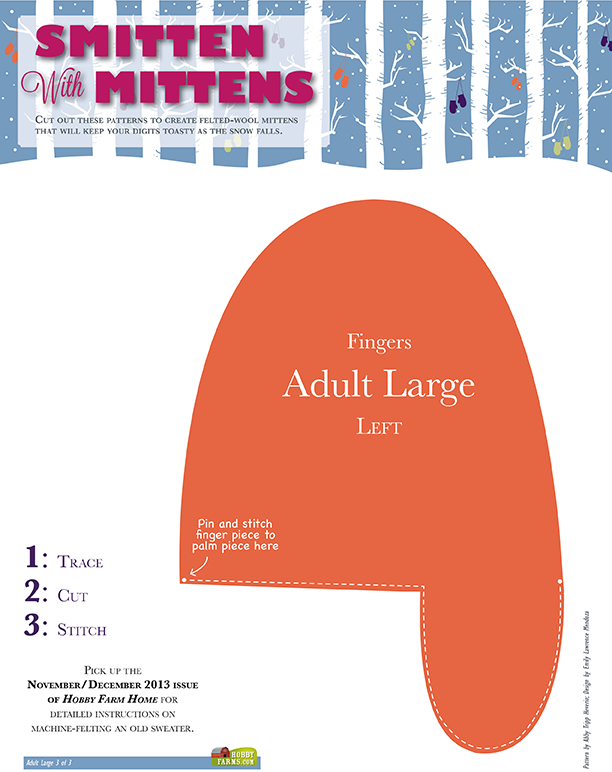
Step 4: Arrange Sweater Mittens Pattern and Cut Out
Download the mitten pattern in the desired size. Lay the pattern pieces on the felted sweater, aligning the palm and back pieces with the sweater’s hem if desired. Pin the pieces in place, then carefully cut around the pattern with shears.
Flip the pattern pieces to cut out shapes for the opposite hand. Ensuring both mittens are symmetrical helps create a neat, professional-looking finished pair.

Step 5: Pin and Stitch Palm Pieces
With the inside of the fabric facing together, align the palm pieces for each mitten, ensuring the thumbs point upward. Pin the pieces in place. Using a steel yarn needle and worsted-weight yarn, blanket stitch along the seam where the top and bottom palm pieces meet, including the thumb.
Tie off the yarn with a knot tucked inside the thumb for a clean finish.

Step 6: Pin and Stitch Palm and Back Pieces
Place the outer sides of the fabric together and align the back piece with the stitched palm piece. Pin in place. Blanket stitch around the outer edge of each mitten, taking care to keep the seams even where the top and bottom palm pieces meet.
This step completes the main structure of the sweater mittens.

Step 7: Tie Off Yarn and Finish
After stitching around each mitten, tie off the yarn with a knot tucked inside the wrist area. The mittens are now complete and ready for use.
Optional: Gift the mittens or use them for personal winter wear. Felted wool creates a durable, warm fabric that holds its shape and provides excellent insulation.
Bonus Project: Mitten-Shaped Catnip Toy
Scrap pieces of felted wool can be repurposed to create a catnip toy shaped like a mitten. This project is simple and makes a fun holiday gift for pets.
Materials and Supplies
- Felted-wool remnants
- Approximately 1½ feet of yarn
- 1–2 tsp. dried, ground catnip
- Batting
- Mitten-shaped catnip toy pattern
Directions
- Cut two pieces of wool using the catnip toy pattern, with the wrong sides facing each other.
- Pin the pieces together.
- Using a blanket stitch, sew around the outside of the mitten shape, leaving the cuff open.
- Unpin and stuff the toy with batting and catnip.
- Stitch the cuff shut, tying off the yarn securely.
This pattern can also be adapted to create small holiday ornaments or gift toppers.
Downloadable Sweater Mittens Patterns
Printable mitten patterns are available in two sizes: one for children and one for adults.
- Children’s Pattern: Two pages; print and cut out for smaller mittens.
- Adult Pattern: Three pages; print and cut out for larger mittens.
To use, right-click the pattern images, save to your computer, and print. Follow the steps above to create your own sweater mittens.
Here are the two pages for the kids’ pattern:


Here are the three pages for the adult pattern:


Sweater Mittens FAQ
Q: What kind of sweater works best for making mittens?
A: Flat-knit, 100-percent wool sweaters work best. Thicker sweaters create warmer, sturdier mittens, while Shetland wool produces a thinner, more flexible finished product. Avoid sweaters with rolled hems at the sleeves or waistband.
Q: How long does it take to make sweater mittens?
A: Active crafting time is typically 1½ to 2 hours, plus the time needed to wash and dry the sweater for felting. Felted wool produces a dense fabric that’s ideal for mittens.
Q: Can children wear mittens made from felted wool sweaters?
A: Yes. Printable patterns are available for both children and adults. Felted wool is soft, durable, and holds its shape well, making it safe and practical for kids.
Q: Can scrap wool pieces be used for other projects?
A: Yes. Small scraps of felted wool can be repurposed to make catnip toys, ornaments, or gift toppers, extending the usefulness of your sweater remnants.
This article was written for Hobby Farms magazine. Click here to subscribe.


