 Courtesy TongRo Image Stock/ Thinkstock When you make your own candles, you can make them any shape, size, color and fragrance that you want! |
When it comes to creating a romantic, intimate or dynamic dinner table setting, nothing beats candles. The amber cast and undulating flickers they bring to a table filled with delicious foods and drink can transform an average dining experience among friends and family into a special occasion. If your farmstead feast is prepared with ingredients from your own garden, extend your farmsteadtarian mindset to homespun table decorations, too.
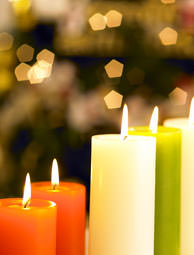
Our favorite candles are an assortment of pillar candles we’ve made ourselves as a part of our annual New Year’s Eve celebration. For many years, now, we’ve celebrated New Year’s Eve with the Carus family, our urban-farming friends in Monroe, Wis. They’re also the ones who host community soup nights, which we write about in Farmstead Chef. We’ve found making our own candles to be a fun activity to usher in the new year. Because the wax needs to be melted down and then color or fragrance added, there’s plenty of time to visit and enjoy a lengthy meal of tapas and drinks while preparing our candle molds, usually done in the basement or a heated outbuilding.
There are lots of types of candles you can make; however, we like to make pillar candles, due to their simplicity. With some degree of care, making candles can be done in your home, too, without a mess or any danger.
Step 1: Gather Materials
Although much simpler than making soap, making candles does require a few supplies:
- Wax
Because there are lots of types of candles, select the wax to fit your purpose. We prioritize recycling and use leftover paraffin wax from previously burned candles, but there’s also soy and other alternative waxes. If you keep bees, consider experimenting with beeswax candles. - Wick
The wick delivers melted wax to fuel the flame. Most wicks today are made with cotton or a cotton-paper blend in a flat or square braid and are most commonly used for pillar candles. Wicks are sized according to the style, wax, additives (like fragrance) and diameter of the candle. Small candles, in general, require thin wicks. Just be advised that there may be some testing involved—that’s the fun part. For some assistance choosing the correct wick, check out the Candlescience Wick Guide.For our pillar candles, our goal is to have a little rim around the top of a burning candle to contain the melted wax, and we choose a wick that will help achieve this effect. If the right one isn’t selected, the wax pool might drip all over the counter or leave us with a crater as the candle burns down into the middle of the pillar. - Slow cooker or double-boiler system to safely and slowly melt the wax without burning it.
- Metal carafe for pouring the hot wax.
- Molds or containers for making your candles.
Pillar-candle molds come in various sizes and shapes. We own both commercially made molds (shaped like an owl or a star) and molds we created from recycled juice, milk or yogurt containers. The widely used votive and container-type candles require your candle holder to be fireproof, leak-free and crack-resistant. - Fragrances to scent your candles (optional).
The fragrances come as oils that are added to the melted wax. They come in just about any scent you can image. We like pine, cinnamon stick, pomegranate cider, carnation and amaretto.
Step 2: Melt the Wax
You can choose to purchase paraffin or soy wax, among the more popular types of wax, or opt for a more frugal approach, like we do. To do this, melt down all the various bits and leftover pieces of assorted candles from previous years. After sorting the leftover candle wax, melt each color group (red, green, yellow, et cetera). Add clear or white candle pieces to mellow any color, or add coloring tablets to brighten them. Once the wax melts, it’s easy to scoop out the old wicks or other non-wax debris that falls to the bottom.
For melting wax, we use an old slow cooker relegated solely for candle making. We find it usually takes about an hour to melt down the wax in our slow cooker to the point where it can be easily poured into the molds. As an alternative, you can melt the wax with a double-boiler system, using an old, metal coffee can set inside a larger wide pot containing boiling water.
It’s important not to heat the wax directly on a stove because when paraffin reaches 390 degrees F, it can spontaneously ignite, i.e. explode. Keep in mind that water boils at around 212 degrees F, so that’s a good temperature to keep the wax at. Monitor it using a thermometer or the temperature gauge on your slow cooker. And never leave the melting wax unattended!
Step 3: Attach the Wick
Attach the wicks so they go down the center of the mold, and tie them off at the bottom and top. Then tape the sides mold tightly shut. Use putty material to seal the bottom of the mold to prevent hot wax from leaking out.
Step 4: Pour the Wax
Using an old, metal coffee carafe, pour the melted wax into the mold. Make your candles one color or multi-colored. We create a rainbow design for some of our pillars by adding different colored, repurposed wax to each layer. For our smaller candles, perhaps those in a Dixie-cup mold, we stick to one color. Once poured, let the wax cool completely. On New Year’s Day, the candles just slip out and are ready for use.
We couldn’t imagine a better way to usher in the New Year than turning leftover candle pieces into a colorful and warm beacon for what lies ahead. Enhance the satisfaction that comes from preparing a delicious meal by gracing your table with your own homemade flickering candles.
Savoring the good life,

<< More Farmstead Chef >>


