Earlier this year, product shortages were showing up across the supply chain as the COVID-19 pandemic continued to interfere with shipping, demand, supply and many other areas of the global economy. Chicken, whether it be at the grocery store or on the menu at a fast-food restaurant, is in short supply. This drives up prices and causes a general difficulty in meeting demand.
To compensate, some restaurants have even taken meals such as chicken tenders off the menu entirely.
In addition to the supply shortage, many Americans have undergone a change of perspective brought about by long months in quarantine. With the idea of circumventing shortages, the extended months in isolation saw numerous Americans planting a garden, some for the first time. Others looked to begin or refresh their skills in raising meat animals.
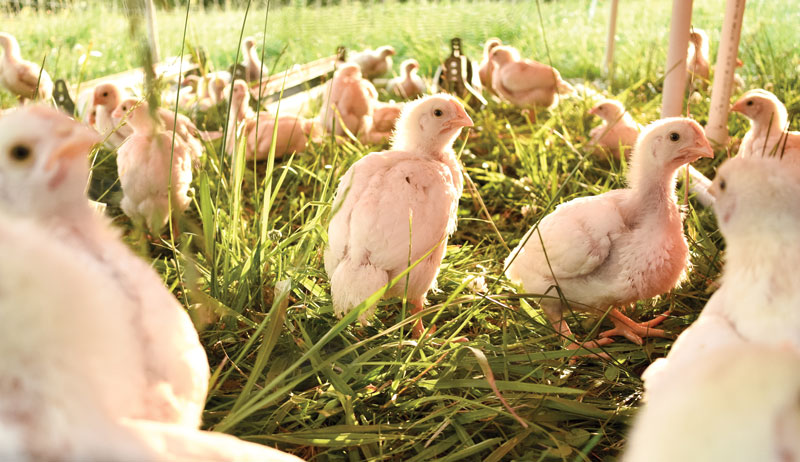
Raise Your Own Meat Chickens
The combination of the two issues has made a shortage of chicken a very real issue. In short, there has likely never been a better time to learn chicken processing for yourself.
However, long before the pandemic began, producers John Kolenda of KC Farms and Greg Nance of Sweet Grace Farm raised their chickens to supply meat and eggs to family, friends and others. Kolenda shares his method of how to process chickens while Nance weighs in on packaging.
Before the process even begins, Kolenda first advises to select male chickens in a sexed batch, if possible. Straight-run, also known as mixed batches, will also work. But female birds typically don’t produce as much meat.
Secondly, to avoid having feces or food in the digestive tract at the time of processing, withhold feed for approximately eight to 12 hours before beginning. Nance sells his live birds before processing for an exercise more about processing birds with a friend than selling the bird after it has been processed.
Both producers recommend watching one or more chicken processing videos to thoroughly familiarize yourself with the techniques you’ll be using during processing.
Read more: Check out this video on how to properly butcher a chicken.
Equipment
Before you start, have the following on-hand.
- Processing cones mounted on a wood frame. Purchase the size appropriate for the bird you’ll be processing and a sufficient number to accommodate the number of birds you’ll be working with.
- Knives. You’ll need at least two—one for use by the killing cone(s) and one for your processing table.
- Knife sharpener
- Two (2) 30-quart boiling pots with lids, one mounted on a gas burner for use during processing. The second pot will be used for packaging.
- Thermometer
- Rubber glove
- Chicken-plucking machine or drill attachment. This is optional, as plucking can be done by hand, but extremely useful.
- Pliers for removal of any remaining feathers missed by the chicken plucking machine
- Processing table with sink
- Strawberry corer or another gutting tool
- Poultry or meat shears
- Three (3) 5-gallon buckets for feet, livers, hearts, guts
- Two (2) large coolers. Fill one with water and some ice for rinsing the processed bird and bringing down its temperature. The second, fill with mostly ice to further reduce temperature. The coolers also keep the processed birds from spoiling until packaging begins.
- Poultry shrink wrap bags
- Zip ties
Pro Tips
- Set up near sources of electricity and water that are also easy to clean up.
- Grassy surfaces or concrete pads work best.
- The thickness of each bird’s feathers and skin will determine how often you need to sharpen your knife blades. A good rule of thumb is to do so at the first sign of difficulty in making a quick, clean cut.
- As you may not wish to process chickens outdoors in cold weather, time of year plays a role. Cornish and Cornish-cross chickens grow out in around six to eight weeks. Order your chicks so that you’ll be ready to process on days with comfortable temperatures.
Chicken Processing: Step 1
After securing the bird by the feet, place it upside down in the processing cone. You may need to hold the body of the bird with your left hand while using your right hand to gently pull and position the head and neck through the opening at the bottom of the cone.
Chicken Processing: Step 2
With one hand holding the head make the incision directly behind the ear, cutting about halfway through the neck. Birds with heavier feathering or thicker skin due to age may require more pressure from the knife. Once the incision has been made, pulling and placing downward pressure on the head and neck will result in a faster bleed out.
To speed up the process, a second incision may be made on the opposite side of the neck. Bleed out takes only minutes. For example, if processing four birds at a time, your first bird will typically be finished by the time you complete the fourth.
Pro Tips
- To expedite the process, move your knife along with you from station to station.
- Start water to boil before processing begins. Your thermometer can help you to make sure that you are maintaining the correct temperature. You can add cold water to reduce the temperature of the water that has gotten too hot while a lid can help keep the temperature steady. More expensive thermostatic systems can also be used that keep the water at a constant temperature.
- Pull the bird out carefully so as not to allow the water to extinguish your flame.
Chicken Processing: Step 3
Grasping the bird by both feet, lift it up and out of the processing cone. With a gloved hand to protect against the hot water and steam, dip the carcass approximately three to four times into the 30-quart boiling pot.
The ideal temperature is 150 degrees F. A water temperature of 130 degrees will take longer for the bird to reach the plucking stage.
Temperatures above 150 degrees will damage the bird’s skin. While still edible for the family, birds with damaged skin may not be suitable for resale. You will know that your bird is ready when you can easily pull out a few wing feathers.
Chicken Processing: Step 4
Transport the carcass by the feet to the chicken-plucking machine. Once the machine is on, periodically add a small amount of water.

Hope Ellis-Ashburn
After just a few minutes in the machine, the bird’s feathers will be almost completely removed. Birds that don’t defeather well can be dipped back into the hot water and run through the machine a second time.
Sometimes the machine will break the bird’s legs. As with any skin-damaged carcasses, these birds are often better suited to piecing up for family consumption rather than selling as whole birds.
PRO TIPS
- Feathers will need to be periodically cleared from the machine to avoid clogging it.
- Any feathers that remain on the carcass once the bird has cleared the machine can be plucked by hand using a pair of pliers.
Chicken Processing: Step 5
Lifting the bird by the feet, carry it to the processing table. The first step in processing involves using a sharp knife to remove the feet. For the ideal cutting location, use your thumb to search for the valley located between the foot and the leg.
If desired, discarded feet can be placed in a separate bucket for later dehydration and use as dog treats.
Use poultry shears to remove the head and neck. For ease of packaging, cut the neck as close to the body as possible. You can, if desired, save the neck for stock.

Hope Ellis-Ashburn
Place both index fingers inside the hole created by the removal of the neck and head. Pull in opposite directions to allow for the widening of the hole. This will aid in the location and removal of the esophagus and windpipe.
Using your thumb or thumb and finger, dig up under the windpipe and pull until it pops loose, allowing for ease of removal out the back of the bird. Repeat the process for the windpipe and crop.
These organs are slimy and can be difficult to work loose.
PRO TIP
- Sharpen your knife as often as necessary to achieve ease of cutting between birds.
Next, use the palm of your hand to press down on the breast of the bird to make the skin in this area tight. Use a sharp knife to make a small slit directly below the vent. Be careful not to cut too deep. You could pierce and cause leakage from the intestines or other organs located here.
As with the neck incision, insert both index fingers on the top and bottom of the incision, pulling in opposite directions to widen the hole. When the hole is wide enough, insert your hand using a scooping motion to secure the innards in your hand, then pull back out of the hole.
You may need to repeat this step more than once, cutting the organs free with a knife once they are out of the bird.
Remove the tail using a sharp knife. Then check for any remaining internal organs such as the heart and lungs. The strawberry corer is an excellent tool to peel organs away from the ribs and aid in getting those remains out the back of the bird.
Finally, use a hose to rinse out the gutted carcass. For presentation purposes, you can make a slit in the extra skin at the back of the bird and use it to secure the feet.
Hope Ellis-Ashburn
Chicken Processing: STEP 6
First place processed birds in the cooler containing mainly cold water with some ice. As this cooler becomes full, the first birds processed can be moved over to the cooler containing mostly ice.
Packaging
Once all of the birds have been processed, it’s time to bring them indoors for packaging. A pot of similar or identical size to your scalding pot works well. The water temperature should be brought up to around 200 degrees and can safely exceed this temperature until it reaches the boiling point.
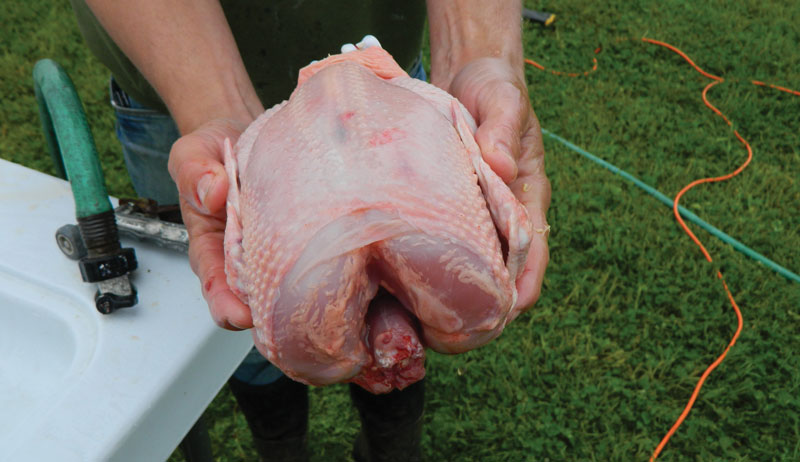
Before packaging, giblets can be bagged or wrapped and placed inside of the bird’s body cavity. Then, the entire bird is placed inside of a shrink-wrap sleeve or bag. Once bagged, twist the wrap tightly to remove as much air as possible.
Dip the bagged bird in the scalding water, which allows the wrap to shrink to fit the bird. Next, zip tie the twisted end to seal the bag closed.
Once packaged, the bird should be weighed. Record this information, along with the date processed, on a label attached to the wrap. Selling prices will vary by region, but Nance sells his for around $3.95 per pound.
cost considerations
Pricing the birds for profit can be a struggle. “Chicks cost around $3 each after you pay for shipping,” Nance says. “Once the chicks are home you can expect up to a 10 percent loss.
“Then there is keeping them warm, fed, watered and clean for about four weeks in a shelter, then relocating them to a field in a chicken tractor, continuing feed, water and moving the tractor daily for the next four to five weeks, keeping predators away, etc. It’s quite an investment.”
This list doesn’t take into consideration the cost involved with killing and processing.
Making use of the entire bird was an important factor for both producers. Chicken feet, for example, can be dehydrated and fed to dogs. Necks make good stock. Organs get composted for use in the garden.
With practice, processing a chicken takes less than 10 minutes from start to finish. Despite the work and costs involved, it can be a fulfilling exercise in self-sufficiency in which the entire family can take part.
This article originally appeared in the September/October 2021 issue of Hobby Farms magazine.