
Season extenders are popular gardening tools these days. They let gardeners give cold-tolerant crops an extra layer of protection, allowing a prolonged harvest. With season extenders in place, even northern gardeners can harvest kale, lettuce, chard and root crops well into the winter. But, buying or building a traditional cold frame or hoop house can be a time-consuming and costly affair, leading many gardeners to not bother. If you garden in raised beds, however, this quick project can turn your garden into a raised bed high tunnel in just a few minutes.

Jessica Walliser
Materials
- 6 one- or two-hole strap brackets
- 6-12 wood screws
- 8-10 plastic zip ties (6-8 inches long)
- 3 8-foot pieces of 1/2-inch PVC piping
- 1 10-foot piece of 1/2-inch EMT conduit pipe
- 1 roll 6-mil plastic sheeting (size will depend on how large your bed is)
- hammer
- pole cutter
- power drill with screw bit
- staple gun with staples
- scissors
Step 1: Attach the Brackets

Jessica Walliser
After gathering your materials, begin by attaching the one- or two-hole strap brackets to the bed.

Jessica Walliser
Screw the first bracket into one of the long sides of your bed, about one to two inches from its corner. Make sure the bracket is about two inches above the ground. The second bracket gets screwed into the same position on the opposite end of the same long side. The third bracket goes between the two, at the center of the long side of the bed.

Jessica Walliser
Step 2: Repeat on the Other Side
Repeat the process with three strap brackets on the other long side of the bed, keeping them opposite of the first set you installed.
Step 3: Cut PVC Pipe if Needed
For raised beds that average four to five feet across, the PVC pipe will not have to be cut, but if your bed is more narrow, or you want the hoops to have a lower profile, cut all three pieces of 1/2-inch PVC down to an appropriate size before installing them into the brackets. For my 4-by-8-foot bed, there was no cutting required.
Step 4: Insert PVC Pipe Into Brackets

Jessica Walliser
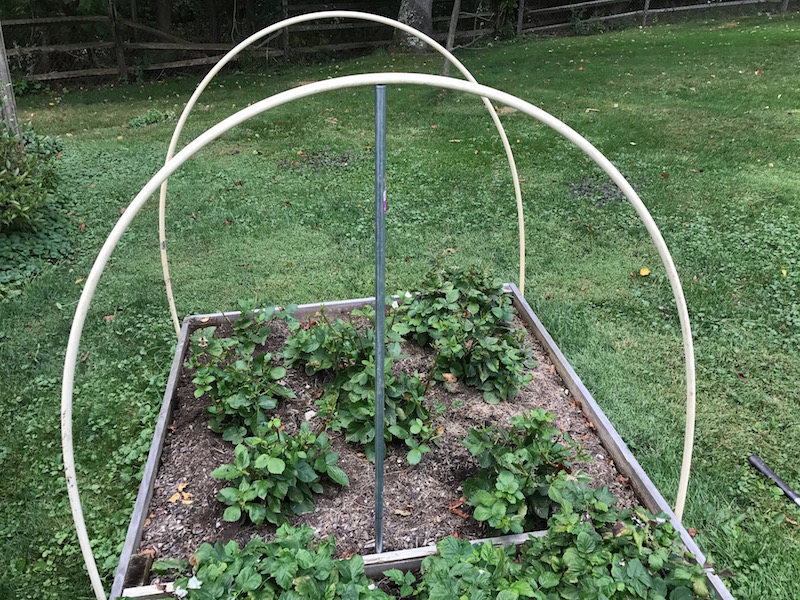
Slide one end of the PVC pipe down through one of the strap brackets, then bend it into an arch until the other end of the pipe can be inserted down into the strap bracket on the opposite side of the bed. Insert the ends of the other two PVC pipes into the other two sets of brackets. At completion, you’ll have three equally spaced arches down the length of your raised bed.

Jessica Walliser
Step 5: Add Vertical Center Support
The next step in building a raised bed high tunnel is to add a center support to the arches. This prevents the arches from folding in windy weather. To make the center support, measure the height of the center arch from the ground to its high point. Then add eight inches. Use the pipe cutter to cut a piece of the EMT conduit pipe to that length. Hammer one end of the piece of EMT conduit pipe into the ground until the top of the pipe sits at the high point of the arch.
Jessica Walliser
Step 6: Add Horizontal Center Support
Next, you’ll need to cut another length of the EMT conduit pipe that’s long enough to create a top support rib that runs from one end arch to the other. Lash it to each of the arches with a pair of crossed zip ties, making sure the center support pole is lashed in as well.

Jessica Walliser
(In my example, rather than using one long piece of EMT conduit pipe, I used two smaller pieces, lashing them together with zip ties at the center arch.)

Jessica Walliser
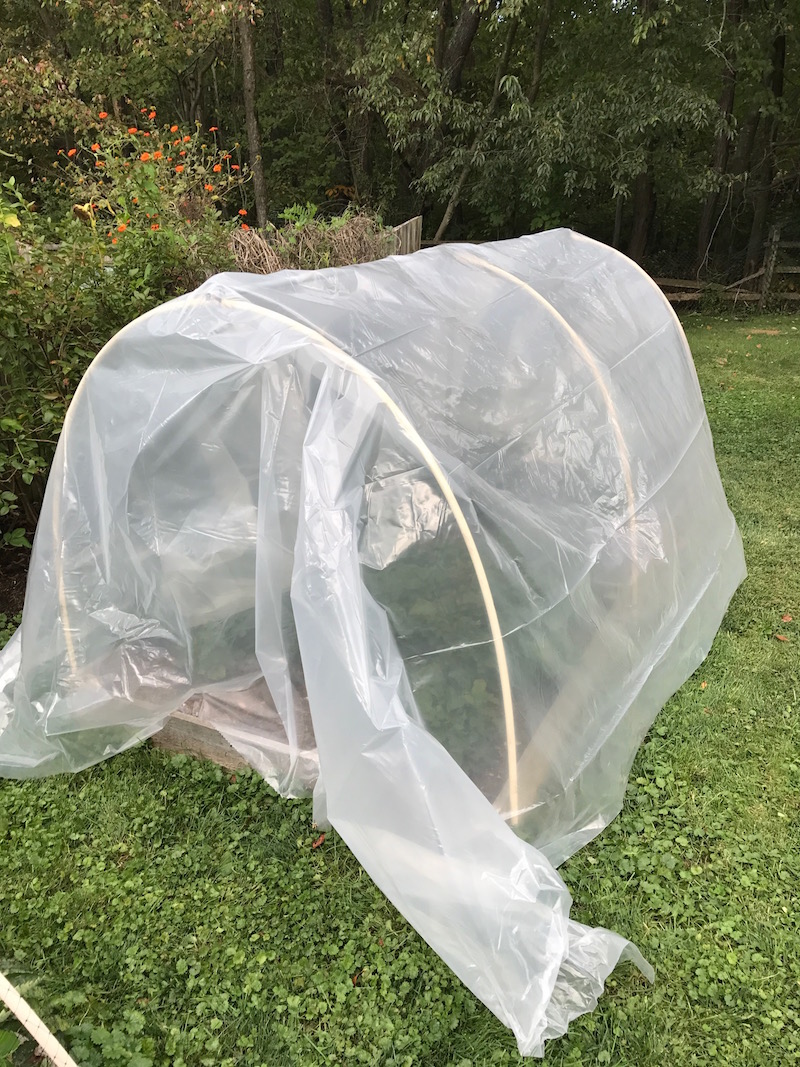
Step 7: Cover With Plastic
Once the frame of your raised bed high tunnel has been erected, cover it with a sheet of 6-mil plastic.
Jessica Walliser
Make sure the piece of plastic is large enough to fully cover the arches and extend all the way down over the lip of the raised bed on all four sides.
Step 8: Secure the Plastic
Fasten the plastic to the raised bed frame, pulling the plastic taunt as you go. In my example, I used a staple gun to secure the plastic to the bed, leaving one end of the bed unstapled to allow me access to harvest the crops. That end is weighed down with a few bricks, instead of being secured with staples.

Jessica Walliser
If you don’t want to use staples, you could place the plastic snug against the bed’s frame and hammer or screw lengths of furring strip board over the plastic to hold it in place. You could also simply use rocks or bricks to keep the plastic in place.
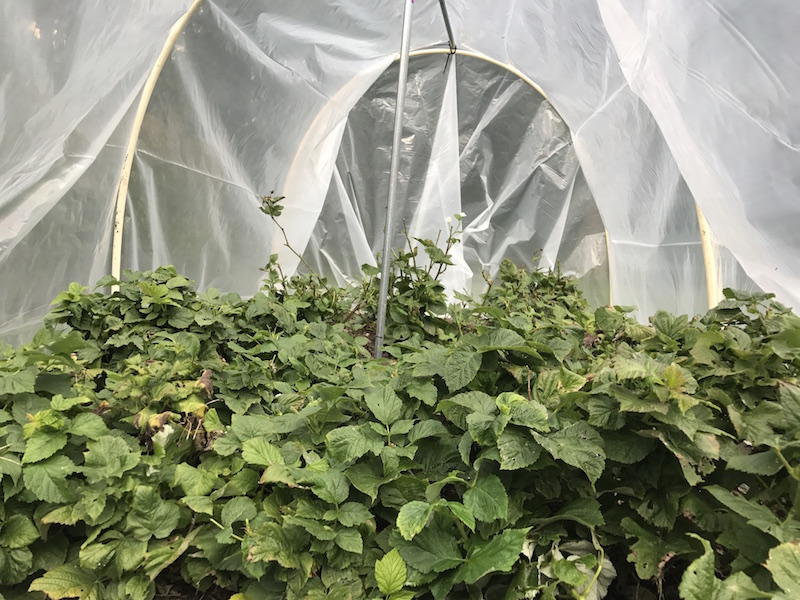
Step 9: Monitor for Ice & Snow
Once the plastic is securely fastened over your raised bed high tunnel, all that’s left to do is make sure that heavy ice and snow don’t put too much pressure on the tunnel during the winter months and cause it to collapse. I visit my bed and sweep off the snow whenever more than an inch or two accumulates on top of it.
Jessica Walliser
With this easy-to-make raised bed high tunnel, you’ll be enjoying harvests of homegrown greens, root crops and other cold-tolerant veggies for weeks to come!


