Cellaring, canning, drying and freezing are all easy and trustworthy preservation methods that allow us to safely fill our larders for the winter. However, the ancient practice of lacto-fermentation is often overlooked despite its long history.
This is unfortunate, because this fermenting technique is easy to learn. And with only a few pieces of equipment that you likely already own, you can preserve nearly any vegetable with minimal startup costs.
Types of Ferments
Wines, breads, yogurts and krauts are all products of fermentation—a natural process by which microorganisms convert a complex substance into a simpler one. For example, wine is produced when yeasts convert sugars in fruit juice into alcohol.
Bread is produced in much the same way as yeasts convert sugars into alcohol and carbon dioxide. Carbon dioxide produces the rise so desirable in well-made bread while the alcohol cooks off during the baking process.
However, yeasts aren’t the only organisms capable of producing ferments. Many ferments, such as sauerkraut, are created with the aide of lactobacillus bacteria within an anaerobic environment. Instead of converting sugars into alcohol, the end product is a natural preservative known as lactic acid.
It’s this acid that imparts the tart and tangy flavor common to lacto-fermented foods and also inhibits the growth of Clostridium botulinum and other pathogenic microorganisms.
Read more: Check out these 10 tips for getting started with fermentation.
Culturing
You can acquire lactobacillus via online sites and brick-and-mortar stores, which now carry varying strains of starter cultures. When making a selection, choose starters according to personal preference on the end product’s taste.
Yogurt is a good example as varying cultures produce anything from mild to moderate to extremely tangy yogurt.
However, the practice of capturing wild cultures is still widely used today and is my personal favorite. With this practice, no starter is utilized. Rather, fermentation relies on naturally occurring bacteria found on the vegetables.
For best results, keep in mind that many conventional methods of farming inhibit the growth of these beneficial bacteria, making local, organic produce a more reliable choice.
The primary drawback to depending on wild cultures, however, is the lack of control over the final taste as the flavor depends on which specific strains of Lactobacillus are present. This unpredictable nature of wild culturing is what many enjoy, as each creation is truly unique.
Equipment/Ingredients
Regardless of the culturing method, equipment and ingredients are essentially the same. You can either purchase an entire system that includes everything needed except for the cutting tools. Or you can create your own setup from items you may already own.
You’ll need a sharp knife, mandolin or food processor, a nonreactive vessel such as a food-grade ceramic crock (slow-cooker inserts work quite well) or various sizes of canning jars.
You’ll also need a weighting system to keep vegetables submerged under a salty brine from start to finish. Plastic zipper bags filled with water or plates weighted down with a heavy jar are excellent weights. Their heft pushes the solids down into the brine, creating an oxygen-free environment.
Finally, you’ll need a cover to place over the vessel to keep bugs out such as plastic wrap, a loose fitting lid or a tightly woven tea towel and rubber band.
Most ferments only require three ingredients: produce, salt and water. When possible, select blemish-free, organic, local produce. Salt is also recommended to keep vegetables crunchy and to assist in preventing pathogenic microorganisms from taking over the ferment and causing spoilage.
Select unrefined sea salt or pickling salt instead of table salt for best results. Use filtered water, if possible. However, dechlorinated tap water will work in a pinch as well.
Read more: Ready to start fermenting? Here are the top 5 supplies you’ll need.
The Process
The fermentation process is almost as easy as selecting ingredients. Simply wash produce in cool water and chop to the desired size. Smaller pieces ferment faster than large chunks. And some vegetables such as cabbage and carrots require a little pounding with a potato masher to release their juices.
Once chopped, mix vegetables, seasonings and salt (if creating a self-brining ferment) in a separate bowl, ensuring salt is evenly distributed. When adding salt, however, be aware that too little will allow the ferment to spoil, while too much nearly stops the fermentation process.

Kristi Cook
A very general rule of thumb is to salt at 1 to 5 percent the total weight of produce, or as some recommend, salt to taste. Again, this is a general rule and is where the art of fermentation comes into play. As always, experimenting is key, especially if not following a recipe.
If using vegetables that release enough juices to create their own brine, such as tomatoes and cabbage, proceed to tightly packing the mixture and all juices into the fermenting vessel, leaving 2 to 3 inches of headspace.
However, in the case of vegetables requiring additional brine such as cucumbers or green beans, instead of mixing the salt with the vegetables, add the required salt to the water and stir until dissolved. Then, tightly pack the vegetables into the vessel and add enough brine to cover by at least 1 to 2 inches, leaving an additional 2 to 3 inches of headspace for gases to escape.
Push It Down
After all vegetables and brine are in the vessel, proceed with adding weights, pushing vegetables tightly beneath the brine. If using a plate and jar, brine should rise on top of the plate. Plastic bags, however, tend to keep much of the brine underneath.
Once weighted down, add a loose fitting lid that can be quickly loosened to allow for the escape of gases.
Next, place vessel in a cool, 60- to 75-degree Fahrenheit room, and wait a few days before peaking or tasting. During those first few days, loosen the lid to allow gases to escape momentarily. It’s during this time that bubbling may occur, which tells you fermentation is occurring.
After three days, begin taste testing with a clean utensil. Once the ferment reaches the desired tartness and flavor, move the container to the refrigerator or root cellar to slow the fermentation down to a crawl. The ferment is now ready to consume and will store well for several weeks, depending on the ferment and storage conditions.
Still Good?
But wait! What’s that floating on my ferment? There are times when a ferment will grow something quite weird on its surface. Often it will be a whitish film, called kahm yeast, that just hangs around on top of the brine.
It’s a perfectly harmless collection of yeast that should be skimmed off as it appears. Otherwise, it can impart a strange taste to the ferment.
Other times, circles of fluffy mold develop, and again, it’s almost always harmless and simply needs to be removed. This cycle can continue throughout the fermenting process and is normal.
Your nose will know if the ferment has gone bad. While it’s true that yeasts and molds on top can have an unpleasant odor, a good ferment will have a pleasantly sour, tangy smell underneath the floaters. If uncertain, allow the ferment to continue for another couple of days as the odor will intensify to gagging level if the vegetables are indeed rotting rather than fermenting. Other signs of spoilage are vegetables turning brown or slimy to the touch. If either occur, compost the ferment and start over.
Crafting fermented vegetables is a combination of science and art. Some ferments will be delightfully tasty while a few will fail in astronomical—and quite stinky—ways.
This, to me, is part of the fun of fermentation. So don’t be afraid to experiment, and don’t be discouraged when something doesn’t work out. And if you happen to have a science nerd in the family, grab the microscope and have a little biology lesson with the floaters.
Recipes
Fermented Pickles
Ingredients
- 3 pounds small, whole pickling cucumbers, blossom end removed
- 5 to 8 sprigs of whole dill
- 6 cloves garlic, minced
- 1 1⁄2 tablespoons dill seed
- 1 1⁄2 tablespoons black peppercorns
- 2 oak or grape leaves (helps keep pickles crunchy)
- 6 to 9 tablespoons pickling or sea salt
- water, enough to cover
Preparation
Tightly pack all ingredients except for salt and water into a gallon-sized fermenting vessel. Make brine and add enough to allow for a minimum of 1 inch of brine above vegetables.
Add weighting system and loosely apply lid. Place vessel in cool location.
Remove gases each day as needed. Remove floaters daily. Begin tasting after 1 week.
Remove to refrigerator or root cellar when ferment reaches desired flavor. It’ll keep for several months.
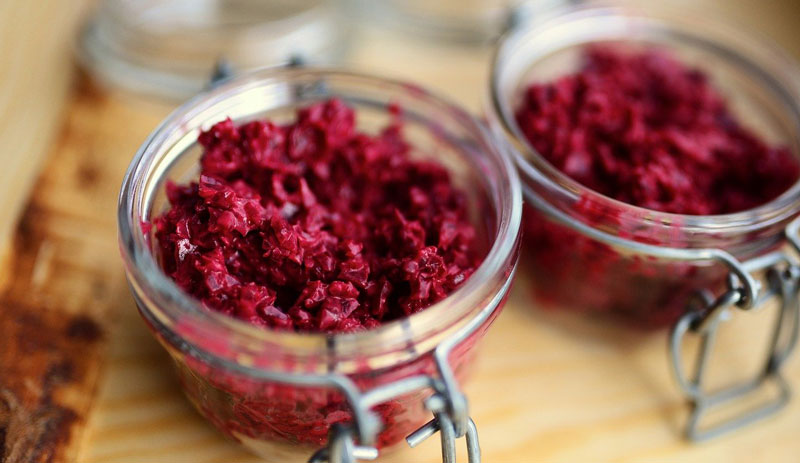
Sauerkraut
Ingredients
- 1 large red or green cabbage
- caraway seeds, to taste (optional)
- 3 to 5 teaspoons pickling or sea salt
Preparation
Remove outer leaves of cabbage and slice into quarters, removing the core. Using a mandolin or sharp knife, shred cabbage into small, slaw-sized pieces. Place each quarter in a large bowl, adding 1⁄4 total salt between additions.
With potato masher or other heavy object, press against the cabbage to encourage the release of juices. Continue until all four quarters and salt have been added. (Note: Some cabbages are more stubborn than others at releasing juices, so it may be necessary to make a small amount of brine to add to the mixture.)
Add mixture to fermenting vessel. Apply weights and lid, placing vessel in cool location.
Remove floaters daily. Taste after 3 to 4 days and continue until kraut reaches desired flavor.
Store in the refrigerator or root cellar. It’ll keep for several weeks.
This article originally appeared in the January/February 2022 issue of Hobby Farms magazine.