

How to start raising chickens often begins long before chicks arrive home in a cardboard box. It starts with daydreams during winter—of warm spring afternoons, garden beds turned over by curious beaks, and the soft peeping of newly hatched chicks. As daylight slowly stretches longer, those ideas turn into plans with each trip to the farm-supply store or late-night visit to a hatchery website.
I remember that anticipation well. As a child, I watched my mother carefully plan each new batch of birds for our small hilltop farm. When a box of chicks finally arrived at the post office, we carried it home like a treasure, tiny bits of fluff poking through the air holes and a chorus of peeps filling the car. A wood-shaving-lined stock tank, fresh feed, and water waited, ready to welcome the newest members of our farm.
Over the years, our birds ranged from Rhode Island Reds and Wyandottes to geese, turkeys, and ducks. Later, when I considered how to start raising chickens with my own flock, I discovered that excitement alone wasn’t enough. Whether chicks come from a hatchery or a farm store, the most successful chicken keepers start with a plan. Before you decide on breeds, housing, or how many birds to bring home, the most important step in learning how to start raising chickens is understanding why you want them in the first place.
Defining Your Flock’s Purpose
Once the thoughts of your own little flock of poultry starts dancing through your mind, start studying the websites of different hatcheries. Finding a breed that is well-suited to your homestead and family’s needs is one of the most important decisions you will make in regard to your poultry.
Why do you want to raise chickens?
- Do you feel a responsibility to know that the food you put in front of your family is raised humanely and safely?
- Is it because of the comfort you find at the idea of more control over your food supply and less reliance on a grocery store?
- Are you hoping to provide a supplemental stream of income from excess eggs and meat?
- Perhaps the idea of free pest control and garden fertilizer is intriguing to you?
- Maybe you want to help preserve a heritage breed of poultry?
- Or is the idea of breeding and raising show poultry intriguing?
Once your own needs and desires for your future flock are established, it’s time to break down the characteristics of different poultry breeds. What follows is a basic overview of just a few different factors to consider.

Read more: What should you do once new chicks arrive? Here’s a checklist to get you started right.
Choosing Layers, Meat Birds or Both
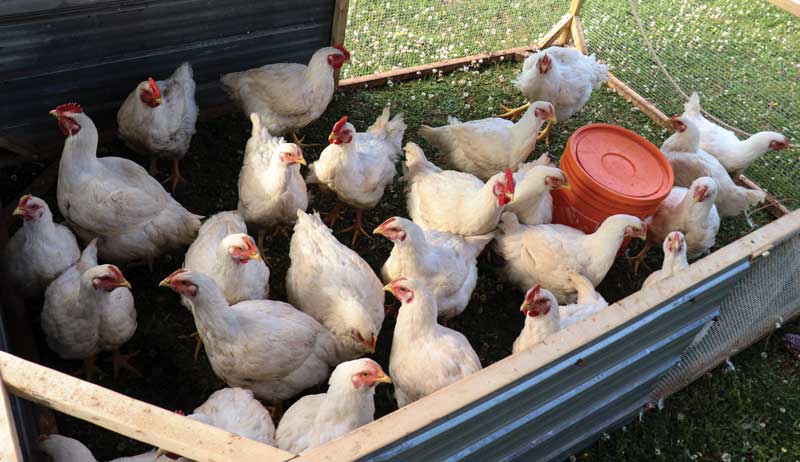
Are you looking to specifically raise chickens for eggs or meat? Layers generally have a leaner body than fryers and are bred specifically to produce a larger amount of eggs. Depending on the breed, layers often produce one egg a day during their laying season (which can vary). Breeds can include White Leghorns, Rhode Island Reds, Plymouth Barred Rocks, Buff Orpingtons and Australorps. (Some of these breeds are also considered dual-purpose—good at providing meat as well as eggs.)
Fryers are bred specifically for meat production and generally grow to a larger size and at a more rapid rate than layers. Their stockier, more muscular bodies are meant to be butchered at a fairly young age and not generally kept for egg production. Breeds can include Red Broilers, Cornish Roasters, Cornish Rocks and Rainbow (or Freedom) Rangers.
Dual-purpose breeds are a good option for the homesteader wanting a combination between a fryer and a layer. While they might not grow as fast as regular fryers, they’ll provide a more muscular body than a normal layer would and can be butchered.
Dual-purpose breeds will also provide substantial egg production and can be used in place of regular layers if you don’t require a commercial egg quantity. Breeds can include Buff Orpingtons, Rhode Island Reds, Barred Plymouth Rocks, Buff Brahmas and Dominiques.
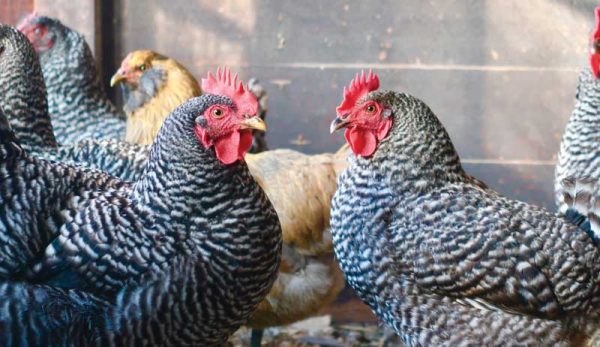
Matching Breeds to Your Climate
Life for chickens in a warm, tropical climate (as opposed to a bitter northern climate) can be very different. If you tend to have long, cold winters, consider breeds with plenty of dense feathering—both plumage on their head and feathering on their feet when considering how to start raising chickens. 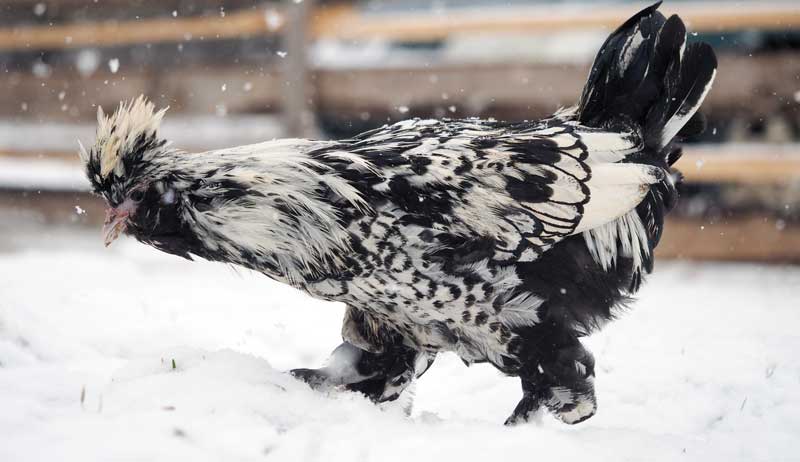
Frostbite is another danger your poultry might face, as the exposed skin of their combs and wattles can become susceptible if temperatures get too low and adequate shelter isn’t provided. Breeds with small combs (such as rose or pea combs) can also have a better chance at dealing with the cold weather than their large-combed counterparts.
How to Start Raising Chickens: Planning Your Space and Skills
It can save you a lot of headaches when you go to start your flock if you recognize your limits and can keep a manageable poultry plan in mind. If you’re only looking for a handful of fresh eggs each day, a few happy Wyandottes might be a good fit. If it’s pretty companionship in your backyard you desire, a variety of bantams can also offer that.
If butchering your own meat is something you look forward to, go straight to the fryers or even some dual-purpose birds, such as the classic Rhode Island Red.
Ask yourself a variety of questions to make sure your poultry flock is something you’ll be able to easily manage:
- How large of a space do you have to offer your chickens? How many can you comfortably house?
- Will they be free-range or confined to a specific area?
- What kind of shelter will you have to offer them? A portable tractor that can be moved around the yard/pasture or a more permanent structure such as a brooder house?
- If you want layers, do you have enough nesting boxes to allow them all a chance to lay throughout the day at some point?
- If fryers are what you seek, what will be the plan when they reach butchering age? (Those weeks can pass by quickly!) Will you butcher them yourself or do you have a processing facility nearby you will take them to?
- If you garden, will it be a chicken-friendly garden that they can freely scratch around in or will you have adequate means to contain them during the summer growing months?
- On the flip side, when winter comes, what kind of shelter (and, if needed, heat) can you supply them with?
How to Start Raising Chickens and Get Your First Chicks
There are several options when looking to start your poultry flock: buying hatching eggs if you want to incubate them yourself, putting eggs under a broody hen, ordering online from a hatchery, buying from an individual, or purchasing live chicks from a farm-supply store.
Likely one of the easiest ways to get a good start with your young poultry flock is by purchasing live chicks from a hatchery or farm-supply store. Chicks can be chosen by breed and sex, and will be shipped via ventilated cardboard boxes to your local post office. Generally, chicks should have fewer health problems when coming from a hatchery (whether shipped straight to you or a farm store) because ill ones will have already been removed.
Once your breed is selected, you’ll need to decide if you want pullets (female chicks), cockerels (male chicks) or straight run (a random assortment of both). Keep in mind that there is usually a difference in price between the three options, with pullets generally being the most expensive. While you might be able to pick each individual chick you want at a farm store, their selections are often smaller than what you will find online at a hatchery’s website.
While chicks and older poultry can be purchased from individual breeders as well, it’s a good practice to be very cautious and do your research before any agreements are made. If possible, arrange to see the breeder’s other poultry and the conditions they’re all raised and kept in.
Be sure to ask about any signs of illness or problems that they have had in the past, as you will want to avoid taking any sickness home to your own flock or poultry facilities.
For the more experienced or adventurous poultry-keeper, hatching eggs can offer a somewhat more affordable option for starting a flock. While the initial cost of the eggs might not be as large as buying live chicks, they’ll require the use of a reliable incubator (and regular monitoring) or an already broody hen.
Hatching your own eggs can be an exciting experience as the first peeps begin to ring through the incubator. But it can also carry heavy risks if the environment is not kept consistently warm or moist enough.
Read more: How to get started hatching chicks with an incubator.
Welcoming Your New Chicks
It’s easy to jump in over your head while staring at a stock tank full of tiny, sweet chicks in the local farm-supply store. I know. I fell prey to their fluffiness last spring.
What started out as a Sunday afternoon stroll through a store ended with us walking out with two boxes of little peepers in hand. While makeshift facilities were set up and the chicks grew up into beautiful, colorful pullets, I wasn’t prepared for them!
Once the decision is made on how your chicks are to arrive, the nursery will need to be prepared and set up in advance. Do a run-through of your equipment and supplies that will be needed.
- stock tank or another way to confine them in an area of limited space at first
- bedding, whether wood shavings or chopped straw or hay
- heat lamp, extra bulbs, an extension cord
- waterers and feeders
- specialty chick-starter (whether medicated or non-medicated feed)
- plenty of fresh water and electrolytes
- a thermometer to keep an accurate idea of how warm the space is
- blocks to safely hold the waterers and feeders up to avoid filling with bedding and debris as the chicks scratch around
When everything is ready and the chicks have arrived, carefully place them one by one into the stock tank or brooder area. Gently dip their beak slightly into the waterer to show them where water is and then again in the feeder. After they have all been moved into the brooder area, continue to monitor them to see how they settle in.
Initially, they might be chilled and spend some time under the heat lamp. If they continue to huddle together tightly under the lamp, lower it a little bit closer to increase the temperature. If they move to the outside edge of the tank, away from the lamp and spread their wings off to cool, move the lamp back up some as the temperature is too hot.
Eventually, you want to find a happy medium where they will actively move around, eating and drinking.
A heat lamp will keep the temperature within the ideal range of 90 to 95 degrees for the first week.
“Measure the temperature 2 1⁄2 inches from the top of the litter directly below the hood,” says “Brooding and Caring for Chicks” from the University of New Hampshire Extension. “Make sure there is enough space for the chicks under the light without crowding or smothering and that there is enough space in the pen so that all of the chicks can escape from the heat. Each week you should decrease the temperature by 5 degrees. This can be easily accomplished by raising the height of the lamp.”
Remove the supplemental heat when the brooder temperature is the same as ambient temperature.
Avoiding “Chicken Math” Surprises
Regardless of whether you’re just dipping your toes into the wonderful world of poultry or you’ve kept chickens for years, eventually you might find yourself falling prey to the dangers of “chicken math.”
For example, if Betty buys five chickens, how long will it be before she has accumulated two guineas, five ducks and a couple of colored-egg layers? The answer is, not long! Chicken math is generally just a humorous term used by many poultry-keepers to refer to the unplanned quantities of poultry their small flocks often turn into.
Whether you choose to hatch your eggs at home or pick out individual chicks at a farm store, have some fun and enjoy the process of researching and learning about the different breeds before you purchase. With some preparation beforehand, you can have a smooth transition into your new role as keeper of the poultry!
Choosing the Right Size for Your Flock
Another factor for consideration is the size of your bird. While this will be somewhat determined already by whether you choose a traditional layer or fryer, some people enjoy the options that the world of bantam chickens has to offer.
Chicken-keepers with small backyards or brooders can enjoy small breeds such as Silkies, Cochins or Brahma bantams.
No matter your experience level, how to start raising chickens starts with a clear plan. From understanding your purpose—eggs, meat, heritage breeds, or garden helpers—to choosing the right breeds, housing, and number of birds, preparation is key. By thinking through your space, skills, and long-term goals, you’ll set your flock up for success. And while “chicken math” may still sneak in, a little planning ensures your flock grows in a manageable, rewarding way. Enjoy the process, and watch your backyard come alive with curious, happy birds.
How To Start Raising Chickens: FAQ
Q: How many chickens should I start with?
A: For beginners, 3–6 hens are usually manageable. This provides fresh eggs daily without overwhelming your space or time.
Q: Can I mix different types of chickens?
A: Yes, but consider temperament, size and cold-hardiness. Mixing breeds can be fun, but some may dominate others or struggle in your climate.
Q: Do I need a brooder for chicks?
A: Yes. Young chicks need a warm, confined area with proper bedding, heat, and water until they are fully feathered.
Q: How much space do chickens need?
A: Each adult bird generally requires 2–4 sq. ft. indoors and 8–10 sq. ft. in outdoor runs. More space reduces stress and keeps them healthy.
Q: Can I start raising chickens if I’ve never kept birds before?
A: Absolutely! Start small, choose hardy breeds, and follow a step-by-step plan. Preparation is more important than experience.
This article about how to start raising chickens was written for Hobby Farms and Chickens magazines. Click here to subscribe.
