
Most gardeners know that autumn is the best time to plant certain spring-blooming bulbs, including tulips, daffodils, crocus and hyacinths. While watching these bulbs flower outdoors in the spring garden is wonderful, having gorgeous blooms like these during the winter months is even more fantastic. Forcing flower bulbs for late winter blooms is a simple autumn job that requires a little finesse but not much effort.
Forcing Flower Bulbs To Bloom
Many different spring-blooming bulbs can be forced into bloom in the winter, including all those mentioned above, plus many more. The trick to forcing bulbs is understanding that bulb plants like these need to be exposed to cold temperatures for several weeks in order to initiate their bloom period. Forcing flower bulbs to flower starts by subjecting them to an artificial winter. Essentially, the bulbs are planted in a pot and then held between 40 and 45 degrees F for about eight to ten weeks. Once the pots of bulbs are pulled out of the cold temperatures and introduced to light and water, they begin to flower. Forcing flower bulbs now means you’ll have blooms in the middle of winter; a time when all gardeners can use a little pick me up.
How To Force Flowering Bulbs To Bloom
Step 1: Choose The Right Bulbs

Jessica Walliser
Purchase spring-blooming bulbs from a local garden center or nursery. If you can’t find them locally, you can always buy bulbs from an online source. You don’t have to buy a particular type of bulb, but choosing short or mid-height varieties will keep them from flopping over in their pots. You can choose to plant only one type of bulb per container, or you can plant three or four different types in each pot to extend the bloom time.
Step 2: Choose The Right Container
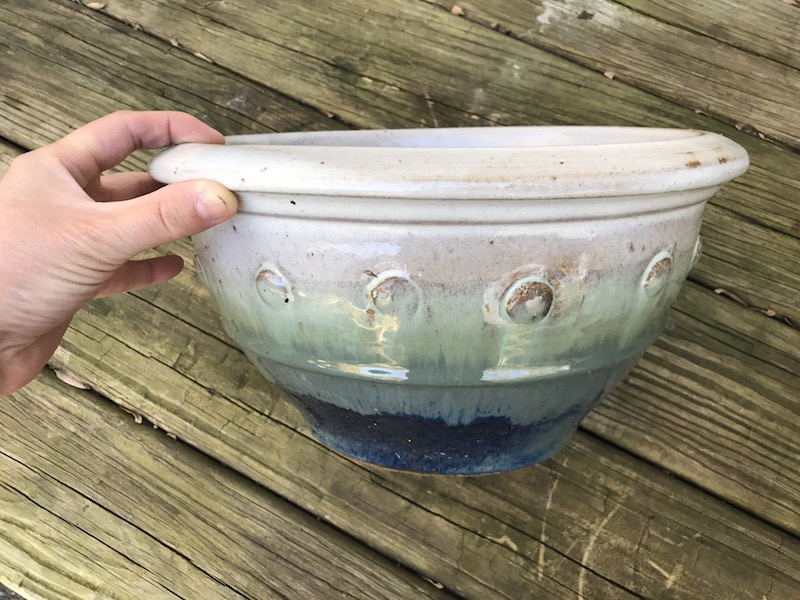
Jessica Walliser
Though any low, bowl-shaped pot will do, plastic nursery pots called “bulb pans” are perfect for the job. If you’re reusing a pot that was previously used to grow something else, be sure to sterilize it first with a dip in a 10 percent bleach solution. No matter what container you pick, however, make sure it has several drainage holes in the bottom.
Step 3: Add Three To Four Inches Of Potting Soil To The Bottom Of The Pot
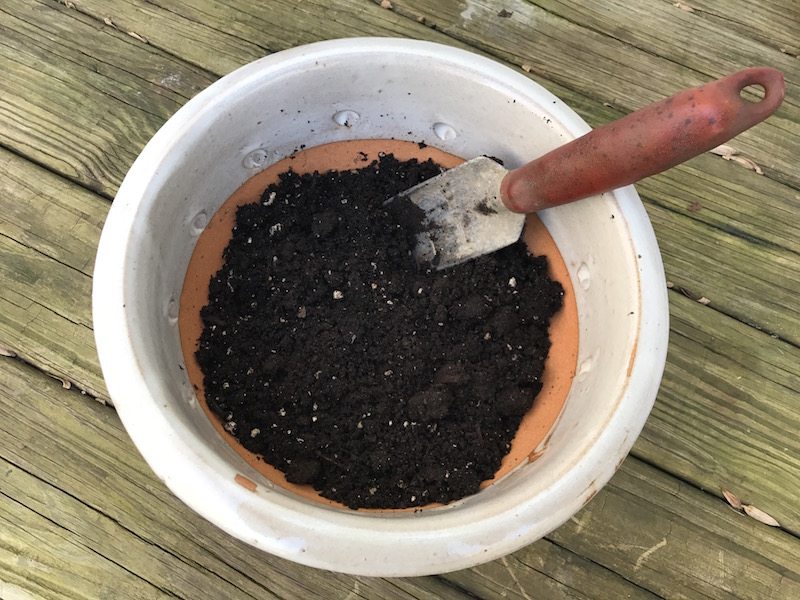
Jessica Walliser
Select a high-quality, sterile potting soil for forcing flower bulbs.
Step 4: Plant The Bulbs
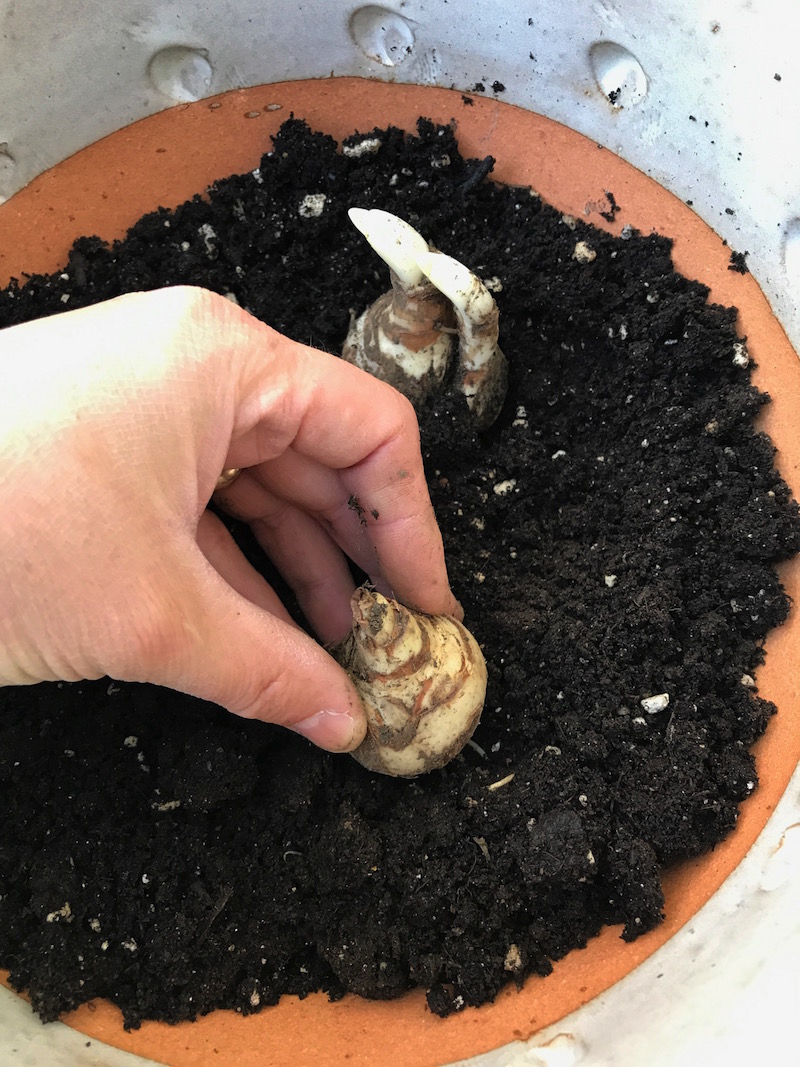
Jessica Walliser
Nestle the rounded base of the bulbs into the potting soil. Unlike when you’re plating bulbs in a garden, you can place them very close together when forcing flower bulbs in a container. Make sure the pointy side is up and then cover the bulbs with a layer of potting soil.
Step 5: Add A Second Layer Of Bulbs

Jessica Walliser
Top this bottom layer of bulbs with a second layer of the same bulb or another variety. Each bulb in this second layer should be situated above and between the bulbs in the bottom layer so each flower stem has space to grow. Cover this layer of bulbs with more potting soil.
Step 6: Add Another Layer Of Bulbs
If you’d like, you can add a third layer of very small bulbs, such as crocus, iris or scilla to the top. When you are done planting all the layers of bulbs, fill the rest of the container with potting mix until it’s filled to the top. The “noses” of the top layer of bulbs should sit about one inch beneath the soil surface.
Step 7: Water The Pot In Well & Cover It With A Clear Plastic Dry Cleaning Bag

Jessica Walliser
Put the plastic-covered container in a refrigerator, basement or unheated garage. The ideal temperature is between 35 and 45 degrees F. If you don’t have a garage or room in the fridge, you can also sink the entire pot (without the plastic covering) into the compost pile or into an empty spot in the garden, burying it up to its rim. The surrounding soil or compost will keep the container insulated through the winter.
Step 8: Water The Bulb Pot

Jessica Walliser
When forcing flower bulbs, it’s important to check the pot’s moisture level ever few weeks. Though the plastic sheeting will hold in some moisture, you’ll have to irrigate it from time to time as necessary. Don’t over-water, however, or the bulbs could rot or mold could develop.
Step 9: Wait
In order for the bulbs to be subjected to the correct temperatures, you’ll need to leave them in the fridge or other recommended location for about eight to ten weeks. Write it on your calendar so you don’t forget.
Step 10: Bring The Bulbs Out To Force Them To Flower

Jessica Walliser
When the correct amount of time has passed, pull the pot out of its chill site and place it indoors, in a warm room. Begin to water it regularly and within a week or two, you’ll see the bulbs begin to sprout. Within three to four weeks, they’ll be in full bloom. To prolong the enjoyment of your forced bulbs, keep them out of direct sunlight and away from forced air heat registers and other drafts.
Don’t be afraid to experiment with forcing flowering bulbs by combining various bulb species and colors together. One of my favorite combos is species tulips mixed with miniature daffodils and purple crocus. Each bulb will bloom in a successive order, giving me many weeks of blossoms. Enjoy!


