Garlic is a standby in my fall garden. While it can be planted in the spring, it benefits significantly from overwintering if planted in the fall and then can be harvested by mid-summer, freeing up space for a second summer planting.
If you’re accustomed to the typical store-bought garlic, you may be surprised by the variety in flavor, texture and coloring among the various garlic varieties available in seed catalogs. The vast majority of commercial garlic is a single variety, much of it grown in California. Contrast this with the hundreds of varieties available that will grow in your region, and you’ll never want to buy grocery store garlic again.
Choose a Garlic Variety
To ensure optimal success in choosing a variety you’ll want to consider a few factors. Garlic, like onions, shallots, scallions and leeks, is in the genus Allium and is divided into hard-necked and soft-necked varieties. While hard-necked garlic is easier to peel due to its fewer and larger cloves, it has shorter shelf life than soft-necked varieties. Examples of hard-necked garlic are German Porcelain, Music and German Extra Hardy. Soft-necked varieties, which are more closely related to leeks, include Asiatic, Turban and Elephant.
Your growing region should also play a factor in the variety you select. Hard-necks prefer long, cold winters, so gardeners in warmer regions may find lower yield, early bolting and disease in the hard-neck garlic varieties they plant, so soft-neck varieties may be a better bet. Bear in mind that soft-neck varieties don’t produce flowering stalks, called scapes, which can be a disadvantage for cooks who like to like to harvest and eat them.
Site Selection & Planting Tips

Jereme Zimmerman
The optimal time to plant garlic will vary a bit by region, but generally, a few weeks before the first frost is expected is a good time. For southern and southeast regions this can be anywhere from mid-October to late November or even early December. The goal is to allow just enough time for the garlic to establish root growth, but to not produce shoots that extend too far above ground. While there is a bit of guesswork involved here, don’t stress it—garlic is a hardy plant.
Pick an area that gets a good amount of sun: Ground plots and raised beds will work equally well. Wait until planting day to break cloves apart. Place cloves pointy side up and root side down, about 2 inches deep in southern regions or up to 4 inches deep in northern regions, and space each clove about 4 to 6 inches apart. Garlic likes loose, well-composted and fertilized soil with high levels of phosphorous and potassium. Amend your soil with bone meal and kelp meal before planting if needed. Sometime between planting and the first freeze, mulch heavily with shredded leaves or straw to keep the garlic well-insulated, maintain good moisture levels and minimize spring-time weed growth.
Garlic Care & Disease Prevention
In addition to the mulch you add in the fall, it may be prudent to add more as shoots begin to develop in the spring. Watch closely for weeds, as they can decrease garlic yield by as much as 50 percent if allowed to get out of hand.
Although garlic can be affected by a number of diseases, the worst is white rot. Prevention is the best practice, as this disease is difficult if not impossible to eliminate once it has infected the soil. The early signs of white rot are difficult to distinguish from other diseases. It usually affects individual plants initially. Watch for early yellowing of outer leaves and stunted growth. Inspect the bulb immediately for rotting and the presence of a white fungus. Dig the plant and surrounding soil from the ground, burn the plant, and dispose of the soil a good distance from any garden areas.
Always purchase garlic from a reputable source that you trust keeps their seeds disease-free. (I use Southern Exposure Seed Exchange.) Organic bulbs purchased from the grocery store are generally trustworthy, but never plant bulbs that aren’t Certified Organic, as they likely have been irradiated to prevent sprouting. Some growers soak their bulbs in hot water, bleach or alcohol to prevent disease. Take note that over-soaking could kill off growth entirely. To prevent white rot and most other diseases, it’s always good practice to ensure your soil, compost and fertilizer comes from reliable disease-free sources. Another good preventative measure is to rotate garden space every three to four years.
Harvesting & Storage
You should begin to see garlic stems pop up by mid-spring. The small green shoots will eventually grow to about 2 feet. Hard-necks will produce scapes once the shoots have fully grown. Scapes should be harvested shortly after they appear, while they are still young and tender. If not harvested, they will curl, straighten and flower, halting growth and resulting in less yield. To harvest, simply grab the base of the stem, pull gently and twist if young. Curled scapes may need to be cut to avoid pulling the root out. If allowed to flower, the bulblets can be dried and saved for seed, though it will take two years for them to develop into a clove.
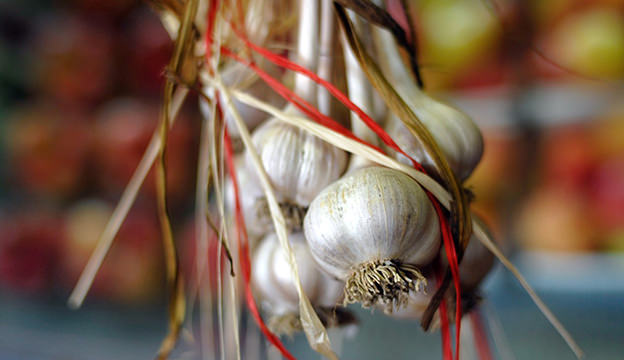
If stored properly, garlic can last until the next growing season. Generally, garlic will be ready to harvest in mid-summer. Watch for the outer leaves to turn brown and yellow and harvest when four to six inner leaves are still green. First, carefully lift one bulb with a digging fork and check for the cloves to be fully differentiated. If not, don’t harvest yet. Once you do harvest, loosely knock off any dirt, but don’t wash the bulbs, as the dirt will help with preservation. Hang the plants or place them on a screen in a cool, dark area for two to four weeks. Check that they are fully dry by rolling the neck between your fingers. When ready, trim the tops to about 1/2 inch from the bulb and snip the roots. Remove any remaining dirt and either wash lightly now or wait until you’re ready to use them.
Ideal storage conditions are in mesh bags in a cool, dry, well-ventilated area. Be sure to store them in an area that stays consistently at 40 degrees F or below. Garlic likes to sprout at around 40 to 60 degrees F. If you can’t keep them in an area that stays at around 28 to 40 Fahrenheit, shoot for above 60. Be sure to set aside some bulbs to plant next year. Stick to this cycle and you may never need to buy garlic again.