To hay or not to hay? That is the question for many farmers. If you can’t devote the land to growing out grass, know that many farmers find that buying hay for winter livestock feeding from a reputable source costs about the same as purchasing and maintaining equipment needed to produce hay.
There are reasons to make hay, though. Namely, if you have more land than you use for pasture, it makes good sense to grow hay to overwinter your animals and sell to members of your farming community.
Growing your own also lets you produce the highest-quality forage for your animals, and, if being chemical-free is important, avoid costly organic hay.
Mowers

Shutterstock
First, you need to cut that tall grass so it can dry out and be stored—and neither your push nor your riding mower will do. Three basic variations of mowers exist: the old-school sickle, disc and drum.
Sickle-bar mowers cut grass at one point between two bar-mounted shearing blades. These date back to the days of draft horses. A drum mower, meanwhile, is a modern, hydraulic-free attachment that uses gear-turned drums and attached blades.
You’re most likely to use a disc mower, considered standard in hay production. Disc mowers employ cutter bar-mounted discs with attached knives that spin and slice grass. They cut fields quickly and aren’t subject to clogging. However, proper maintenance is important.
It’s easiest to take advantage of scheduled maintenance inspections from your dealer, but if you’re the DIY type, inspect the knives, lifters and discs for damage, ensuring that discs are set 90 degrees in relation to each other. Move the discs to check for excessive looseness, which indicates internal wear. Also check the lubricant level on each module, refiling any that seem low.
Tedder & Rake
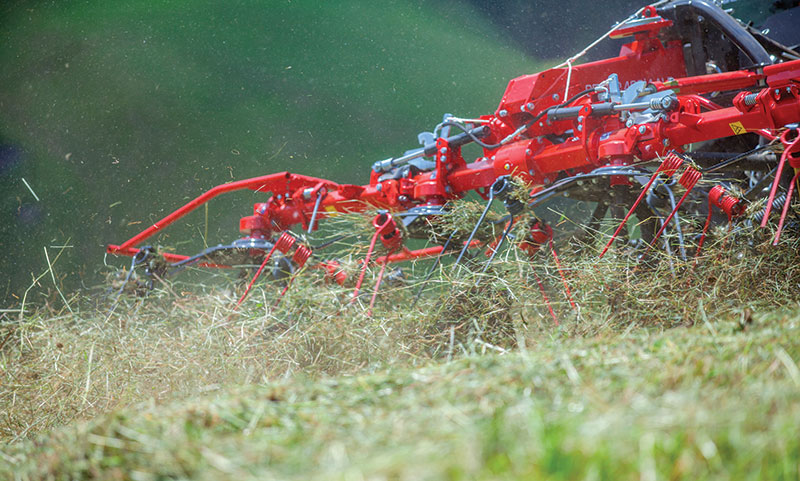
Shutterstock
Once it’s cut, hay must be gathered to dry. A tedder will help reduce drying times, especially in humid climates or after a rain, by exposing buried grass; tines grab grass and send it through the back, airing it out.
Hobby farmers might not need a tedder; a combination tedder-rake might fit the bill. Many farmers just go straight to raking, though, and there are a few options for gathering grass into long lines of piled hay (called windrows).
Wheel rakes are among the most popular for their low cost and minimal maintenance requirements. Rotary and belt rakes, however, produce higher-quality forage that’s free of debris and can handle heavier loads, though many people prefer the belt rake for its small size, ease of use and versatility.
Baler

Bev Curie/Flickr
Finally, you need a baler to gather everything into a storage-ready shape. Round balers create massive bales typically stored in the field; these create waste because of ground contact and exposure to the elements, and they can be difficult to transport.
Mini round and square balers, however, gather and bind hay into shapes movable by one person (bales average about 50 pounds) for storage indoors. Mini round balers require less horsepower, are smaller and require less upkeep, while square balers create classic bales that stack easily and operate much quicker; a square baler can drop a bale every 10 seconds, while a mini round baler takes twice as long. (Don’t overlook the need for gloves.)
Hay Now
While hay dries in the field, nutrients are lost and the forage quality is lessened. According to John Porter, a dairy consultant with The University of New Hampshire Cooperative Extension, these losses occur for several reasons.
- Plant respiration converting plant sugars to water and carbon dioxide increases the fiber and decreases the energy in the feed. Drying hay as rapidly as possible limits respiration losses.
- Rain falling on hay before baling leaches nutrients and reactivates plant respiration. Getting hay wet requires repetition of the hay-drying steps to prepare the hay again. If you expect only a light rain and can’t haul the hay under cover, bale it tight and let moisture from the rain dry off for a day before putting the bales in the barn.
- Although losing small amounts of nutrient-rich leaves is normal during the hay-making process, raking when it is extremely dry increases these losses. Hay should be handled as little as possible to maintain nutrient quality.
Hay Stacking Suggestions
Jimmy Henning and Howell Wheaton, in the department of agronomy at the University of Missouri, write in “Making and Storing Quality Hay” that there doesn’t seem to be much difference in storage losses of hay bales when set side-by-side versus those set end-to-end. They do note that bales placed end-to-end should be the same size, and cone-shaped bales or bales of different diameters placed end-to-end often cause excessive spoilage on the ends of bales.
To help reduce outside storage losses, they offer these suggestions:
- Always store bales on a well-drained area.
- Use a minimum of 3 feet between bale rows for air circulation. The more space there is, the better.
- If bales are stored side by side, leave at least 24 inches between bales.
- Avoid storing bales under trees and in the shade of buildings.
- If space is available, store some of the bales inside, especially higher quality hay that should be used near the end of the feeding period.
You can also consider using an elevator.
This story originally appeared in the July/August 2018 issue of Hobby Farms magazine.