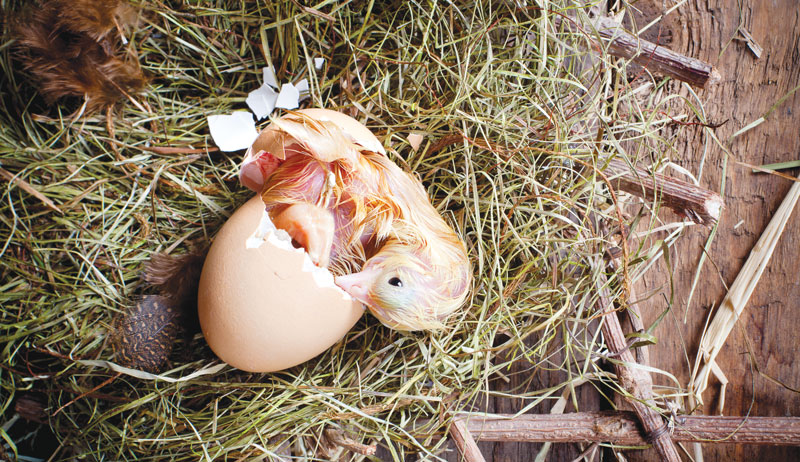
Do chickens have belly buttons? It’s a common beginner question. Even though a chick hatches from an egg instead of being born from its mother’s womb, it still has a “belly button.” However, the navel on a chick is more difficult to find, especially on a healthy newborn.
A poorly closed navel is a clear sign there’s something wrong with the chick. And it may indicate a problem with your incubator or incubation techniques.
A chick’s navel is one of the most vulnerable places for bacterial and fungal infections. So it’s important to understand what a chick’s belly button tells you.
How Is a Chicken Belly Button Formed?
Do chickens have belly buttons? A belly button is basically a scar left behind from the umbilical cord. In unborn human babies, the umbilical cord connects the baby’s belly to the mother’s placenta to provide the blood supply the baby needs to survive.
Because a chick develops inside an egg instead, do chickens have belly buttons? Yes, the umbilical cord is attached to the yolk sac where it gets much-needed nutrition. A few days before hatching, the chick absorbs the small intestine and the remaining yolk sac inside its body. This leaves behind a navel at the entrance.
“From day 16 to day 19, the small intestine, or umbilical loop, retracts into the growing body wall,” says Eric Gingerich, doctor of veterinary medicine and technical poultry specialist with Diamond V, a global animal nutrition and health company.
“Then, the yolk sac is drawn into the body cavity, which is directly connected to the small intestines through the yolk stalk. By day 20, the yolk sac should be completely inside the body and the navel should be fully closed by hatching. A ringlike muscle called the umbilicus becomes the future navel.”
Maurice Pitesky, doctor of veterinary medicine with the UC Davis School of Veterinary Medicine and Chickens Poultry Science columnist, adds that chicks “get their calories and nutrients from the yolk sac, which continues to serve as their main source of nutrition for the first two or three days of life.”
Anneka/Shutterstock
Do Chickens Have Belly Buttons? Finding the Navel
Do chickens have belly buttons? Yes. A well-closed belly button is a good sign of health in a newborn chick. And it’s usually well hidden beneath its soft down. Even if you hold the chick and run your finger over it, you could still miss the navel.
But it’s there.
“In a healthy chick, it’s very hard to find, because it’s smooth and dry, but it’s just below the tail. In a poorly hatched chick, it shows and can be an issue,” says Shelley McBride Lynch, who raises laying hens and Cornish cross chickens, among other things, as the owner of 3F’s Feathers-n-Fur Farm. She’s also the owner of Oklahoma’s first and only state-inspected poultry slaughter and processing establishment, 3F’s Poultry and Rabbit Processing.
Gingerich further explains that a normal navel appears as a dry, sealed hole in the body wall. It’s located just below the anus of the chick under the feathers. Blowing on the underside of the chick will reveal its navel.
“Hold the chick where you’re looking at its ‘business end’ and the belly button is about two fingers south of the cloaca,” Pitesky says. “You’ll see a little nubbin that should be clean and closed. If it’s red or hot, it implies there’s an infection of the navel.”
Read more: Watch out for these conditions in incubated chicks.
What Can Cause Chicken Belly Button Issues?
Hatching your own eggs requires ideal incubation conditions to ensure healthy chicks. When conditions are less than satisfactory, your chicks may suffer. One of the signs that something went wrong is a poorly formed belly button.
Depending on the navel problem, external issues affecting your chick could be a factor. However, different incubation issues are often the cause.
“When the naval doesn’t close properly, it’s usually a sign that something went wrong during incubation, especially if there’s an infection,” Pitesky says. “You must maintain as sterile an environment as possible and have really clean incubators. Poor hygiene in the incubator and in the brooding area cause most navel abnormalities.”
Incubation Issues
Gingerich points out that various problems during incubation can also cause navel issues in a chick. He stresses that proper temperature and humidity conditions throughout incubation are needed, so the synchronization of the retraction of the yolk sac and intestines by day 20 can take place.
“Abnormal navels can result if the temperature during incubation is too high after day 16,” he says. “Or if the temperature and humidity conditions resulted in too little or too much moisture loss, which may be caused by low or excessively high ventilation rates. Also, trying to hatch eggs you’ve stored longer than seven days or from breeder birds older than 50 weeks may result in more issues with bad navels.”
High temps can make a chick hatch too fast, leaving part of the yolk sac out when the hole closes.
“Low temps can make a chick small and weak and unable to suck the yolk residues up,” Lynch says. “If ventilation keeps too much humidity inside, it could make the birds full of water, leaving no room for the final taking up of the yolk. A long or short hatching period can also affect the absorption rate and naval closure problems could occur. Trying to hatch different ages of eggs at the same time can also lead to problems with belly button closure.”
Signs of a Bad Belly
According to Pitesky, a well-formed belly button should be clean and fully closed and never be red, hot to the touch, or smelly or have anything coming out of it. If you notice wet, sticky down, it’s likely a sign of a leaky, unhealed navel.
Discolored navels and unabsorbed yolk sacs may also be a sign of omphalitis, also known as yolk sac infection.
A chick with minor navel problems may survive. But they may grow more slowly or have lower weight if bred for slaughter. More severe naval issues could lead to death, often occurring shortly after hatching.
“Wet, unhealed navels can lead to infections. They serve as an entry point for bacteria,” Gingerich says. “Also, abnormal navel closures mean the incubation conditions weren’t correct and poorer performance of the chick can be expected.”
4 Signs to Watch For with a Chicken Belly Button
1. Black buttons or bruised navels from too low or too high temperatures in the hatcher after transfer
2. String navels from excessive cooling caused by low temperatures after transfer or spraying hatch eggs after transfer
3. Open or unhealed navels due to incubation temperatures outside the normal range
4. Infected navels from poor sanitation of the hatch trays or use of floor or dirty nest eggs for hatching

TEA OOR/Shutterstock
Care for Common Chicken Belly Button Issues
For some navel issues, it’s generally advised that you don’t do anything and let nature take its course. A common issue that’s generally okay to ignore is a dry navel. Even rough, dark navels are less risky than wet navels.
In these cases, the navel may simply have dried remains of the umbilical cord on it. It shouldn’t cause health issues if it remains dry.
“As long as the navel is closed and not wet, you shouldn’t do anything,” Gingerich says. “Even if the chick has an ‘outie’ belly button, as long as the navel isn’t bleeding or wet, do nothing.”
Pitesky agrees that you shouldn’t be as concerned with a dry navel. Clean and dry is what you want—not hot, not red, not inflamed, not wet. “A scab should form,” he says. “Scabs do better in dry conditions, instead of moist, as far as preventing infections.”
On the flip side, if a chick has a wet, leaking belly button, it’s probably not properly closed and is basically an open wound. This wound can allow bacteria to enter a very sensitive part of the chick’s body cavity, where internal organs and the rest of the yolk sac sits.
This area provides an ideal place for bacteria to breed. Infection could cause the chick to die within the first week.
“Treat it just like a wound and keep it from becoming infected,” Lynch says. “Use creams for fungal and bacterial infections and keep it clean.”
“Be sure to provide a clean, dry brooding environment,” Gingerich says. “And sanitize the navel with alcohol and iodine disinfectant solution.”
Read more: Check out these tips for incubating a clutch of eggs!
Should I Leave or Remove Pieces of the Umbilical Cord?
There is some debate on what to do if a piece of the umbilical cord is still attached to your chick. Generally, this isn’t a sign there’s something wrong with the chick. Many experts advise leaving it alone.
However, it’s possible your chick will be at a higher risk of developing an infection. Lynch sides with those who advise leaving it alone. He says it should harmlessly fall off on its own in time.
Pitesky adds that not only should you leave it alone and wait for it to fall off, but you should never pull it. “If you pull on the umbilical cord, you could pull the intestines out, causing a hernia,” he says. “If you try to push the intestines back in, you could cause strangulation of the intestinal loop and kill the chick.”
“This is called a string navel and you can remove it safely by clipping it with scissors,” Gingerich says. “Do not pull it out! Pulling out the remnant tissue may open the navel allowing an entry for bacteria.
“String navels are caused by low temperatures during the hatch process leading to a slowing of the retraction of the yolk sac. This means that the naval was open longer than normal during hatch and exposed to a relatively higher bacteria level than a normal hatching chick. Chicks with string navels should be considered at risk for omphalitis.”
Poorly closed belly buttons affect chick quality and may cause higher mortality rates. If you’ve noticed an escalating number of naval problems, thoroughly analyze your incubation techniques and the cleanliness of your incubator to pinpoint potential problems in your incubation program that could put your future chicks at risk.
12 Ideal Incubation Tips
Even chicks hatched from eggs incubated under the best conditions may still have poor navels. But it’s less likely. Poorly healed navels can be a definite sign that conditions in your incubation program aren’t ideal.
Try these 12 tips to improve your program to promote better navel quality and healthier chicks.
1. Use only fresh, fertile eggs laid at approximately the same time by breeder birds younger than 50 weeks old.
2. Select eggs that are normal in color, size, shape and shell texture.
3. Ensure the incubator is placed in an area free from drafts, that’s not too close to heaters or heating ducts or in direct sunlight.
4. Always thoroughly clean your incubator between every hatch and ensure it’s appropriately calibrated for temperature and humidity control before setting any eggs.
5. Operate your incubator for several hours before placing eggs inside to ensure temperature and humidity are stabilized.
6. Maximize yolk sac utilization by avoiding temperatures that are too low or too high in the setter, where eggs are turned every hour for the first 18 days of incubation.
7. Optimize hatcher ventilation regarding relative humidity and carbon dioxide.
8. Avoid high temperatures in the hatcher, which can make the navel close too fast before full absorption of the yolk sac.
9. Adjust the rate of weight loss during incubation if you notice poorly closed navels combined with full bellies.
10. Shoot for a narrow hatching window by promoting appropriate preheating and uniform incubation conditions.
11. Avoid exposing hatching eggs to fluctuating temperatures or rapid temperature changes.
12. Immediately remove any moldy, cracked or leaking eggs to prevent losing your entire hatch.
This article about do chickens have belly buttons originally appeared in Chickens magazine. Click here to subscribe.