“Reduce, reuse and recycle” has been the green-living mantra for decades. And, more recently, “rethink” and “repair” have begun to gain the traction they deserve, too. Many are now forgoing cheaply made goods in favor of higher quality items that are built to last.
And, to give items some extra life and keep them out of the landfill, many folks are repairing what they can as well.
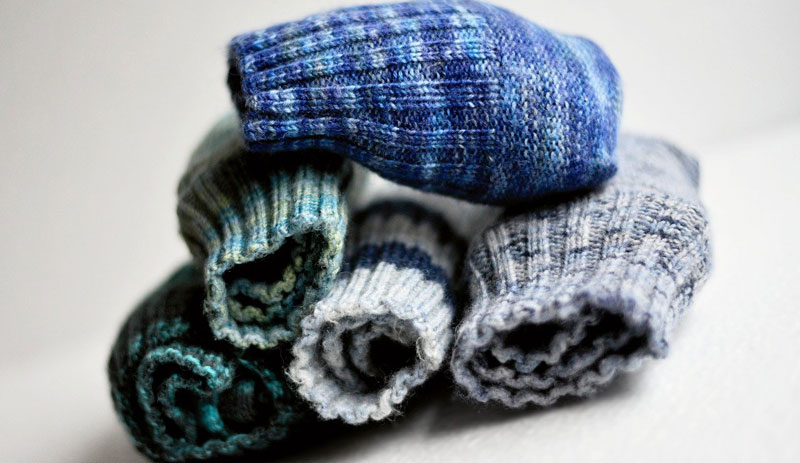
Although it may seem like a little thing, salvaging those holey socks and sweaters can make a difference. (In 2018 alone, more than 9 million tons of clothing and footwear ended up in U.S. landfills!) You don’t need much in the way of talent or fancy equipment to be able to darn a knitted item. And you can get a surprising number of extra miles out of a well-mended sock.
Getting Started
Even the most carefully knitted socks wear out eventually—usually at the heel or, occasionally, the toes. The trickiest part of mending these is maintaining the sock’s shape and the right amount of stretch as you go. Some people simply slip one hand inside their sock during repair, but I’ve not had good luck with this method.
Instead, I use a wooden darning “egg” for this purpose. It looks a little like a miniature maraca, and I use it to fill out my threadbare sock’s heel. You could just as easily use a racketball, a lightbulb or maybe even a hard-boiled egg for this purpose. Experiment until you find an object that adequately supports the area as you work.
You’ll also need darning needles. (These tend to be thicker and have larger eyes than regular hand-sewing needles.) Finally, you’ll need yarn or embroidery floss. Choose something that matches your sock’s material type and weight as closely as possible. (For instance, repair heavy wool socks with wool yarn. Darn lightweight cotton socks with a lightweight cotton thread or embroidery floss.)
Read more: Install a simple clothesline to save energy and money.
A Stitch in Time. . .
You don’t have to wait until you have a complete blow-out to repair a sock. In fact, you’re likely to get more life out of it if you shore up a threadbare patch before it goes completely holy.
For relatively unobtrusive repairs, use a matching yarn color and turn your sock inside-out before you begin. With a few washes and wears, the darned area eventually will blend in. But, depending on the location and size of the patched spot, newly darned socks can take some getting used to.
Because comfort is more important to me than aesthetics, I usually use whatever yarn colors I have on hand. And I often darn my socks right-side-out. That way, I’m less likely to feel the mended area’s change in thickness or texture.
Read more: Ready to make your own soap? Here’s how to create your own bars of lye soap.
How to Darn Socks, Step-by-Step
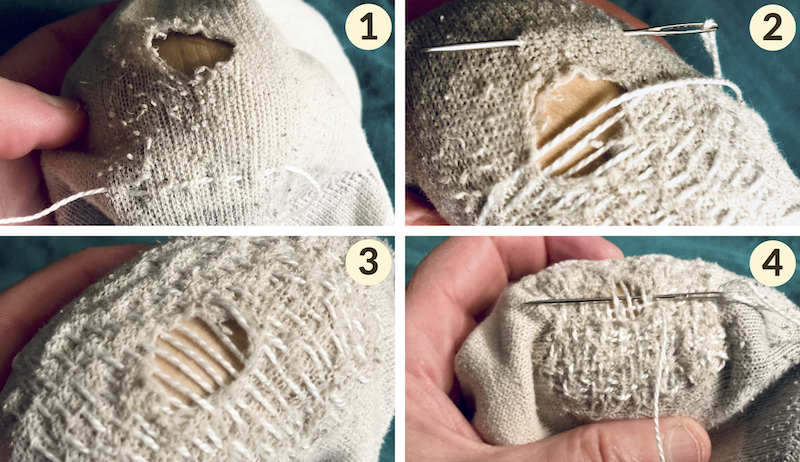
The image below corresponds to the following steps.
Susan Brackney
Step 1
Turn sock inside-out. Insert darning egg (or similar object) to support the holy (or threadbare) area. Thread your darning needle with a long length of yarn.
Using small, running stitches, begin stitching 1 or 2 inches below the hole. (Be sure you’re working on a portion of fabric that’s still in good shape. After all, these exterior stitches will help to anchor your final repair.)
Step 2
Stop 1 or 2 inches beyond the edge of the hole. Turn your needle and head back in the opposite direction. Again, use tight, running stitches to create a set of parallel rows. Keep these rows as close to one another as possible. Alternate the stitches in each row to create a brick-like pattern.
Once you reach the section of sock with the hole, span the yarn across like a bridge. Pick up sewing with running stitches again when you reach the intact fabric along the hole’s outside edge. Again, keep the rows in this bridged area as close together as possible.
Step 3
Once you’ve spanned the hole with rows of yarn, keep sewing with running stitches. Stop once you’ve reached a point that’s an inch or two above the hole.
Step 4
Turn the work and begin sewing another tight set of rows perpendicular to the first. Again, you’ll use small, running stitches. This time, however, incorporate the first set of rows, sewing an over-under-over-under basket weave pattern as you go.
When you reach the bridged hole, keep basket-weaving each perpendicular row. (Essentially, you’re weaving a new patch of fabric here.) Once you’ve finished basket-weaving over the hole, keep sewing with running stitches. Sew with the over-under-over-under basket weave pattern until you’ve incorporated all of the remaining rows.
Backstitch to secure your work, snip the excess tail, and your darning is done. You can use this same technique to repair sweaters and other knitted items.