With shortages becoming a prominent condition in the grocery store, many people have started to become self-reliant, and an even larger homesteading movement is taking place right before our eyes. Many people have started to raise and process meat chickens for the many benefits and products that they offer while also being low-maintenance animals.
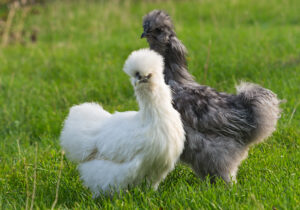
Before we look at the slaughtering process, you need to take a few things into consideration such as the type of chickens you’ll be raising. If you decide to go with a Cornish Cross, you’ll easily find them in many feed stores. Cornish Crosses are yellow chicks that grow rapidly and are ready for slaughter within eight to 10 weeks. Because the growth rate is expedited, this decreases their feed consumption required over time.
Cornish Crosses are the most popular breed when it comes to chickens people raise and process for meat production. However, if they go past 12 weeks of age, medical issues will arise, such as possible broken legs from weight gain and gout. You can’t keep this breed for an extended period because of how fast and easily they put on weight, without enforcing a strict feeding regiment.
I prefer heritage breeds and mixes on my farm. This way, if life gets in the way, I’m not on a strict slaughter timeline to ensure their health and welfare. There are tons of heritage breeds available that produce wonderful birds with a good amount of meat.
The breeds I have raised and slaughtered ranged over the years, but my favorite has been the Buckeye. The meat tastes amazing, and knowing I raised them myself provides an entirely new appreciation for the animal and what it gives me and my family.
We also must consider the cons of raising heritage breeds. They don’t grow quickly, for starters. So while a Cornish can be slaughtered at 8 to 10 weeks of age, a heritage breed will take 14 to 20 weeks.
With heritage breeds, you do get meat with a more distinctive flavor, though.
Once you’ve decided on your chickens and your timeline, it’s time to consider the actual slaughtering process. I’m not going to say processing chickens is the easiest thing you’ll ever do. You should take the time to prepare mentally before you harvest your first bird.
The first time I harvested my own meat chickens, I encountered many negative emotions and had to put my slaughtering day off. I was just not ready to do it. These is a normal response a lot of us go through when met with the intimidating task of culling our first animals.
Keep in mind that you’ve given your birds a great life, and, if you slaughter them correctly, they’ll pass peacefully. You must prepare for the slaughter, though. The day before, you’ll need to remove their food. You can leave water, but the crop and digestive tract should be as clear as possible.
Tools Needed
Tools you’ll need for slaughter are as follows.
- a large pot that can hold a full chicken and be placed over a fire or burner
- a boning knife
- a rope
- a kill cone (If you don’t have a kill cone, an upcycled traffic cone will work too!)
- bleeding knife
- cooler with ice or ice bath
- storage bags
- water hose
- bacteria-resistant table for cleaning/quartering
- thermometer
The day of slaughtering, you will need to set up everything before you start culling birds. You don’t want to be fumbling with equipment while trying to humanely dispatch birds. Make sure the equipment is in working order and ready to go.

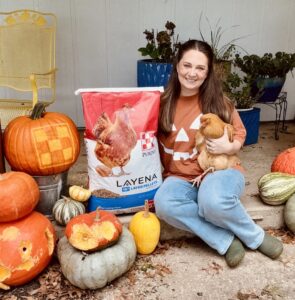
Marissa King
Getting Ready
The first step you should take is lighting your fire or burner and setting your pot full of water over it. The water temperature in the pot needs to be between 140 to 150 degrees Fahrenheit to loosen the feathers without scalding the delicate skin. That can take a few hours if you’re using a fire (a gas burner will heat quicker, of course).
You don’t want to have a culled bird and be waiting on the water to heat up.
Once your water is heated up and you’ve hung your kill cone, you’re ready to begin. Catch the bird and turn it upside down, hanging it from your hands by its back feet. We don’t want the bird to go into tonic immobility but to relax. The bird should relax automatically and kind of spread out its wings.
Lift the bird up and into the kill cone. The head and neck should be exposed. This part is very important. Your knives must be extremely sharp to keep the bird from needlessly suffering. With the head exposed, feel for the bird’s jawbone, and visualize where the ear is. With swift and steady movement, make two cuts on either side of the neck, parallel to the jawbone, right under the ear on either side of the bird. This will sever the chicken’s arteries.
The bird shouldn’t struggle but rather slowly close its eyes (though, after death, the bird’s nervous system may react automatically with some movement). I use a bucket to catch the blood and make cleanup easier.
After around a minute, the bird should be completely bled out. Now it’s time to start the cleaning process. Take your bird out of the kill cone and dip it into the scalding pot for 45- to 60-second intervals, until the feathers are easy to pull off.
I’ve found that two to three minutes of dipping is ideal.

Marissa King
Feathers, Head & Gland Removal
Once you’ve reached the point where the flight feathers come out with ease, tie the bird up by the back legs with your rope. This isn’t a must, but I find it easier than laying it on a table. Pluck the bird by hand, until no feathers or feather shafts remain. The shafts can be stubborn, especially when you process heritage breed chickens. Some homesteaders bypass plucking by skinning the bird instead.
Once the plucking or skinning is done, move on to the head, innards and preening gland removal. Place your plucked bird on a clean surface. Stainless steel works best to keep bacteria at bay, but any nonporous surface can work. At this point, I remove the bird’s head. You’ll follow your initial cuts with a separate sharp knife, or you can cut with trauma shears right below the bird’s head to remove it.
Some people remove the head at different points, either before scalding it or during innards removal. It’s your choice. I don’t like the scalding water getting bogged down with blood from a headless bird, which is why I do it after scalding.
After removing the head, place the bird breast down and locate the preening gland where the bird’s tail feathers were before you plucked them. If you miss the oil gland, your meat could have a funny taste to it, so it’s imperative that this is removed. On a lot of birds, it has a yellowish tint to it.
Once the preening gland is removed, remove the legs. At the joint, you’re going to take a separate sharp knife—never your bleeding knife—and cut right at the bird’s joint. The first few times you do this, it’ll be trial and error until you find the sweet spot. Some people don’t keep the feet, but I dehydrate them and use them as dog treats. I’ve also had people tell me you can make the best chicken broth with them. Just make sure to clean them well first.

Marissa King
Next Steps
Now we’re going to loosen the windpipe and craw. Start at the head (my preference) or the back. Flip the bird breast up. There will be an indentation at the bottom of the neck and the top of the breast. Make a slit here with your knife, and you’ll see a large tendon. Hook your finger through it and pull it loose but not out of the bird.
Pull the windpipe loose next but not out of the bird.
After that step is complete, flip your bird around to where the back end is facing you. Locate the vent and carefully cut above the vent, taking care not to cut the intestines within. Slide your hand into and through that slit, scraping the inside of the bird along its ribs to loosen the organs.
Once everything is loose, cup your hand over the innards and pull them out in one swoop. They’ll still be attached by the bottom of the vent. Make a small V cut, and your intestines will drop down. A well-placed bucket is handy to catch the innards. Some people do keep the different parts of the chicken such as the heart and liver. Just make sure you can properly identify them, and set an area off to the side to rinse them. Keep them together.
If you’re by yourself, like I am most of the time, you’ll have to go bird by bird from start to finish. It’s a long process, especially if you have a lot of chickens. If possible, get another person or two to help so you can set up an assembly line to make the process run smoother and faster.
Now rinse the chicken under cold water. Once it’s rinsed, put it immediately into a cooler filled with ice water for at least two hours. You want the bird to reach 40 degrees Fahrenheit, as measured in the deepest part of the breast. Then, pat it dry and move on to packaging or quartering.
Packaging/Quartering
Quartering a chicken seems pretty intimidating the first time, but there are so many ways you can do it. The process of cutting up chickens is not difficult at all.
To remove the legs, turn the chicken breast up and pull the leg away from the body. With a sharp knife, cut where the body and thigh meet. You may have to rotate the leg around a little bit, but you’ll see the hip socket stick. Just like the legs, cut through that to separate the thigh from the body. Some people will pop it out by manual pressure, but I like a clean cut. Repeat with the other side and, boom, you have your thighs.
You can cut these down to only a leg and drumstick also by cutting the notch where the drumstick meets the thigh. You’re repeating the same process we used for the legs on the wings. Cut through where the wing meets the body and continue through the shoulder joint on both sides of the bird. Voila! You have your wings.
To get the chest pieces out, put the chicken breast-side down and cut along each side of the backbone. Once the backbone is removed, set this aside to make some awesome chicken stock. Cut through the ribs where the neck once sat. Once cut, the chicken breast will split in two. Remove the excess rib bones, and you have your fully quartered chicken!
After pulling the birds out of the ice bath, pat them as dry as possible. Our last step is to package our birds. You want them in the freezer or cans as soon as possible after the two-hour ice bath.
Can your chicken if you’d like, or store it in shrink bags. I personally store in shrink bags because it’s quickest and easiest! After packaging, leave the birds to rest for at least 48 hours before using them.
This article originally appeared in the Sept./Oct. 2023 issue of Hobby Farms magazine.