I’m not sure if critters get a bit bored with the same old pasture, but they can plainly see that what’s on the other side hasn’t been chomped and is therefore taller and smells fresher. The problem is animals can get in trouble when they break their confinement. Sadly, we all want what we don’t have, even if we have plenty and are safe right where we are.
That phrase “The grass is always greener on the other side” has been around for more than a century. It was probably born because some farmer noticed that his or her livestock would continually reach over the fence to nibble the greens on the other side. It didn’t take much time to relate the phrase even to human behavior.
Anyway, it should serve to illustrate the importance of livestock fencing.
Ins & Outs
Fencing is required to satisfy two important potential problems: how to enclose your livestock or poultry and how to keep predators and/or other humans out. To ensure success, you must consider several factors, the first being the species of livestock.
Animal Considerations
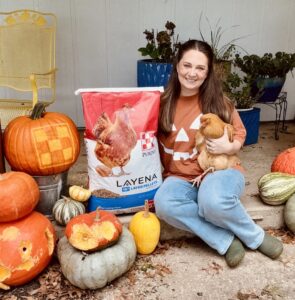
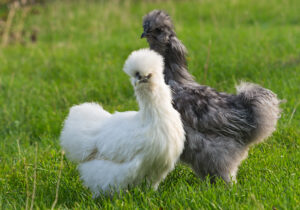
Each species of livestock has specific behavioral tendencies that dictate which type of fencing is going to be the most ideal. For instance, chickens can fly over low fences and all poultry may need protection from aerial attack. Swine tend to rout under fencing if it isn’t partially buried beneath the surface by at least a few inches of topsoil. Horses may tend to chew on wood fences destroying the top run of a board fence.
Give some thought concerning species you have or may have in the future.
Plan Ahead
Before you begin the build, check your local building codes to see if there are any restrictions as to type of building materials or height limitations in your city or county. Most rural settings have minimal requirements but err on the side of caution. Fences within city limits, however, may require a permit.
Ask in your city or county.
Fences along roadways are likely to have setback requirements. If you’re building a perimeter fence that includes property lines, establish the exact line, stay on your side, or follow closely and discuss with neighbors.
Style Selection
There are many styles of fences based on height and differing building materials. We’re only going to concentrate on fences that are practical for livestock. The factors to be considered must first start with the idea of confinement—not just any confinement but safe confinement.
You should know which predator types live in your area and what is the potential they have to harm or kill your livestock. Sheep and chickens are natural prey species and may require a bit of additional protection.
Money Matters
The last factor when considering livestock fencing is going to be cost. Because of the cost and ease of installation, galvanized wire fencing is often the best choice and will be the focus of our discussion. Wire mesh fencing may be sold under the names “field fencing,” “welded wire fence,” “woven wire” or simply “pasture fencing.”
The material will likely be sold in 50- to 330-foot rolls.
In addition to the length, consider the fencing height needed to secure your species of livestock. For instance, a 3-foot-high fence would be worthless for livestock; 4- or even 5-foot fencing is best for most livestock, especially poultry. To keep out deer, you’ll need at least a 6-foot barrier.
Note that horses and/or cattle may reach over the fence, pushing down the top wire over time. Therefore, you may want to consider adding a single strand of barbed wire above your mesh wire as an additional deterrent and providing a bit more height. Look for brands of fencing that have a heavier gauge wire as the top and bottom strands to minimize bending from critters that try to reach over or sneak under.
Field fencing is also sold in two or more thickness gauges. Always use the heaviest gauge wire that you can afford. Heavier wire will last longer, bend less and provide an additional layer of protection. You can use other materials for livestock fencing, but wood or vinyl fencing may not hold up to wind and the sun in the long term. Both types are potentially more costly.
A cyclone style fence is effective and attractive but once again too costly for a large pasture.

Bill Graves
Building Plans
The meat and potatoes of building a fence isn’t too complicated. I mentioned ease of installation, but that may be a bit understated. Fences do take some time and effort. If the fence is longer than a few hundred feet, it’ll also require a bit of walking, so an ATV/UTV or pickup truck may be a big asset. A second or third hand may also be needed.
Because building a fence requires activities to occur in a definite sequence, we’ll describe each procedure in order. The first step is to establish the corner locations and build adequate bracing. Included here are some photos of corner braces and how they should be built.
The central or main length of the fence is simply made up of straight lines, so metal tee posts are all that is needed. Use the heaviest tee posts you can afford, especially if you intend to confine horses or cattle.
On long runs, it’s best to add an additional beefier post or two in the middle of the span. A long span is considered a full length of 330 feet of wire. Common sense dictates bracing will also be needed when making splices in wire mesh fencing or when making any turns in the fence, even if it’s not 90 degrees.
Angling turns in fences will require bracing because the turn will become a point where you may need to pull the wire tight. Corners of 90 degrees absolutely require corner braces because you will be pulling the wire under high tension to make the wire taught.
Consider metal posts as corner bracing or metal in combination with wood. Corner braces should be concreted in place and allowed to dry before you proceed.
Once the corners have been set and cement allowed to dry, stretch out a string line. Using heavy construction string, pull from the corner braces at a height of 3 to 4 feet. Pull tight enough to minimize sagging.
Next, lay out your heavy tee posts along the string line with the bottom of the tee post laying near the string. The tee posts should be approximately 8 feet or less apart. When building a pasture fence with all wood posts, the span should be slightly less than 8 feet so a top spanning board can easily be added.

Bill Graves
In Go the Posts
Using a tee-post driver, now start setting posts. Make sure that you set all the posts with the ribbed portion of the tee post facing the inside of the pasture. That way the wire mesh fencing will be on the same side of the post as your livestock. Animals that push on the fence will be pushing against the post and not pushing the wire off the post.
Of course, on occasion you’ll have animals on both sides of a crossing fence, but it’s always good practice for perimeter fences.
To drive a post, use the string line to establish the bottom point. Holding the post up straight, place your driver up over the top. Drive the post to a point where the stabilizing blades are well beneath the topsoil and yet where you have about 8 inches of post above your finished fence height. Take this into account especially if you’re planning to add a strand or two of barbed wire.
Before the wire mesh is fastened, posts can be tapped down level and straightened to vertical by making slight bends using the driver as needed. If you’re working on a windy day, your string line will be thrown off, so occasionally make visual inspections.
A second set of eyes at one end can be a big help.
Wire to Wire
Once all your tee posts are set, roll out the wire mesh. Most quality fences are designed to keep animals from poking their noses through as they graze near ground level, and you may notice that the square openings are tighter at the bottom of the wire mesh.
Start by unrolling the mesh a short distance beyond your first corner bracing and in line about 5 feet from your post line. It may sound incorrect, but if you have the space, start the top of the spool closer to the post line and the bottom farther away such that the spool won’t want to roll up after its been flipped over.
As you begin, park your ATV or other heavy weight on the beginning of the roll. Now unroll the entire spool of wire to a point beyond the next brace point and again secure with a heavy weight or tie down the coil so it can’t spring back to a coil.
The following steps usually require more than one person. At the starting corner brace, move the hold down and start flipping the wire over and back towards the fence posts such that the wire can’t reroll itself. If you have the help, walk back and forth several times on the wire in order to flatten it to the ground taking out the springy tendency. Done properly, the fence won’t want to recoil, and the bottom edge should now be nearer to the bottom of each tee post.
When you feel the wire is flattened to the ground, use strong plastic cable ties and stand the fence up making temporary attachment points every third post or as needed. Your helper will probably have to hold up the wire as you proceed along the fence line. But when you reach the next brace, the mesh should be standing on its own and close to its final positioning.
The fence should now be attached firmly to one of the two corner braces (but not both) as you still need to stretch the wire. Use a pickup, a tree or other fixed spot to attach a come-a-long style hoist to pull the wire tight. This requires a little planning to decide which end to attach firmly and which end to park the truck.
Cut two pieces of wood 2-by-4 feet, drill some holes and clamp the two boards on either side of the fencing with 3/8th bolts so you can use a chain along with the come-a-long. The two boards should be as long as your fence is high and be well clamped with the bolts, otherwise you may distort the wire grid shape.
Use the hoist to pull the wire as tight as you can or until you’re happy with the tension and the look of your new fence. Be prepared for your temporary cable ties to snap as you pull. If you can, stretch wire on a warm afternoon because wire stretched on a cold day will relax and become looser when things begin to warm up.
Use appropriate fasteners to tee posts and staples wherever as required to wood posts. Go completely around your intended enclosed space in the same manner and you’ll be well on your way to a safe and beautiful fenced-in area.
More Information
Adding Gates
Before you get too far along—and as you’re considering your livestock fencing layout—decide where any gates might be placed. Even on small pastures, construct at least one gate so it’s possible to drive through with a full-size vehicle.

Bill Graves
A 10-to-12-foot gate is usually adequate or slightly more if you must approach the gate from an angle. See the photo above of a 10-foot gate with a closeup of a latch and hinges. Also note the bracing of the gate has been placed near a corner so the brace can serve double duty.
Wood Advice
If you must use wood posts only, toss a shovel of dirt in the post hole after setting the wood posts so the very bottom of the wood post is not “sealed” in the concrete. Unfortunately, sealing a wood post in concrete tends to promote rot.
Posts should be either 4-by-4-inch, pressure-treated wood or redwood. They should also be at least 8-feet long with 2-feet in the ground, longer if you have a very high fence.
Don’t cut posts off on the top until later. (Imagine if you cut your posts and decide later to add a strand or two of barbed wire or an electric strand to the top!)
This article originally appeared in the Sept./Oct. 2023 issue of Hobby Farms magazine.