I was looking to expand my garden this summer and wanted to add two raised beds for berry plants. Being short on time and cash (as most of us usually are!), I wanted to get the beds into the garden without having to spend big bucks or dedicate an entire day to building them. After a quick stop at the hardware store, I built these two raised beds in less than 20 minutes each. Yes, it took me a little longer to fill them, but I have a trick for that, too!
What You’ll Need (Per Bed):
- 2 8-foot-long 1-by-6 cedar boards (I used cedar because it’s naturally rot resistant and lasts for many years. Other good choices include redwood and locust.)
- 3 4-foot-long 1-by-6 cedar boards
- 6 6-inch-long 1-by-2 cedar boards
- 25 outdoor wood screws
- cordless drill with bit
- measuring tape
- pencil
Step 1

Jessica Walliser
Once you’ve assembled all of your building materials, lay the pieces down on a flat, level surface. Arrange them so the two 8-foot boards run the length of either side and the three 4-foot boards are positioned with one on each end and one close to the middle.
Step 2
Use the measuring tape to find the middle of each 8-foot board, and mark it with the pencil.
Step 3
Place a 6-inch 1-by-2 at each corner and one on either side of the middle brace.
Step 4

Jessica Walliser
Using a cordless drill, screw the boards to the 1-by-2 pieces at each of the corners, using the 1-by-2 piece to make sure the corners are square by keeping it flush with the boards. Put two screws in on each side of each of the four corners, one an inch from the top and another an inch from the bottom. Repeat until all four corners are done.
Step 5

Jessica Walliser
Line the middle brace up with the pencil marks, and use two screws to attach it to a piece of the 1-by-2 wood. Then attach the 1-by-2 to the side board with two screws.
Step 6

Jessica Walliser
Once all four corners have been screwed in and the middle brace is attached, position the bed where you want it. It’s helpful to have a partner to help you carry it, but it’s not necessary. Once it is placed, level the ground beneath it if necessary.
Step 7

Jessica Walliser
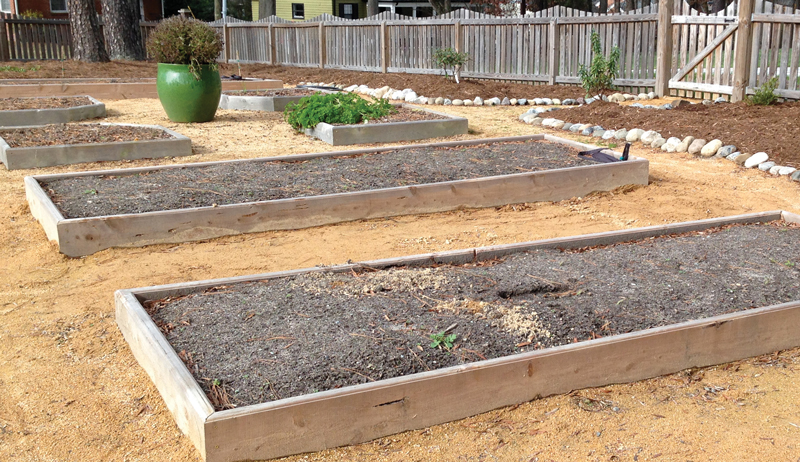
Fill the bed. During this project, I was also building a new perennial border next to the raised beds, so I used the sod I stripped from the perennial bed to help fill the raised beds. I used a flat-bladed spade to lift the turf and then I flipped the turf pieces upside down into the raised beds. Once the beds were filled with sod about three-quarters of the way, I topped them off with compost. Because they’ll settle over time, I over-filled the beds. A few weeks later, I planted one bed with strawberry plants and the other with dwarf raspberries. If you don’t have sod available to fill your beds, use a 50/50 blend of compost and topsoil instead.

Jessica Walliser
I spent about $50 for the supplies to build each bed, but if you wanted to save some money, you can use the same plans to build raised beds out of old barn wood or boards left over from another project. Avoid using treated lumber, however, if you’re going to be growing food in your raised beds.