Corn-husk-wrapped, meat-filled tamales that most of us are familiar with owe their origins to Mexican cuisine. But tamales are a common food in so many cultures around the world. Latin America, the Caribbean, the Philippines and Brazil are just a few examples of regions that have their own version of the tamale. In the U.S., tamales are frequently found throughout the Southwest and often associated with special occasions such as Christmas.
A well-made tamale is a true treat. But one reason why they’re homemade only a few times of year is due to the work involved.
Many traditional recipes use fillings made with slow-cooked meats. And recipes can yield upwards of 40 tamales per batch. That’s a lot of wrapping and steaming, even when the whole family is involved. The good news is that there is a way to merge traditional methods with a little more convenience and less time spent in the kitchen.
And you don’t need to sacrifice the flavor and texture of an outstanding tamale.
Making the Masa
I went through a few batches of rather dry and hard tamales before I learned the importance of the ingredients in the masa, or dough. Now that I focus my energy on getting the masa right, I have to admit that homemade tamales are even better than those I get from restaurants and food stalls.
Masa Harina Matters
The dough starts with masa harina, the flour. This is easily found in the Mexican or international section of most supermarkets. It’s often translated to “instant corn flour mix” or “instant corn masa mix” on the label.
The most common brand, Maseca, makes a version specifically for tamales. I prefer this one, but as long as it is masa harina, it will work for tamales.
The difference between the masa used for tamales versus tortillas is predominantly the added fat but also some baking powder. The dough of a tamale, once it’s steamed, should be light and fluffy.
This is where the fat, baking powder and extended mixing come in.
About the Fat
Traditionally, pork lard is used as the fat. You can most definitely use that, but it’s not a requirement. Vegetable oil, like in the recipe we’ll make here, can be used as well as vegetable shortening, coconut oil, or a mix of liquid and solid fats of your choosing.
The one thing to remember is that if the recipe you follow uses a liquid fat, and you substitute a solid fat, melt the solid fat before adding it to the dough to ensure you have the right amount for that recipe.
When making the dough, mix the water with the masa harina first. Let it rest shortly. Next, blend in the baking powder, salt and fat.
I like to mix the masa harina and warm water using a wooden spoon. Once it’s ready for the fat, it goes to the mixer. You can use either a hand mixer or a stand mixer. The mixer really is key, because you can blend the dough at a higher speed and incorporate air.
Let it mix for a solid five minutes. In the end it should resemble a thick hummus or a thin, drop biscuit dough.
Tips for the Filling
Whatever type of filling you choose, just be sure that it’s room temperature or only slightly chilled. Hot fillings will melt the masa and create a mess. Cold fillings may increase the steaming time needed to cook the tamales.
Many fillings can be made ahead of time. Get them out of the refrigerator about 30 minutes before you start making your tamales.
The filling should also be relatively dry with no standing liquid. If you add ingredients such as sauces or tomatoes to your meat, allow the liquid to cook off.
The best tamales have a balanced ratio of masa to filling. But once you begin making them, you realize just how little filling you really need. It’s important not to overfill the tamale.
When folded, the masa should cover it completely. It could take a few tries to get it right. Each tamale may vary slightly because the corn husks can vary a little in size.
If you measure out your masa and filling, though, your tamales should be close to equal in size regardless of the husk.
Prepping the Corn Husks
Chances are you’ll buy your dried corn husks in a big bag, which means you’ll need to sort them and brush off any dust or debris before making your tamales. Choose husks that are the most similar in size.
The recipe we’ll make here yields 14 tamales. Always select five or six more husks than you need. This will cover you in case any split or if your measurements are off and you end up with an extra tamale. It will also supply you with strips of corn husk to tie off the tamales before steaming.
The dried husks need to be soaked so they are pliable for making the tamales. Laying them all out in a deep roasting pan works the best. Pour warm water over them until they are submerged. If they float, set a baking pan or skillet on top to weigh them down and keep them in the water.
Soak for about 30 minutes. Once they are softened, drain the water and give them a shake, and they are ready to use.
Read more: Give this fabulous fermented corn relish recipe a try!
Tamales: Step-by-Step
I’m going to take you step-by-step through making your own tamales using my recipe for tamales with chicken, chiles and cheese. This recipe makes about 14 tamales.
Ingredients
- 18 to 20 corn dried corn husks
- stockpot with a deep steaming basket
For the filling
- tablespoon canola oil
- 1⁄4 cup diced yellow onion
- 4-ounce can mild diced green chiles
- 2 tablespoons diced pickled jalapeños
- 1 teaspoon fine sea salt
- 2 cups cooked and shredded chicken thighs (about 1¼ pounds boneless thighs)
- 6 ounces Monterey Jack cheese, shredded
For the masa
- 3 cups masa harina
- 3 cups warm water
- 1 teaspoon fine sea salt
- 1⁄2 teaspoon baking powder
- 1 1⁄2 cups canola oil
Step 1: Soak corn husks
Place the husks in a large shallow pan. Cover with warm water. Allow them to soak for 30 minutes.

Lori Rice
Step 2: Make the filling
Add the 1 tablespoon of oil to a small skillet set over medium-high heat. Add the onion. Cook for 2 minutes, until it just begins to become translucent.
Add the can of chiles, and then the jalapeños. Cook for 3 more minutes, until most of the liquid from the chiles has evaporated. Stir in a 1⁄2 teaspoon of salt.
Transfer the chicken to a medium bowl. Add the contents of the skillet, and stir well. If using unseasoned chicken, add the remaining 1⁄2 teaspoon of salt.
At this point all ingredients are cooked. Feel free to taste and add more salt if desired. Set aside to cool.
Step 3: Start masa
Add the masa harina to a large bowl. You can use the bowl of your stand mixer if you use one. Add the warm water and stir well, mixing it into a thick dough.
Let sit for 10 minutes.
Read more: Grow your own storage corn for use in the kitchen.
Step 4: Blend the masa
Mix in the salt and baking powder. Then add a little oil at a time with the mixer on low until the oil is incorporated. Increase the mixer speed to about medium-high. Mix for 5 minutes.
The masa should be thick but spreadable, resembling thick hummus or a thin drop biscuit batter.
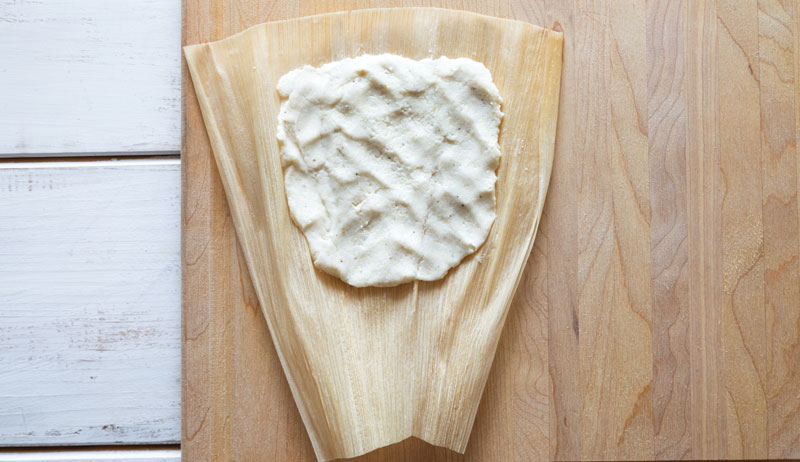
Step 5: Add masa to corn husk
Lay a corn husk in front of you, flat on the countertop, with the larger end at the top. Scoop out about 1⁄3 cup of masa. Place it in the upper portion of the corn, but close to the middle.
Spread or pat out the masa, leaving about 1 1⁄2 inches from the top, 2 inches on the left side and about 1 inch on the right side.
Your measurements don’t have to be exact. The point is that the masa is inside the corn husk and doesn’t squish out when you fold up your tamale.
Lori Rice
Step 6: Add the filling
Spoon about 2 tablespoons of chicken filling down the center of your masa. Top it with 1 tablespoon of shredded cheese.
Step 7: Make the first fold
Fold the left side toward the right side to where the two sides of the masa meet. Press gently to seal them together and tuck your filling inside.
As you do this, you’ll pull back that left side of the corn husk just a little away from the masa.

Lori Rice
Step 8: Fold up
Now fold the right side over the left and press down gently. A little masa will extend over the center of the tamale inside the corn husk.
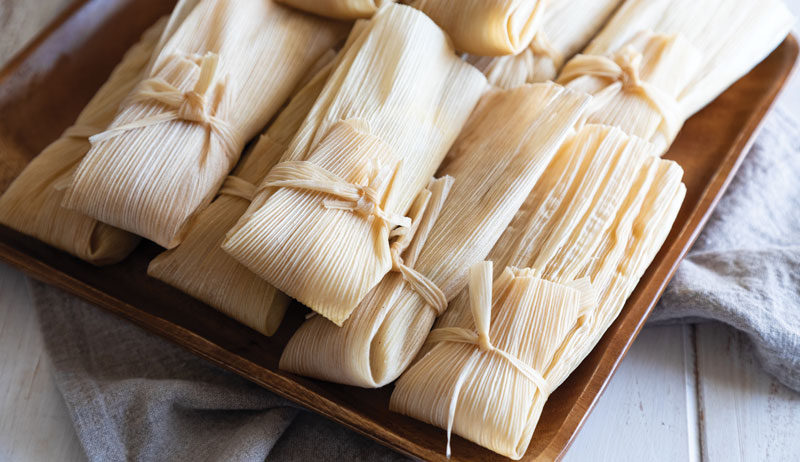
Step 9: Tie up
Take one of the extra corn husks and tear it into long pieces to create the string you will tie around your tamales. The soaked husks can be fragile. Make sure the pieces are at least a 1⁄2 inch in width so you can pull them tight.
Fold the bottom of the corn husk up, to cover the tamale. Tie the corn husk string around the tamale, hold the bottom flat up and secure in a knot.
Repeat steps 5 through 9 for each tamale.

Lori Rice
Step 10: Steam
Bring a large stock pot filled about 1⁄3 full of water to a boil. Reduce to a simmer. Then place a steaming basket or pasta inset in the pot.
Be sure no water is visible at the bottom of your steamer, where it would come into contact with the tamales.
Add the tamales to the basket with the open end facing up so that they are sitting upright in the steamer. Cover, at least partially, with a lid. Steam for 75 minutes. Check your water at regular intervals and add more if necessary to complete the steaming time.
Remove the tamales from the steaming basket with tongs.
The bonus step is the best part: Now it’s time to enjoy your tamales. To do so, cut the tie or slide it off and open the corn husk.
Top tamales with any number of your favorite toppings. I prefer some crumbled cotija cheese, cilantro and hot sauce. Avocado, Mexican crema or sour cream, and salsa are good topping choices as well. To cook tamales, you need to steam them, and tamales need to steam for longer than you might expect, considering that the ingredients are all cooked. To steam: Fill a large stock pot about 1⁄3 full of water. Bring that water to a boil then reduce it to a simmer. A deep steaming basket works best, but a pasta inset works well if your steaming basket isn’t deep enough to hold the tamales upright. The tamales shouldn’t come into contact with the water. Keep an eye on your water, and add a little more every 20 minutes or so, as needed. Cover the tamales, at least partially, with a lid while they steam. They should be ready in 60 to 90 minutes. If you have more tamales than you can handle, they freeze well. You can freeze them before you steam them or after steaming them, once they have cooled. If you’ve frozen them after steaming, you can heat them up in the microwave when you’re ready to eat; I think the best way to reheat them is to put them back in the steamer whether you steamed them before storing or not. To freeze, wrap each tamale tightly in plastic wrap and then put them inside a freezer-safe bag. They can be frozen for three to six months. I find shorter freezing times prevents the chance freezer burn will occur. This article appeared in Hobby Farm Home, a 2022 specialty publication produced by the editors and writers of Hobby Farms magazine. You can purchase this volume, Hobby Farms back issues as well as special editions such asBest of Hobby Farms and Urban Farm by following this link.More Information
Cooking Tamales
Freezing Tamales