
My first encounter with trench composting was in the jungles of Central America, while I was staying in a rainforest lodge in Belize during the late 1990s. Traipsing around the property one morning, I came across an enormous garden. Because the lodge was far from anywhere, bringing in food was a big undertaking. So instead of importing their eats, the staff raised almost everything they needed to feed 20 guests and all the employees right there on the property.
There were banana and papaya trees, tomatoes, peppers, beans, onions and rows upon rows of other fruits and veggies—some I recognized, others I did not. Among all the scrambling chickens and rambling plants, toward the garden’s center, was a deep, 2-foot-wide trench. One end of it was partially filled with all the things I usually toss into my compost pile (minus the grass clippings, of course; thankfully, there’s no lawn in the jungle). And there, standing next to the trench thoughtfully tossing shovels full of soil onto the “yard waste” and kitchen scraps, was the gardener.
Though my long-out-of-high-school Spanish coupled with his complete lack of English was a barrier, I was able to garner some information about what was happening. He told me that they bury all kitchen and yard waste to feed the garden. There’s no garbage man there to haul away the trash in a jungle, and so there is no trash; everything finds a second (or third or fourth) use.
He was burying the likes of banana peels, old greens, fruit rinds, eggshells, dead palm fronds, and all the half-eaten remnants of the previous night’s dinner and that morning’s breakfast. He explained that every day he dumps in “the goods” and fills up a section of the trench. He starts on one end and works his way down to the other, topping everything off with a foot of soil to keep the critters out. A new trench is dug and slowly filled, from one end to the other, every three weeks.
“Ingenious!” I thought. “I can’t wait to tell everyone about this.” However, when I returned home and reported my findings to some gardening cohorts, I learned that while the technique was new to me, the rest of the world has apparently been doing it for thousands of years.

Shutterstock
Why the Trench?
Trench composting, to some degree, has been happening on this continent for a very long time.
“Folklore tells us that Native Americans participated in a sort of trench composting when they buried a fish beneath each mound of corn,” says Robert “Skip” Richter, county extension agent in horticulture for Harris County, Texas. “They were using a meat, but for the backyard gardener using yard waste, it’s the same concept: We are burying waste and waiting for it to decompose and add nutrients back to the soil.”
Traditional compost piles should be “managed” by turning and aerating and using the right ratio of ingredients; they also take up a lot of space, something that’s at a premium for most urban farmers.
“Trench composting is so much easier than building a compost pile,” says Robin Follette, a former market farmer from Talmadge, Maine. “There is no need to turn it at the right time or spread it out when it’s finished. I can fill the trench, cover it and forget about it. The earthworms and microbes—I call them my ‘micro-herd’—do all the work. And, since I always seem to have a greater proportion of green than brown materials, I don’t have to worry about ratios in a trench; I just put it in. In my high tunnels, I can trench compost year-round, but I can’t keep a pile going outside when it’s minus 20 [degrees Fahrenheit]!”
It’s apparent that the appeal of trench composting is multifaceted: There are no fancy tools or bins to buy, no turning dates to mark on the calendar, no need to check for the proper amount of moisture, no measuring ingredients, no compost thermometers and no need for a wheelbarrow and pitchfork to spread the results.
“It’s so easy,” Richter says. “It’s almost no work.”

Shutterstock
Before You Dig
Before you start digging in your yard, you should always know where your underground utility lines are located. To locate them, use the free service put together by state governments and utilities that allows homeowners and contractors to get all the lines marked with water-solvent paint or flagging within 48 hours. Just dial 811 to get your property marked; check www.call811.com for more details.
Trench How-To
As with all things gardening, everyone has a favorite technique. The core aspect of trench composting is the burying part. Whether you do it in an individual hole, as the Native Americans did, or on a large scale, like my Belizean gardener friend opted for, that rule remains the same. The composting ingredients should be buried 8 to 12 inches beneath the ground. This means that how deep and how wide you dig your trench depends on how much “waste” you have to compost.
Sometimes called hole composting, small-scale trench composting involves digging an individual 12- to 18-inch-deep hole and tossing in a day’s kitchen scraps. Fill the hole partway with scraps, and then top it off with the backfill soil. Chopping the scraps up first results in faster decomposition but isn’t necessary.
“Usually, when people say composting, they think of a managed system where decomposition happens,” Richter says. “But here, there is no management, and the compost still happens.”
Most importantly, the gardener still reaps all the benefits that compost-rich soil provides. The main negatives of hole composting are the likelihood that you’ll forget where you made the hole and accidentally dig it up before decomposition is complete. Richter says that if the original pieces were small, it may only take a few weeks to fully break down. The rate of decomposition depends on your soil life, the soil temperature and the amount of moisture present.
“You can plant right over it,” Richter adds, without having to wait for it to decompose. Because it’s such a small amount of items decomposing, there won’t be any settling to consider.
Full-scale trench composting is great for turning larger amounts of waste into black gold. Follette uses a technique similar to the Belizean gardener’s: “But I dig my trench and fill it up all at once. I make the trench large enough for all the waste I have to bury at that particular time.
I do this because, if I start a trench, I don’t always get back to the trench to completely fill it in a reasonable amount of time,” she says. “I have found that it’s better for me to tend to it from start to finish.”
Dig the trench, fill it and top it off with soil, all in one afternoon. “I mix food scraps and plant waste with some of the soil from the trench, moisten it if necessary and refill the trench. The last remaining soil is spread 8 to 12 inches deep over the trench and tamped down,” she explains.
Follette then waits at least a month before planting over the trench. “If the soil is cool, I wait even longer to be sure the contents have broken down. I don’t want to dig up something nasty by not waiting long enough.”
Holed Up
Shutterstock
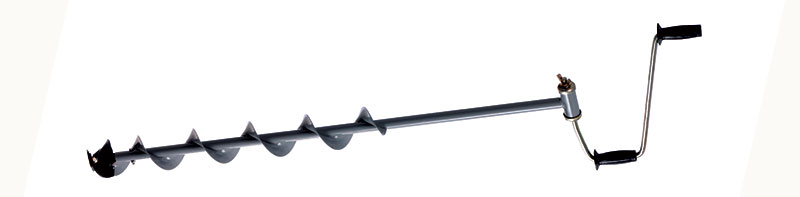
If digging a trench or even a series of holes seems out of your physical capabilities (or you just want to save some time), there’s another way to reap the benefits that trench composting provides. Use a manual ice auger to drill holes in the soil, partially fill the holes with kitchen scraps, and then kick the soil back to fill in the remainder of the hole.
For even easier digging, use an ice or bulb-planting auger that fits onto a cordless power drill. Both the manual and drill-mounted augers come in various diameters, but the ice augers tend to be wider, allowing you to create a larger hole for a bigger composting volume. An 8-inch-diameter handheld ice auger will cost between $35 and $60. You can also use the augers to plant bulbs, make holes for vegetable and annual transplants, sink garden stakes and bird-feeder stands, and take soil samples—not to mention all the ice-fishing possibilities!
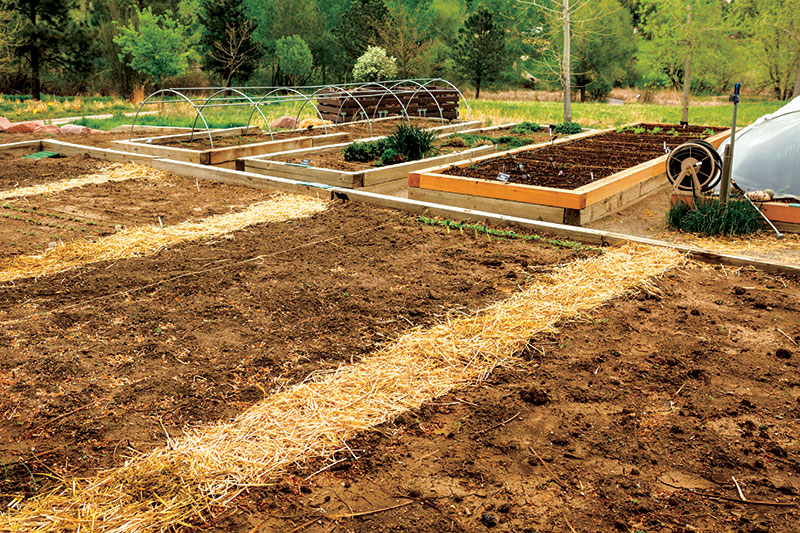
Trenching on Rotation
Shutterstock
It’s important to track the location of previous trenches and keep a rotation plan of sorts so you know which parts of the garden have been amended and which have not. With hole-composting (see “Holed Up” on page 46), this is more challenging but perhaps not as critical. With full-scale trench composting, it’s a near necessity.
It was clear in the Belizean garden that the new trench was dug immediately next to the old one, with the backfill from the new trench serving to top off the recently filled one. I like this system because it’s easy to know where you’ve been and where you need to go. Plus, it simplifies the planting plan. Only two sections remain unplanted at any given time: the one with the newly filled trench and the one with the currently-being-filled trench.
Because of the Belizean garden’s three-week trench-digging schedule, this means that as soon as a trench is completely filled, the previous one can be planted (and the next one can be dug). Each section remains unplanted for a total of six weeks—three weeks to fill followed by three weeks to rest. Keep in mind that the Belizean gardener grows on a fairly large scale year-round and winds up trenching every section about once a year.
Chances are good that you do not garden year-round, nor do you do it on such a grand scale. It’s likely that you may only dig and fill one or two trenches per season. In this case, simply plant on top of the filled trenches the following spring, and dig the new one right next to it.
If you rototill your garden, don’t start any new trenches close to the time of tilling. You’ll find that with regular trench composting, the need to till is eventually eliminated. Digging the trenches serves to loosen the soil and all the additional organic matter the compost provides, creating a crumbly, friable soil without tillage. Not to mention how good the “micro herd” is at aerating and turning the soil.
Added Advice

Shutterstock
Richter offers a few more suggestions for optimal trench composting. “Put thicker twigs and branches in the bottom of the trench if it’s an area where you are not going to till,” he says. They take longer to break down and can stay there for as long as needed.
“Cornstalks are also great additions, as are untreated lawn clippings,” though Richter reminds us that too many grass clippings can generate a lot of heat: “It can get too hot to plant on top of a trench with a lot of grass clippings, so mix them with leaves first or layer them with other ingredients. You don’t want too much of any one thing. Get some variety, if you can, for faster decomposition.” Nonbleached paper towels and napkins, coffee grounds and filters, small amounts of shredded newspaper, and plant trimmings are also on the list of possible trench fillers.
There are, however, a few items you probably don’t want to toss into the trenches. Don’t trench compost perennial weeds; sections of their roots can regrow and become invasive. Also avoid weeds that have gone to seed, especially if you plan to till. Tilling brings those seeds up to the soil surface, where they’ll quickly germinate and cause a weed outbreak. While Follette does trench compost meat and dairy scraps, some gardeners prefer to avoid them, believing they will attract pests. Flies are not a problem with trench composting because the items are deeply buried, but if you have dogs, raccoons or other digging critters, I suggest skipping these ingredients. Also avoid pet wastes. Farm animal manures, like those from poultry, rabbits, cows, horses and sheep, can certainly be trench composted, but be sure to not plant where they are buried for four or more months to avoid any potential pathogen exposure.
Trench composting is especially great for those who reside in cities or municipalities that have ordinances against bin or pile composting. When properly done, there are no odors, no animals and no worries. Build that rich, organic soil that you crave with trench composting.
This article appeared in Living Off the Grid, a 2018 specialty publication produced by the editors and writers of Hobby Farms magazine. Aside from this piece on trench composting, Living Off the Grid includes stories on permaculture design, renewable energy, growing plants without seeds and long-term produce storage. You can purchase this volume, Hobby Farms back issues as well as special editions such as Best of Hobby Farms and Best of Urban Farm by following this link.


