There are a number of reasons why we might want to save seeds from the squash and pumpkins we harvest in the fall. The first is economic. Saving seeds is like saving money. The more seeds we save from our garden this year, the less seeds we will need to purchase for planting next year.
Another good reason to save our seeds is the preservation of the varieties. Let’s say you grow an old heirloom squash. By saving the seeds, you are doing your part to ensure that variety is preserved for future generations to enjoy.
If you grow for market, some of your customers might have come to love the varieties that you offer. By saving your seeds for next year’s garden, you’ll be sure to have that same squash to offer customers again next year. Depending on a seed catalog to always carry your favorite types is risky. If they suddenly quit offering the squash you were planning to grow, you’d be out of luck.
Unless of course, you saved your seeds!
Another reason to save our seeds, and possibly the most important, is adaptation. Seeds harvested from your garden are adapted to your climate and your growing techniques. Simply put, seeds harvested from your garden will perform better in your garden than any seeds you purchase elsewhere.
Read more: Check out this video to learn the basics of saving tomato seeds!
How to Save Seeds from Squash & Pumpkins
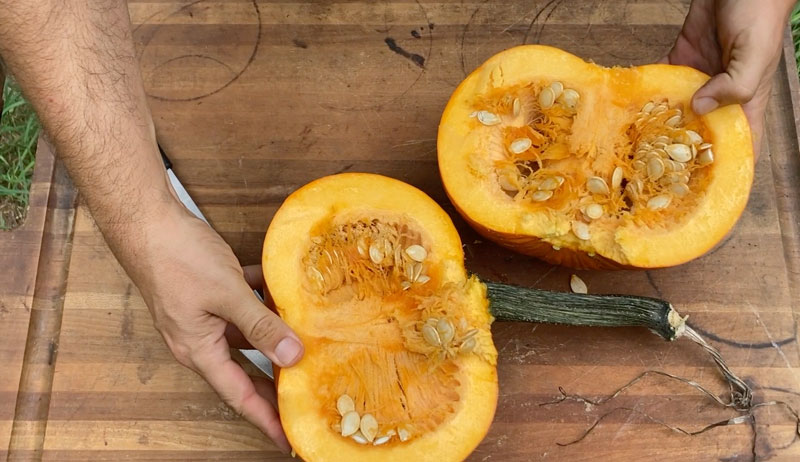
The first step to successful seed saving is learning to identify mature fruit. We need to let our squash and pumpkins fully ripen in order to get mature viable seed. The squash will signal its ripeness by changing color, typically from green to orange.
Another way to test that your squash’s maturity is by trying to pierce the fruit’s skin with your thumbnail. A fully mature squash will have a hard outer shell. If you can damage the skin with your thumbnail, the fruit isn’t quite ready to harvest for seeds.
Once you’ve identified a mature squash, simply cut it open and remove the seeds by hand. Then we’ll need to wash the seeds to clean them of any bits of fruit. This can be done quickly and easily by using a colander and a garden hose.
If the inside of the squash is extra stringy and clingy, just toss the innards, seeds and all, into a bucket of water and allow it to sit for a couple of hours. The water will help break down the plant material and the seeds will drop to the bottom of the bucket. Dump them out onto a screen and give a good rinse.
Then, put your washed seeds out to dry on a screen or even on a plate. Make sure to label the seeds so you can remember which variety you saved!
Leave the seeds to dry for around seven to 10 days. Once they are completely dry, package them up. For packaging you can use a canning jar or similar container, an envelope, paper bag etc.
Again, make sure your seeds are well labeled, then store them away in a cool, dark place until it’s time to plants your seeds again next spring!


