A fire crackles in the woodstove that’s nestled in the corner of the dining room. The smell of a wood fire drifts through the house, along with the scent of freshly cut pine boughs and drying orange slices. A small stack of firewood split logs sits neatly beside the stove, waiting to be added once the fire begins to die down.
Whether it’s for the radiating heat that can warm any cold body or the extra sense of security that a back-up heat source offers, investing in firewood heat for your home can be beneficial and enjoyable.
Before you dive right in and begin chopping down the shade tree in the backyard for firewood, you need to be aware of a few basic things, not only about the type of firewood you use to heat with but also how to safely cut it down and store it.
Wood Basics
The type of firewood you choose to burn might vary from region to region and depend on what trees are plentiful nearby. Around my area in central Kansas, Osage orange (hedge) seems to be a popular choice. Considered a hard wood, when burned after curing (drying), it produces an excellent, long-lasting heat.
Retired fish and wildlife expert Clarke Dirks has been cutting and heating with firewood for years. He also burns hedge but prefers to let it dry and cure about two years before use. Hedge wood can withstand this long curing period. It’s an extremely dense wood and resistant to bugs and rot.
Dirks points out that other types of firewood wouldn’t need to cure (and wouldn’t last) as long as hedge wood before burning, though. For example, species such as cottonwood, elm and hackberry could be dried in less time (probably six to eight months), while oak should be left to dry for a full year.
A general tip Dirks shares is that lighter woods should be cured for at least eight months, while hard firewoods should spend at least 12 months drying. For more information on how to choose which type of wood would work best for you, study the BTU ratings for the different types. This will tell you how much heat a cord of wood would produce. Check out the Utah State Forestry Extension chart online.
Chainsaw Basics
While an axe will never run low on gas, chainsaws offer a great way to cut wood much more quickly and efficiently. When well maintained and used safely, you’ll have a stack of firewood piled up before you know it.
Make sure the saw you choose to use for the job is adequately sized for you and the tree. Avoid something that is so large and heavy that you will tire quickly just holding it.
If looking to purchase a used saw, check on the following before handing over the money.
- Observe overall signs of wear.
- Notice how faded and scratched up the plastic is.
- Look for any signs of oil leaks.
- Check for strong compression when pulling the pull rope like you were going to start it.
- If removing the muffler, notice if the pistons look scored or the inside of muffler looks burned.
- Check the edges of bar for wear.
- Notice if the chain is loose on the bar.
- Listen to how it runs. Is it running too “rich?”
- Check the air filter, as you won’t want a saw that has sucked dirt into the engine.
- Look at the underside of the saw to see how much paint is worn off from wood chips.

MoiraM/Adobe Stock
Chainsaw Maintenance
Before you head out to start cutting, check your saw over and make sure it’s in good working condition. The air filter should be clean, and the chain should be sharp and have enough oil in the chain lubricant case to keep it well-oiled as you cut. As you consider the chain, make sure it’s the correct length for the saw blade and tight enough on the bar to cut well.
When it comes to fuel for your saw, avoid using straight gasoline in a two-stroke engine. Use good quality fuel, and mix it with two-stroke oil before adding to your saw. Another thing to keep a close eye on is the carburetor, which should be adjusted correctly or else it could cause damage to your engine.
(If you’re unsure of how to do this yourself, find someone that is reputable and understands chainsaws and carburetors to work on it for you.)
Cutting the Wood
Once you have any necessary safety gear and your saw is serviced and ready to go, it’s time to choose a tree that needs cleaned up.
Ideally, look for at least 6 to 8 feet of open space in all directions around the tree you select and have a path of escape chosen in case of emergency. Dirks encourages that if there is more than one person working in the area, keep a safe distance from each other and alert them if you’re working on a situation that could potentially turn dangerous for others.
Be alert! Have a plan ready in case something begins to fall in the wrong direction.
Use the right size saw for the job that you’re tackling. If it’s too small of a saw, it might not reach all the way through a large tree. Be aware also of the wind direction before you cut, and, if needed, a wedge can be cut away at the base of the tree to help direct it as it falls. Be careful, though, because cutting away a wedge doesn’t guarantee the tree will fall in that direction. Likewise, caution should be used in how you cut, to avoid the chainsaw bar and chain getting pinched inside the tree if the weight of the tree shifts. This can cause an issue when trying to get the saw back out of the tree.
If cutting up a fallen tree on the ground, begin by removing all the smaller, outer limbs and work your way back to the main trunk of the tree. Limbs can either be discarded later, or, as Dirks suggests, left in a brush pile which will allow songbirds a place to roost, woodpeckers a place to feed, and rabbits, mice and ground birds (including pheasants and quail) a place to shelter.
Once the smaller limbs have been removed, the main trunk can be cut up piece by piece, making sure that the logs are short enough that you can pick them up and fit them in your stove. Depending on the width of the tree, consider splitting them before burning. Splitting can be dangerous, so use caution when doing it, whether by hand or with one of the various types of splitters.
As you process the tree, it can be helpful to have extra people to carefully remove the logs after cutting. They can be piled up in a trailer for later transportation to wherever you intend to store them or taken to a splitter for the next step of processing.
If you’re looking to use as much of the tree as you can, send someone to gather up small twigs and sticks around the place where you’re cutting. These can be placed neatly in boxes or containers and stored away in a dry place for later use as kindling when you want to start the stove.
Clear an Area Properly
It’s good to know your objectives before you begin cutting. Dirks says that if your main goal is simply to cut firewood, choose a site that offers the easiest wood to reach and is the closest to home.
If working with a section of more heavily wooded land, he shares that there are two methods to go about removal:
- thinning out specific trees just for firewood and allowing the remaining trees room to grow
- spot clear-outs, where you choose an area and remove everything in that space, which allows you to come back and establish a new or different type of habitat with selected species intended to fulfill a specific purpose.
If tackling a smaller job that consists of simply removing some existing trees in a shelter belt, Dirks notes that you could go back and replace them with a variety of different options. This could be a taller tree (such as hedge), a shrub which can offer cover closer to the ground, or something such as a plum or choke cherry that can become an extra source of food.
If you have other goals in mind such as creating a wildlife habitat, look for and first remove damaged or sick trees, as this will allow the healthy trees to grow better and provide more of a habitat. If hunting is something you enjoy and you’re looking to curate a clearing that the turkey and deer will frequent, open a clearing and replant it with “plant species that will attract the wildlife species you are managing for,” Dirks says.
On his own land, the whole creek bottom piece is filled with hedge trees, offering little more than cover to wildlife. Dirks continues to work from one end to another, clearing out and replacing them with suitable tree species that provide more benefits to native wildlife. In several areas, he removed the hedge trees, allowing native grasses and forbs to grow up unhindered. Now, he finds there are deer and turkeys continually enjoying the space.

Evangelos/Adobe Stock
Stacking Wood
Once your logs have been cut for firewood, split (if desired) and hauled to their destination, begin stacking. There is a bit of an art to stacking a neat pile of wood. While some people crisscross logs through the entire pile, others simply stack them up neatly lengthwise.
Lay them in such a way that the pile doesn’t begin to lean and eventually topple. Check as you stack that the logs fit together well and the pile feels sturdy.
If you want to measure the amount of firewood you have cut, there are two common measurements: a “cord” (which is 128 cubic feet, or 8 feet long, 4 feet high and 4 feet wide) and a “rick” (which is, as Dirks put it, “1⁄3 of a cord and 16 inches by 4-by-8 feet”).
If possible, have a place inside and under a roof to store your firewood. Keeping it out of the elements will allow it to dry quicker and keep it from rotting as fast.
Insects are practically unavoidable when wood is stacked outdoors. Dirks says that like a food pantry, continue to rotate and work through the wood pile, starting first with the oldest wood. For example, pests can consist of boring beetles (that produce small mounds of sawdust next to their holes) to termites, which can destroy a whole woodpile.
With the right saw and a careful dose of caution and preplanning, you could have a nice stack of firewood right outside your back door. Use any safety gear needed, and do your best to get the job done safely.
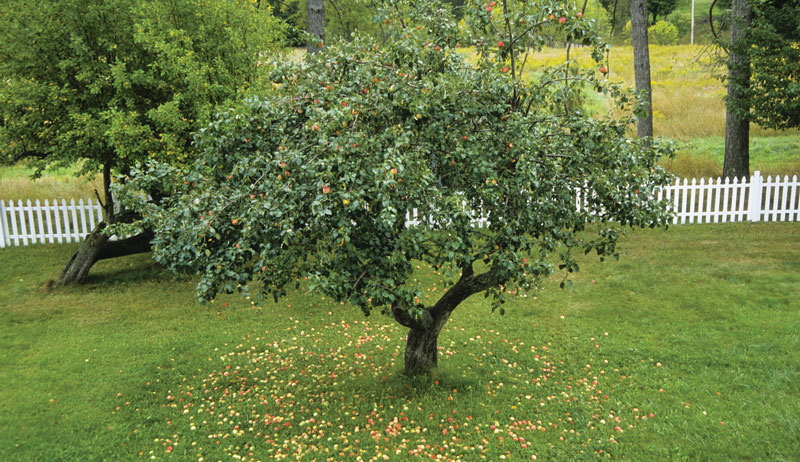
More than Just Firewood
From songbirds flittering amongst the branches to squirrels running up and down the limbs, trees have much to provide for the wildlife that lives all around us. As retired fish and wildlife expert Clarke Dirks shares, wildlife has three basic needs: food, cover and water.
Some trees provide two of those needs: shelter and food. Whenever a tree is removed, Dirks suggests replacing it with a species of tree that will offer at least shelter, if not shelter and food.
While species of trees will vary from area to area across the country, around central Kansas, where I live, people typically cut hedge trees (also known as Osage orange). While this tree does provide cover for wildlife, Dirks says it doesn’t offer much in the way of food, except for squirrels that’ll munch through the knobby, green hedge apples in search of seeds.
On his own homestead, Dirks has cleared out hundreds of hedge trees and planted in their place a selection of hard woods, varying from black walnut and oak to pecan and persimmon. He has also added smaller, more shrublike varieties such as plum and choke cherry.
How you choose to replace the trees you remove will vary depending on your desired outcome for the plot. If you desire to return it to a habitat-state, choose your species of trees accordingly. Dirks points out that shrublike trees and bushes planted near grasslands are beneficial for small games species.
He prefers to plant shrub species that’ll have a two-fold benefit, flowering in the early spring and offering a food source of pollen and nectar for his bees yet producing fruit later in the summer for the birds. Examples of flowering shrubs that he has planted include plum, dogwood, chokecherry, blackberry, elderberry and hazelnut.
When looking to replace trees that have been cut down, Dirks tries to plant five or six trees for each one that he removes. While it might seem like a large quantity at first, he points out that they won’t all survive until maturity unless time is specifically dedicated to nurturing and watering them. Fifty years from now, he hopes that the original tree that was removed should have at least one replacement.
For advice on choosing trees for yourself (and possibly even a chance to purchase them), look to your state’s forestry commission. Most states have one.
Heating with Wood
The feeling of walking inside from the bitter cold to a warm house with the smell of burning wood is something special. Heating your home (or shop) with wood can be inexpensive once you get past the initial installation of the stove, hearth, pipe, etc.
Follow these basic tips for when heating with wood.
- Use a chimney brush to clean your chimney pipe regularly and remove any build-up of creosote or soot. This can help reduce the risk of fires in the pipe when the stove is in use.
- Watch for any live coals or embers when removing ashes during the season of use. Use a metal bucket in case of anything hot, and set it in a safe place.
- Keep the size of your stove in mind as you cut wood. Avoid cutting logs that are too large to fit inside the stove.
- Avoid burning green wood, as it often produces more creosote and can cause your chimney pipe to plug up more quickly.
- Burning your stove at a higher temperature can help keep your chimney clean, but do this with caution and seek out an expert if needed.
- If you haven’t already put in your stove, install high-quality pipe as it can help avoid catching your house on fire.
- Check local restrictions or regulations as needed before installation.
This article originally appeared in the Nov./Dec. 2023 issue of Hobby Farms magazine.