Fall garden chores are an important step in closing out the growing season and setting your garden up for success next year. Tackling these tasks now means healthier soil, fewer pests and weeds, and less work when spring planting arrives. Here are five simple chores to keep your garden in top shape this fall.
1. Tidy Up Garden Beds
If you’re not growing cool-weather crops for the fall, now’s the time to clean up any plant debris left behind from your summer plantings. Removing this organic material will help reduce the incidence of future disease and pests. If you had issues with plant diseases during the growing season, do not compost any of the affected plant remains, as most domestic composters never get near the 130 or 140°F needed to destroy many of these plant pathogens.
2. Get Ahead on Weeding
A good weeding in and around the garden at the end of the year will help prevent some weeds from overwintering and will destroy some important habitats for many insect pests. Also, if your garden plot is in your formal yard, now is the time to edge your garden plot to stop the gradual encroachment of grasses.
3. Check and Improve Soil Health
Testing your soil this time of year means you’ll be able to amend it well before the spring planting season. Testing is as simple as contacting your local extension agent to get a sample bag or box and then following the instructions to submit your soil sample. In the same vein as soil testing, this is also the time of year to add compost and other organic materials to enrich your garden soil.
4. Update Your Garden Journal After Your Fall Garden Chores
If you tried and failed to keep or update your garden journal during the spring and summer months, now is a great time to jot down a few general notes about any successes or failures you faced, favorite cultivars to grow again next year, a simple sketch map of plantings to help with crop rotation, and any other observations regarding the soil conditions, diseases and pests.
5. Care for Tools and Equipment
Finally, clean and lightly oil your tools after you have finished your fall chores. Store the clean tools in a dry environment off the ground. These simple steps will help protect your investment in good shovels, rakes, and hoes by preventing rust and corrosion.
Fall Garden Chores: Final Thoughts
Completing these fall garden chores now sets the stage for healthier soil, fewer pests, and stronger plants in the coming year. A little effort in autumn goes a long way toward ensuring a smooth start when spring planting arrives.
This article about fall garden chores was written for Hobby Farms magazine. Click here to subscribe.
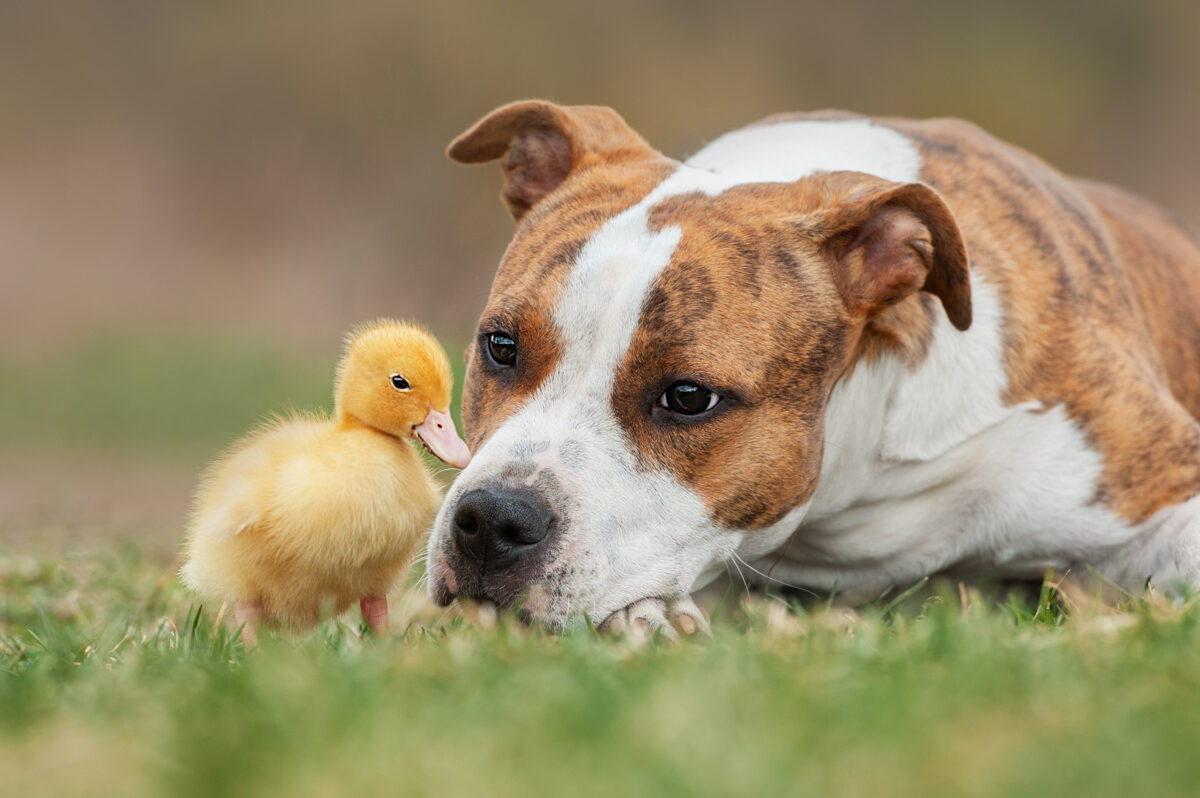
Dogs and ducks living together and coexisting peacefully may sound impossible, but it doesn’t have to be. With a duck-friendly dog breed, careful training, and the right dog, your canine companion can learn to live in harmony with your webbed-footed friends.
Choosing Dog Breeds for Ducks
If owning both ducks and dogs is on your bucket list, a good place to start is by choosing a duck-friendly dog breed, such as a livestock guardian dog. There are many breeds available that can coexist with ducks, but before acquiring a dog, do your research to learn what breed best fits your needs.
Even when choosing a duck-friendly breed, dogs are individuals, and some may possess a higher prey drive than others. To prevent accidental injuries or fatalities, always supervise dogs and ducks living together. Even the most behaved canine can accidentally injure ducks.
Good dog breeds to raise with ducks include:
Australian Shepherd
Border Collie
English Shepherd
Great Pyrenees
Rough Collie
Shetland Sheepdog Pembroke Welsh Corgi
Erin Snyder
Dogs and Ducks That Don’t Mix
To help dogs and ducks living together coexist peacefully, avoid dogs with high prey drives. However, some individuals of the breeds below may still get along well with ducks.
Some dog breeds to avoid include:
Alaskion Malamutes
Dachshunds
Golden Retriever
Greyhounds
Huskies
Jack Russell Terriers
Pitbulls
TerriersWhippets
Whippets
Yorkshire Terriers
A Word on Retrievers
Some Labrador Retrievers and Nova Scotia Duck Trolling Retrievers can get along well with ducks, while others have a higher prey drive due to their purpose as waterfowl retrievers.
If you are considering owning one of these two breeds and want your dogs and ducks living together in harmony, stay clear of individuals with hunting bloodlines.
Erin Snyder
Helping Dogs and Ducks Get Comfortable
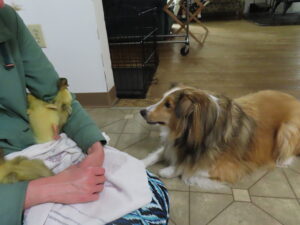
Ducks will be more relaxed if they are allowed to build an awareness of your dog before any introductions are made. Not only will this first step benefit the ducks, but it will give you a chance to see how your dog reacts to seeing ducks from a distance.
Chain your dog for a few minutes at a time close to the duck run, making sure to choose a spot where he will be safe and can easily see the ducks, but can’t reach them.
Give the dog a distraction, such as a chew toy or dog bone to chew on while he watches the ducks. Discourage your dog from barking, as barking can make ducks act nervous.
With your dog in plain sight, offer the ducks a treat to keep them calm and relaxed. Keeping ducks calm is important, as excited, nervous ducks will perk up your canine’s prey drive.
Wait to take the next step of the introductions until the ducks remain consistently calm, and the dogs are calm and not showing any aggressive behaviors such as lunging or barking.
Training Dogs and Ducks to Coexist
For dogs and ducks living together to work, you must train your dog to behave around waterfowl. Ducks are prone to being nervous, especially around things they view as threats. If your flock isn’t used to interacting with your dog, or when you bring a new dog home, their first reaction is to become nervous.
Start by introducing your dog to the ducks on opposite sides of a completely predator-proofed run. Allow your dog to approach the enclosure. Keep the dog on a leash and speak in a gentle, but firm voice. Remind your dog to be gentle (a command he should master before being introduced to waterfowl).
In most cases, the ducks will panic as the dog approaches, causing the dog to react. Keep a firm hold of the leash so the dog can not keep approaching the scared ducks. Use the commands “no” and “gentle” to remind your canine to settle down.
Once the dog has calmed down, lead him away from the ducks. Repeat these steps daily until all members involved have calmed down around each other and no longer react. While it may seem impossible at first, ideally, your dog should be able to walk right past the duck pen without the dog or ducks reacting, before being introduced face-to-face.
Always keep introductions to one dog at a time, even if you have a multi-dog household.
Knowing Your Dog Around Ducks
Knowing your dog’s personality can go a long way to help dogs and ducks living together. Does your dog remain calm when he sees ducks? Does he show signs of aggression or become overly excited when visiting the flock?
Watching a dog’s behavior before introducing him to ducks face-to-face can tell you whether or not your dog is up for the challenge.
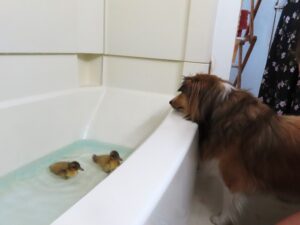
Introducing Dogs and Ducks Safely
Dogs and ducks living together will only work if they respond to each other in a positive manner.
If both ducks and dogs are responding well to seeing each other on opposite sides of the fence, the face-to-face introductions are usually smooth.
Always keep your dog on a short leash during the introduction so you can control him if needed.
Use the same commands as when introducing ducks to dogs with a fence between them. Never allow your dog to chase or harass your ducks in any way. Keep meet and greets short and frequent to prevent stressing ducks and dogs. With time, some dogs are able to safely be around ducks without needing a leash restraint.
During these times, a careful eye should be kept on both webbed-footed and four-footed friends at all times.
Never allow dogs access to your ducks’ coop or pen in the barn. This is critical as ducks should always have a place they can go to feel safe and secure, should they become spooked by a dog or other predator.
Raising Puppies With Ducks
Dogs and ducks living together is certainly possible; however, most puppies are not the best mix with ducks. Puppies become very excitable and may accidentally injure or kill a duck.
Protect your puppy and your flock by waiting until puppies have matured before being introduced to your ducks.
When Dogs Show Aggression to Ducks
If your dog shows signs of aggression toward ducks, it does not always mean that they can’t live together. Some signs of aggression include:
Baring teeth
Biting ducks
Growling
Killing ducks
Snapping at ducks (Snapping at the air when herding, not included)
If you notice your dog displaying any of these behaviors towards your ducks, permanently remove him from the flock and avoid flock interactions.
Important Note: Even if a dog shows aggression to ducks, it does not mean that you can not own ducks. Protecting your ducks from an aggressive dog is possible with a completely predator-proofed pen and by avoiding confrontations.
Protecting Ducks From Dogs
Accidents can happen, so it’s important to be prepared. The best way to do this is to have a secure run and coop for your ducks to live in. Never allow ducks to free range to minimize ducks and dogs meeting face to face without supervision (this is especially critical when dealing with a dog with a high prey drive. When allowing dogs to interact with ducks, keep a close eye out for problems that may arise to prevent accidents from happening.
Protecting Dogs From Ducks
It may sound strange when discussing dogs and ducks living together to discuss dog protection, but some ducks love nothing more than terrorizing their canine companions.
Ducks that are confident around dogs have no problems biting a dog’s legs, neck, and any other body parts they can grab hold of. This is especially important when working with a toy or small breed or an elderly dog.
Even when non-intentionally bullying dogs, confident ducks have no problems walking right up to a dog, walking in between your dog’s front and hind legs, and even climbing on a resting dog. If these behaviors make your dog uncomfortable, be sure to keep a watchful eye on your flock and discourage unwanted behaviors.
Dogs and Ducks Living in Harmony
With time, patience, and the right canine companion, dogs and ducks living together is possible. Learning how to train your dog, and recognize signs of aggression will also help your ducks and dogs live together in harmony.
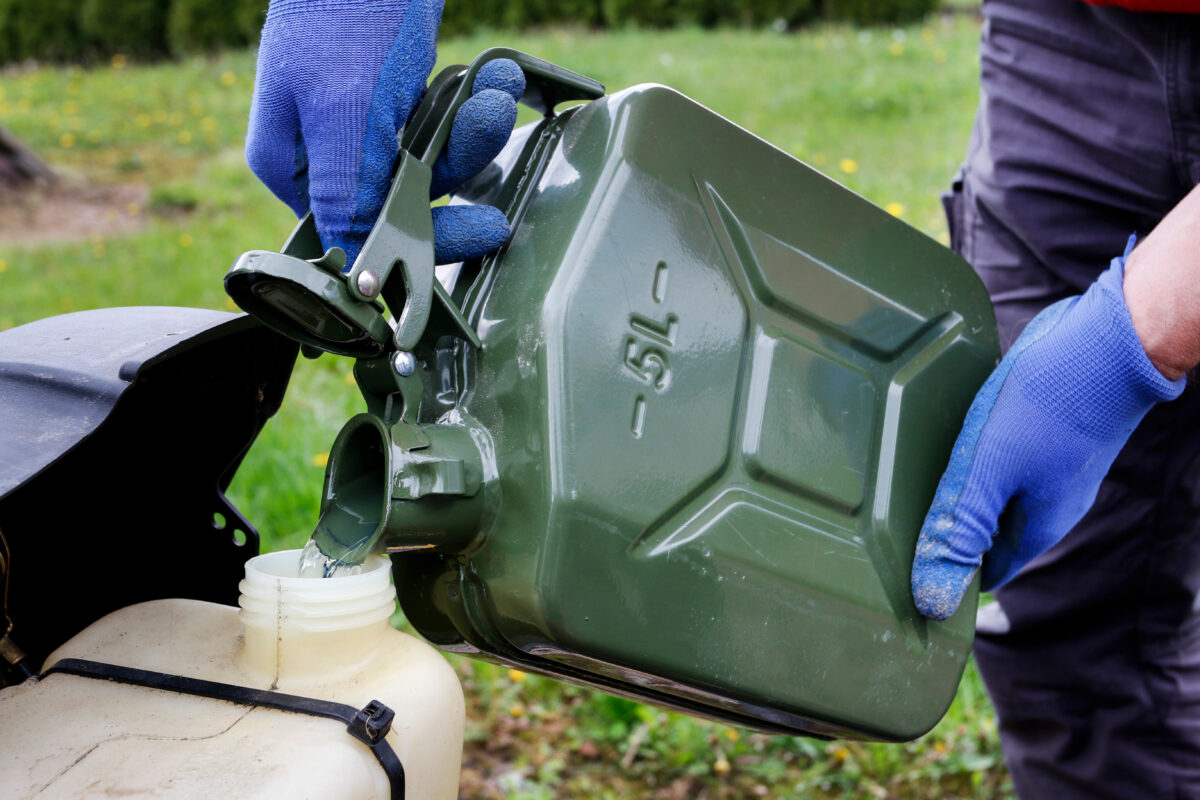
Can you use ethanol for farm equipment? Using ethanol gas on the farm has some benefits. We’re typically looking at the common E10 blend, standard in the U.S, which consists of 10% ethanol and 90% gasoline. Using E10 for farm equipment can make some financial sense, as E10 is often less expensive than 100% gasoline. It’s also far more widely available, so E10 is easily sourced. So is it a good fit for your gasoline-powered tractors and other farm equipment?
Pros and Cons of Ethanol For Farm Equipment
Generally, yes, E10 gasoline is fine to use. But there are some caveats. E10 is designed with the idea that it’s going to be used in vehicles—and used frequently. Most vehicles don’t spend a lot of time in storage—they’re on the road, going through a tank of gas with relative speed. Problems with ethanol can pop up when a machine—like a tractor—sees more storage time, perhaps in the off-season.
Gasoline itself cannot mix with water, but the 10% ethanol content of E10 can—it’s hygroscopic, meaning it’s water-soluble and actually attracts moisture into the fuel system. While not an issue in the short term, machines that are stored with E10 can see rust and deterioration occur due to the water molecules introduced by the ethanol. Proper storage techniques are required to keep this from occurring.
Also, older machinery built before 1995 may definitely see some other downsides from ethanol, including the deterioration and corrosion of rubber gaskets, fuel lines, and other parts.
But for newer farm equipment that is used frequently and properly maintained, E10 should pose no serious problems—go ahead and use it (following manufacturer recommendations of course).
Using Ethanol in Small Farm Engines
Then we have your small machines. This would include your typical fleet of small 4-stroke engines—walk-behind snow blowers, walk-behind and small riding lawnmowers, walk-behind rototillers, chippers, walk-behind string-trimmers, and more. These are often one-cylinder machines with carburetors. For these, 10% (E10) ethanol should still be OK, but again, these machines often see limited use throughout the year, so straight gasoline may be more desirable for that reason. Also, many small machines have very long lifespans, and if your small engine is older than 1995, it may be wise to forego the ethanol and use straight gasoline for compatibility reasons.
For 2-stroke engines—what you typically find in chainsaws, weed trimmers, small rototillers, and the like—ethanol is probably best avoided. The hygroscopic water-attracting properties of ethanol can lead to poor performance and engine degradation with 2-stroke machines, even damaging gaskets, so it might be best to skip the E10 for these unless the manufacturer specifically recommends E10.
Ethanol and Older Farm Equipment
Your other issue may be with machines that ran for many years on straight gasoline and have deposit buildups in fuel lines or carburetors. If this is the case, the ethanol in E10 may actually work as a solvent and dissipate those old deposits, which can actually lead to clogged engine parts and poor performance. So it’s not the ethanol per se, but its role in removing old deposit buildup. Still, the result is the same, so if you have an engine that’s never seen ethanol, you might want to keep on using the 100% gasoline.
Final Thoughts on Using Ethanol or Gas in Farm Equipment
Bottom line? If it’s a newer machine and sees consistent use, E10 is likely a fine option. Older or poorly maintained machines may do better with 100% gasoline.
This article about using ethanol for farm equipment was written for Hobby Farms magazine. Click here to subscribe.
How to raise chickens may seem simple at first, but managing a free-range flock comes with unique challenges—especially when they decide your porch or equipment is the perfect perch. Chickens are entertaining and useful livestock, but keeping them safe, healthy, and out of unwanted areas takes some strategy. Free-ranging allows your birds to forage naturally for better nutrition and overall health, but it also opens the door to mischief.
If you’re struggling to keep chickens off your porch or wandering where they shouldn’t, these practical tips on free-range chicken management will help you maintain harmony between your flock and your property—without resorting to confinement.
1. Move Your Coop to Manage Free-Range Chickens
Jennifer Cook, the small acreage management coordinator from the Colorado State University Extension, says that a free-range flock needs a minimum of 10 square feet per bird in a run or fenced area to forage. If you have 10 chickens, they need at least 100 square feet of space set away from your human-designated areas but will likely roam farther based on their comfort with the space as well as with you.
Placing shelter and feeding stations nearby makes sense from an accessibility standpoint, but this accessibility makes your porch, equipment or anything else that could serve as a nice poultry perch tempting to your fowl flock, too. If proximity when figuring out how to raise chickens seems to be the problem for your situation, consider moving your coop and other shelters farther from the area where your chickens need to be banished.
If proximity isn’t the problem and your hens are just straying too far from the coop, as they tend to do as they become comfortable with an area, Jacquie Jacob, a poultry extension associate at the University of Kentucky, recommends adding a rooster to your flock: “Sometimes a rooster will keep them closer to home,” she says.
2. Limit Feeding Areas to Keep Chickens Off Your Porch
If you are comfortable with how to raise chickens and your poultry shelter is already positioned at a suitable distance or moving it didn’t have the desired effect, evaluate the behavior of your flock to determine what might be driving them to set up shop in your zone. “Other than the use of confinement, it is hard to get chickens to not roost where you don’t want,” Jacob says. “Sometimes, they want to be near people, so even if there are better perching areas, they still migrate to where the people are to see if they can get handouts.”
Be sure to keep your handouts restricted to the area where you want them; feeding near your personal areas will only encourage them to seek you out. Food should be associated with a location more so than a person.
If you’re not the attraction when working out how to raise chickens comfortably, look around to see what is. Does a porch railing or tractor steering wheel give them a better vantage point than they already have? Chickens will look for the highest perch for the best view and might even compete for the honor if there isn’t room for more than one, which is why you might find them roosting in trees on your property or, if you lack those, your porch rail. If you find this is the case, raise the stakes—or perch alternative, as it might be. Offer a higher perch near the point of offense to lure the birds away. If your chickens take the bait, gradually move the perch toward their designated area to help ease the transition.
3. How to Raise Chickens and Break Bad Habits in Your Flock
Even with proper spacing and preferred perch options, habits can be difficult to break. If you have the time and energy to devote to herding the birds off your porch several times per day for days on end, then a traditional shooing method might be enough to curb your birds’ bad habits.
You will need to be home to drive the birds from their perch as quickly as possible each time they come to it. Leaving to go to town or leaving the area to do other tasks will kill the consistency needed to make this method successful. These “shooing” methods include just walking calmly and slowly with arms extended toward the birds—probably the safest and least trust-damaging method to use with your birds—to using spray bottles to spritz the offending fowl.
That said, when working out a schedule with how to raise chickens successfully, most small-scale farmers don’t have that luxury and would prefer to devote their energies to other farm-related chores. In this case, look into automated deterrents, including mechanized decoys and water sprayers. Chickens have a natural aversion to their common predators, which has led some companies to develop animated owls, snakes and hawks that move and make sounds. These frightening tools have limited efficacy as the birds can become accustomed to the mechanized predators, especially if they aren’t moved to various locations and positions on a regular basis. While this is a lesser commitment, it does require some upkeep to garner the most benefit from it.
Another mechanized tool that might work is an automated sprayer often sold for deterring dogs from landscaping. These motion-activated sprayers shoot a small stream of water at the offender. This one would require a thoughtful placement to avoid spraying yourself or other members of your family, but it affords the consistently random deterrent required to keep chickens at bay.
How to Raise Chickens and Use Deterrents and Perch Alternatives
Be sure the deterrents you choose don’t impact the raptor population in your area. Although birds of prey, such as great horned owls, hawks and eagles, are natural predators of poultry, it’s illegal to use scare tactics or lethal controls on them without a permit.
People who experience raptor damage problems should immediately seek information and/or assistance, according to the Internet Center for Wildlife Damage Management, a research website (www.icwdm.org) funded through a grant and maintained by Scott Hygnstrom, the director of the Wisconsin Institute for Wildlife at the University of Wisconsin-Stevens Point:
“Frustration killings occur far too often because landowners are unfamiliar with or unable to control damage with nonlethal control techniques. These killings result in the needless loss of raptors, and they may lead to undesirable legal actions. If trapping or shooting is necessary, permits should be requested and processed as quickly as possible. Always consider the benefits that raptors provide before removing them from an area; their ecological importance, aesthetic value and contributions as indicators of environmental health may outweigh the economic damage they cause.”
Although they vary by state, the legalities that protect these birds are quite strict: All hawks and owls are federally protected under the Migratory Bird Treaty Act. These laws strictly prohibit the capture, killing or possession of hawks or owls without special permit. No permits are required to scare depredating migratory birds except for endangered or threatened species, including bald and golden eagles.
In addition, most states have regulations regarding hawks and owls. Some species may be common in one state but may be on a state endangered species list in another. For permit requirements and information, consult your local representatives at the U.S. Department of Agriculture Animal and Plant Health Inspection Service Wildlife Service, U.S. Fish and Wildlife Service, and/or state wildlife department.
The Internet Center for Wildlife Damage Management recommends preventing an attack before predation becomes a problem: “Eliminate perch sites within 100 yards of the threatened area by removing large, isolated trees and other perching surfaces. Install utility lines underground and remove telephone poles near poultry-rearing sites. Cap poles with sheet metal cones, Nixalite (bird barriers), cat claws or inverted spikes.”
The same fright devices you use for your chickens might not be legal for birds of prey in your area, so check local regulations. The same pitfalls of these devices often apply to birds of prey: Generally, if birds are hungry, they quickly get used to and ignore frightening devices.
This article about how to raise chickens and keep them away from your personal space was written for Chickens magazine. Click here to subscribe.
Farmer putting away round hay bales with skidsteer. Keeler Johnson
What’s the best way to move hay rounds on your farm? Several pieces of specialty equipment can do the job after you’ve chosen the hay baler you prefer. And you’ll definitely need at least one.
Why Farmers Prefer Hay Rounds
If you prefer your hay round instead of small and square, you’re not alone. When measured in pounds, hay rounds tend to be cheaper than an equivalent number of small squares. Round bales are also easier to produce than small squares and they’re more moisture resistant, so there’s less concern about a round bale getting a bit of rain in the field than a small square.
But these benefits come with a downside familiar to any farmer who feeds hay: round bales are heavy. Very heavy. A small square bale weighing 40-50 pounds can be carried by a single person. But hay rounds, depending on a variety of factors, can tip the scales at over 1,000 pounds.
Fortunately, there are implements designed specifically for moving round hay bales that can be attached to a skid steer and/or tractor to make the job safe and easy. Here are four ways to move hay rounds.
#1 Moving Hay Rounds with a Bale Spear
Provided you have a tractor with enough strength to lift round hay bales, a bale spear is a straightforward solution.
While exact designs can vary, a bale spear attaches to the front-end loader or three-point hitch and features three or so prongs that pierce the flat side of the round bale and allow the tractor to lift it. The tractor can then drive the round bale wherever it needs to go, whether it’s from field to barn, from barn to livestock pasture, from field to transport trailer, etc.
#2 Using a Bale Unroller for Hay Rounds
A bale unroller is a machine designed primarily for unrolling round bales for feeding. Many mount on the three-point hitch of your tractor. A spike is inserted into each flat side of the round bale, and by lowering the bale so it contacts the ground, friction causes the bale to rotate and unroll.
Of course, you can also lift the bale so it doesn’t contact the ground, and then you can drive the bay wherever it needs to be unrolled. Thus, a bale unroller is an effective way of transporting round bales.
#3 Handling Hay with a Bale Squeeze
As an alternative to a bale spear, you can also use a different front-end loader device—like a bale squeeze—to move hay rounds. A bale squeeze uses hydraulic arms to squeeze bales from the sides, tightly enough so they can be picked up.
#4 Transporting Rounds with a Bale Grapple
A bale grapple is similar to a bale squeeze but typically features a bucket with a large hydraulic claw on top. The claw opens wide enough so the bucket can slide underneath the round bale while the claw bites down from the top, providing a firm grip.
Safety First When Moving Hay Rounds!
Regardless of which method you choose for moving round hay bales, appropriate safety measures should be followed.
For example, you’ll need to properly counterbalance the bales you lift to maintain the stability and traction of your skid steer or tractor; a ballast box or liquid ballast box can do the trick if you’re lifting bales with a front-end loader. While it can be tempting to lift bales high with the front-end loader to improve driving visibility, it’s better to keep them low, which lowers your tractor’s center of gravity and reduces the risk of tipping over. Along the same lines, you should be careful negotiating uneven or sloping ground when transporting round bales.
As long as you take appropriate precautions, any of the four implements described above will allow you to easily move hay rounds your farm.
This article about how to move hay rounds on a farm was written for Hobby Farms magazine. Click here to subscribe.
Knowing when to harvest sunflowers is not difficult. Your sunflowers have lots of purposes on the farm. They are great for decoration, birds, and pollinators. From the American Giant to the Cherry Rose types of sunflowers, these beauties add spectacular vertical space to the garden, and those charming yellow or brown petals surrounding a giant head of seeds are just a spectacular piece of garden décor. But multipurpose sunflowers are a crop that can be useful for more than just looks. If you’d like to enjoy a sunflower seed harvest for snacking or replanting, it’s important to recognize the right time to pick them. Here are the key signs that your sunflowers are ready.
Signs To Know When to Harvest Sunflowers
The foliage is fading. Your sunflower seeds likely aren’t ready for harvesting while the plant itself still looks fresh and vibrant. A dulling, browning, and fading of the leaves will be present as the seeds move towards ripening.
The seeds look “finished.” They should look full and big, and start to loosen from the flower. The seeds should have the final color expected of the variety you grew (often striped).
The sunflower head is yellow to brown. If it’s still green, it’s probably not quite time to harvest. Hold out for a while, but keep checking!
The bloom is starting to droop. Finished sunflowers begin to look drowsy and start to tip their heads forward, signaling it’s time to begin harvesting sunflower seeds.
How to Harvest Sunflower Seeds
Once you begin to see signs of mature seeds, you have basically two options for your sunflower harvest.
Cut and Dry: You can cut the flower head off early, and store it in a cool place to dry. The seeds will continue to ripen as this occurs.
Leave to Ripen in the Garden: You can leave the flower head attached to the plant and let the seeds ripen fully in the garden. You may need to cover the flower head with a mesh bag or paper sack to prevent birds from stealing your harvest.
From there, you can enjoy roasting sunflower seeds for a tasty snack, or save some for next year’s planting.
Why Leave Some Sunflowers Behind?
Rather than harvest all your sunflowers, you can simply save the dried seeds for replanting next year. A single large bloom will give you a tremendous number of seeds for this purpose.
During sunflower harvest time, it’s easy to leave some plants intact—especially if you grow a large crop and there are plenty of blooms to choose from. Here’s how it helps your farm wildlife and gardens.
Leaving sunflowers behind can represent a nice late-season nectar source for honey bees and bumblebees.
Birds will also love the sunflowers—native and migrating birds will likely stop and pick seeds. Birds may continue to benefit from the sunflowers even into winter.
Beneficial insects may use the stalks as a refuge from winter’s cold temperatures.
So while you can certainly clean up the garden and use the seeds if you’d like, there are some potential benefits to leaving some sunflowers behind to grace winter’s chill.
Final Thoughts on When to Harvest Sunflowers
Learning when to harvest sunflowers ensures you get the most from these garden favorites. Whether you’re gathering seeds for roasting, saving them for next year, or leaving a few behind for wildlife, timing is key. By watching for signs like fading leaves, drooping blooms, and mature seed color, you’ll enjoy a successful sunflower seed harvest while still supporting pollinators, birds, and beneficial insects.
This article about when to harvest sunflowers was written for Hobby Farms magazine. Click here to subscribe.
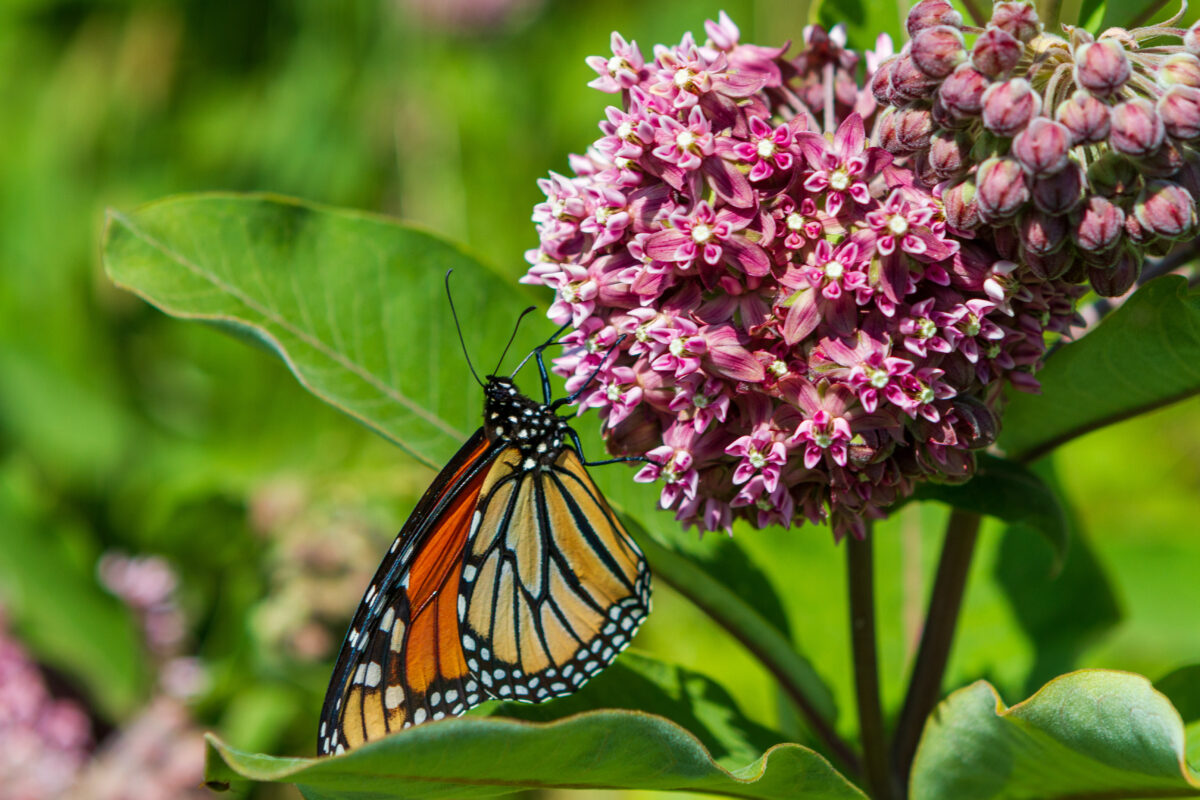
The milkweed plant is often debated as either a helpful wildflower or a harmful weed. Its fragrant blooms attract attention, yet many landowners mow it down because it poses risks to livestock. At the same time, milkweed is critical to monarch butterflies, whose survival depends on it. So, is milkweed a friend or foe on your property?
Milkweed Plant Dangers for Livestock
Milkweed is a perennial plant that dies back to the ground each year—it doesn’t produce permanent woody stalks like a shrub. Nevertheless, it’s a robust wildflower, with a thick stalk, large leaves, and delicate yet robust pink blossoms. When portions of the plant are snapped or broken, a thick white sap escapes. The downside is that this sap contains cardiac glycosides or cardenolides—answering the common question, Is milkweed poisonous? Yes, it can be harmful to people and animals. It’s a problem for horses, cows, goats, sheep, chickens—all kinds. Some livestock will avoid eating milkweed when other, better forage sources are available, but if milkweed is present in pastures, it can definitely represent a danger to livestock. Milkweed in hayfields can also present a threat, as the toxins remain even when the plant is dried. On top of all this, milkweed is an aggressive spreader. It’s not technically invasive, but if you have one patch in your fields, you may soon see more.
Why Milkweed Matters
The main benefit lies in the connection between milkweed and monarch butterflies, since it’s the only plant monarch caterpillars can survive on. Of all the thousands of plants in your area and on your property, milkweed is the only plant that monarch caterpillars can eat, survive, and grow on. If monarch butterflies can’t find milkweed to lay their eggs on, the next generation can’t exist. Besides their beauty, monarchs are also excellent pollinators and a valuable piece of the overall ecosystem. And milkweed itself isn’t an unattractive flower, and in fact, the aroma is quite sweet.
Is the Milkweed Plant Good or Bad?
Because of the toxicity threat to livestock, it’s common for farms to mow down patches of milkweed in an attempt to eradicate it from the property. It’s an understandable approach, especially for farms with livestock. However, doing this adds to the ongoing problem of habitat destruction for the monarchs.
One compromise is to grow milkweed for pollinators, along with other nectar sources that support monarchs and native bees. Doing this can provide energy sources for the monarch’s extensive annual migrations. Flowers that bloom in early spring or late fall are especially valuable in this respect. Mix brilliant flowers alongside your garden veggies. Plant a row of sunflowers or other pollinator favorites on field borders. It doesn’t help the monarchs with their egg laying, but it’s a good step toward an ecosystem-friendly farm. Flowers also add aesthetic benefits for humans!
Another workable solution is to permit (or even plant) milkweed in non-production regions of your farm. This could include roadsides, field buffers, and simply areas of the farm that don’t see animal or crop use. Care can be taken to prevent spreading, while still encouraging monarch caterpillars to utilize the critical milkweed leaves to raise the next generation of monarchs.
Milkweed on the Farm: Final Thoughts
The milkweed plant may pose challenges for farms with livestock, but it also plays an irreplaceable role in supporting monarch butterflies and other pollinators. By managing where it grows—such as in field edges, buffers, or non-production areas—you can protect your animals while still preserving this essential wildflower. In the end, the milkweed plant doesn’t have to be an enemy; with balance, it can be both a friend to your land and to the wider ecosystem.
This article about the milkweed plant was written for Hobby Farms magazine. Click here to subscribe.
Probiotics for chickens are just as important for their immune systems and digestive tracts as probiotics and ferments are for humans. With their ability to help ward off harmful bacteria and viruses and keep our guts healthy and robust, it’s no wonder we want to include probiotics in our everyday diet. Not only does feeding chickens probiotics improve their well-being, but it’ll also improve their flock owner’s health.
ANTIBYDNI/STOCK.ADOBE.COM
Understanding Probiotics for Chickens
The word probiotic means “for life.” So, it’s only fitting that every living creature needs probiotics to thrive. Probiotics are beneficial bacteria and yeast known as live organisms in your chicken’s body. These organisms line the chicken’s digestive tract and intestines with a protective coating to help prevent infections and disease. Probiotics also help to raise a chicken’s antibodies to further protect against illness and harmful bacteria or yeast. (More on that later.)
While all chickens naturally have some probiotics in their bodies, just like humans, supplementing their daily diet will increase these beneficial microbes, resulting in a healthier, more robust flock.
Through probiotics, chicks receive the beneficial bacteria they need to fight off infection by pathogenic bacteria, such as Salmonella. FERNANDO/STOCK.ADOBE.COM
The Benefits of Probiotics for Chickens
So many benefits come from supplementing your chickens’ diet with probiotics that it’s difficult to know where to begin. While we know that probiotics help control Salmonella, E. coli, and other bacterial infection outbreaks in backyard flocks and commercial chicken farms, you might wonder what else probiotics do. Before diving into different ways probiotics benefit our chickens, let’s look at how probiotics can help combat and avoid Salmonella and E. coli outbreaks.
Salmonella and E. coli are members of the bacteria family. Both can be very harmful and cause sickness and, in extreme cases, death. Probiotics work to coat a chicken’s intestinal tract to protect against these and other harmful bacteria and yeast attacking the intestinal walls. Probiotics stimulate the microflora and pathogen growth in a hen’s intestines, combating harmful bacteria with good bacteria in the intestinal tract. Research has proven that probiotics can not only lessen a chicken’s chance of contracting salmonella, but they can also heal the gut of a chicken that has a salmonella infection.
While E. coli exists in all poultry manure, it only becomes a problem when a chicken’s (or flock’s) digestive system becomes susceptible to the E. coli. These bacteria can happen because an individual hen is sick, but the infection usually starts because a chicken has an unhealthy gut. The infected hen will poop manure infected with E. coli, spreading the bacteria to the rest of the flock. E. coli infections are a severe condition that will spread through the flock and could also harm you and your family if you consume the eggs or meat from infected birds.
Probiotics for chickens are the best way to combat an E coli outbreak. In contrast, antibiotics can increase the E. coli bacteria, leading to death. Probiotics eliminate the effects of an E. coli infection by safely removing harmful bacteria from an infected hen’s intestines. Since the antibiotics’ job is to kill all bacteria (good or bad), it makes sense that probiotics would be a more effective treatment for an E. coli outbreak.
So, how else do probiotics benefit our flocks? Probiotics provide backyard flocks the chance to live healthy, productive lives. Chickens raised on probiotics are more energetic and lay bigger eggs with thicker eggshells. These traits are due to probiotics enhancing the gut’s ability to break down carbohydrates, releasing the necessary energy our chickens need to thrive.
Did you know that 60% of a chicken’s immune system is in their digestive tract? This explains why chicks and chickens raised on probiotics have a stronger immune system capable of fighting infections and diseases, including cancer.
Researchers at PoultryDVM.com have found that probiotics may prevent and, in some instances, help to treat toxins, infections, bacteria and conditions. These include avian intestinal spirochetosis, avian tuberculosis, chronic respiratory disease, coccidiosis, E. coli, fowl cholera, heatstroke, salmonella, sour crop, yolk sac infection, and more.
Probiotics can also have positive side effects on molting chickens and hens recovering from antibiotic treatment and prevent respiratory diseases. However, never use probiotics to treat a sick or injured chicken unless directed otherwise by a licensed veterinarian.
How to Add Probiotics to Your Chickens’ Diet
Just as you take supplements daily to keep yourself healthy, your flock needs probiotics daily to thrive. Adding probiotics to your chickens’ daily diet is very easy. There are two ways to incorporate them into your flock’s diet, as probiotics can get mixed into either feed or water.
Using Probiotics in Chicken Feed
Pros: Feed probiotics are convenient because you only have to mix them in when opening a food bag. It’s just once and done without the hassle of a precise probiotic-to-feed ratio.
Cons: The downside to probiotics mixed into feed is your lack of control over your chickens’ consumption. The probiotic powder often sifts down to the bottom of the bag, leaving your flock with little to no probiotics at the top and potentially consuming too many nutrients when the bag starts running low.
Probiotics can be mixed with fresh water. CCESTEP8/STOCK.ADOBE.COM
Administering Probiotics Through Water
Pros: Water-soluble probiotics are my favorite. Just add the probiotics to a gallon of water, and that’s it. And if all flock members drink, everyone gets equal nutrition daily.
Cons: Many flock owners consider water-soluble probiotics a con due to the need to refill waterers twice daily. However, chickens prefer fresh drinking water, so changing water twice daily with or without probiotics is advised.
Whether you choose to mix probiotics into feed or water is a personal choice. Store all probiotics in a dry area in an airtight container. Avoid placing probiotics in direct sunlight, especially when mixed with water.
ERIN SNYDER
Choosing the Best Probiotics for Chickens
There are many poultry probiotics, so what should you be looking for? Probiotics formulated specifically for chickens should always include Lactobacillus. It’s one of the most common and beneficial probiotics in a chicken’s gut. Buy a probiotic that includes Lactobacillus in its ingredients.
When purchasing probiotics, read online reviews to see what other poultry keepers recommend. While there can be conflicting reviews, look for probiotics that help sick chickens recover. An easy rule to remember is: If it can help the sick, it can help to prevent the healthy from contracting an illness.
Most importantly, when you find a good probiotic, stick with it. While purchasing the cheapest probiotic currently on the market may be tempting, this practice could cause your flock more harm than good. A chicken’s digestive tract and immune system can be delicate, and the constant switching of probiotics could make individual birds sick.
When to Avoid Giving Probiotics to Chickens
Even when fed a proper diet with probiotics, chickens can still become ill and require medication. Never feed probiotics to a chicken taking medication (especially antibiotics) unless directed by your veterinarian.
Once the chicken has completed a round of antibiotics, provide probiotics for six to eight weeks until she has regained her strength.
Even if probiotics aren’t part of your flock’s diet, always administer to a chicken recovering from any illness or injury unless directed otherwise by a qualified veterinarian.
Probiotics can also just be used during times of stress, such as molting, and after antibiotic treatment. BOB/STOCK.ADOBE.COM
How Probiotics for Chickens Protect Your Family
Today, many backyard flock owners raise their chickens for enjoyment, but the chickens’ original purpose was to provide meat, eggs or both. Therefore, we want to ensure our meat and eggs are safe to consume by our family and customers. You may wonder how supplying your chickens with probiotics will equal a healthier you. The reason is that harmful bacteria and yeast in your chicken’s gut may lead to human salmonella or E. coli infection.
While the common myth believed by most flock owners is that Salmonella comes from ingesting an egg that has come in contact with manure, most cases result from the egg yolk getting contaminated in the ovary. Even though many hens carrying salmonella appear healthy on the outside, their gut is still unhealthy. Therefore, experts suggest that all chickens, whether they appear healthy or not, should consume probiotics daily.
Chickens raised without probiotics are 99% more likely to spread Salmonella or E. coli to humans through the consumption of their eggs or meat than chickens raised on probiotics. With probiotics, you and your family can safely consume eggs and meat without worrying about disease, giving you the peace of mind of a healthy family and flock.
While feeding your chickens probiotics doesn’t mean they’ll never get sick, it does help to decrease their chances of becoming ill. So, if you want a healthy, long-lived flock that provides you with quality eggs and meat, consider supplementing their diet with probiotics.
This article about probiotics for chickens was written for Chickens magazine. Click here to subscribe.
Chicken scratch feed can leave even experienced backyard chicken keepers scratching their heads. Standing at the “snack bar” in a local urban feed-supply store, you might wonder which grains are best for your hens, how much to offer each day, and which mixes are nutritionally sound. Understanding what goes into scratch feed can help you make informed choices that keep your flock healthy and happy.
Chickens scratch the ground every day searching for seeds, insects and other tasty treats. Offering them scratch grains, such as cracked, rolled or whole grains (corn, barley, oats or wheat), stimulates that behavior while providing them with added food resources. Scratches are a source of mental and physical stimulation—particularly during the winter months when weather conditions reduce the presence of natural treats such as insects, grass and seeds.
Understanding the content of chicken scratch mixes can help you determine what to choose from the buffet at your local feed-supply store.
A word of caution: Chicken scratch grains are not meant to be the primary source of nutrition for your flock. Think of scratch as a limited treat—something hens enjoy but should not consume in large quantities. Feed mixes are nutritionally balanced resources your hens need for healthy living. They contain nutritional elements, including calcium and protein, that support growth and egg production. Chickens need those resources much more than tasty scratch offerings that they will inevitably enthusiastically eat.
Chicken Scratch and Your Hens’ Diet
According to Laura Harper, owner of The Urban Chicken store in Raleigh, North Carolina, the average hen eats about a 1⁄4 pound of food a day. Scratch should make up only about 10 percent of that. Any more than that will affect their nutrient balance.
“Scratch is so low in protein that it doesn’t support hen health,” Harper says.
As with humans, too much of a good thing isn’t necessarily a good thing.
Robert Litt, former owner of the Urban Farm Store in Portland, Oregon, says chickens eat for energy. If you provide cracked corn with unfettered access alongside layer feed, they will eat all their calories in corn. And corn offers only 7 percent protein, while prepared chicken feeds offer 16 percent protein with corn in the mix.
Chickens that consume too much scratch can experience extended molts because of the low amount of necessary protein. A lack of nutritional balance can also affect egg production and cause birds to become unhealthily overweight. When hens choose between their regular feed and scratch, the feed lingers untouched in feeders, attracting mice and rats to your run.
With nutritional needs in mind, Litt and Harper educate people about the use and offering of scratches. Scratches should not be the only source of food a small flock receives. Scratches are always treats, and understanding their content can improve the health of your birds.
norrie39/Adobe Stock
Using Chicken Scratch Feed in Winter
During winter months, cracked corn is a good addition to any scratch recipe. Cracked corn is a high-energy carbohydrate made of starch and sugars. Chickens love it. Fed before dusk on cold days, the corn provides a thermic effect, creating heat as it’s digested.
This helps hens stay warm on long winter nights.
Scratches can also help bored hens during the wintertime. Cold months often limit hen activity levels, keeping them inside the coop and more sedentary than during other seasons. During these times, flocks become more disruptive, pecking at one another when boredom sets in. Scratch provides mental and physical stimulation for a small flock.
“During the winter, I suggest that people offer scratch in the form of a flock block or in a toy that makes the girls work harder for the food,” Harper says.
Toys that require the hens to work harder to obtain treats promote activity, fight boredom and keep hens busy. Rather than picking on one another, hens will puzzle out how to get their favorite treats.
During the hot days of summer, eliminate corn from scratch. Because corn stimulates metabolism, it can cause heat-related stress for birds. The summer is a time to add alternatives that provide nutrition, such as calcium and protein.
“Summer scratch can contain whole oats to help with heat stress,” Harper says.
It, along with dried soldier fly larva (which adds calcium), is an excellent resource during the peak egg production days of summer. Harper sees people mixing their own summer scratch blends by including flaxseed and raisins along with the whole oats.
Hens that have some free-range time in a backyard each day gain the benefits of nature’s own scratch: new grass, insects, seeds, weeds and more. These fresh local foods are great for flock health because hens must work hard to find them.
Kalypso/Adobe Stock
Creating Your Own Chicken Scratch Feed Blends
Litt and Harper offer their own special blends of premixed, seasonally sensitive scratches. Each shop owner also provides scratch bars with resources for customers to make their own blends.
Harper suggests a wide range of ingredients when blending your own. She uses mealworms, dried soldier fly larvae, oats, barley, wheat, flaxseed—high in omega-3 for egg laying—sunflower seeds, raisins, kelp, and a vitamin/mineral supplement.
Harper also suggests making grit available on a free-feed basis.
Cautions When Feeding Chicken Scratch Feed
Chickens can—like humans—become addicted to their favorite scratch food items. Litt says that these hens become pushy, grumpy and demanding, expecting and choosing available scratch over the feed they need for a balanced diet.
Employ a tough-love approach. Give hens limited access to scratches, with their health and well-being in mind. Too much chicken scratch can cause health problems, including weight gain, longer molts and summer doldrums in egg production.
Litt and his wife, Hannah, work to find natural resources for hens that promote better health and egg production. The pair co-authored A Chicken in Every Yard (2011) and have researched the use of natural options for feed and scratches. For instance, Hannah Litt discovered that black cumin (Nigella sativa) seeds could support egg production and size.
The Litts offer it in a mash so that none of the tiny black seeds are wasted. Their interest includes energy for hens. For instance, amaranth is another chicken scratch ingredient that can add protein and energy.
Robert Litt noted that people often offer hens kitchen scraps, such as pasta and bread. These, too, have low nutritional value because they don’t contain much protein. Small meat scraps are a good protein option.
Some people have begun growing their own chicken scratch. This includes raising fodder by sprouting seeds that are fresh and inviting. Litt suggests a windowsill fodder system.
Chickens also like silage, fermented greens left from the summer season. Silage offers helpful probiotics that are partially digested and enable chicken keepers to offer greens throughout the winter.
Overall, scratches offer benefits in moderation. Just like us, hens need care and attention when it comes to choosing a diet. Seasonal offerings can help your hens have successful molts in the fall and winter and begin the spring and summer season with good egg production. Experiment with creating your own scratches by observing what your hens do and don’t prefer.
Expert Advice on Feeding Chicken Scratch
Here is what Jacquie Jacob, poultry extension project manager at the University of Kentucky, says about chicken scratch in “Feeding Chickens for Egg Production.”
“Scratch grains are like French fries; chickens that eat too many scratch grains have less of an appetite for more nutritious feed. If you are using scratch grains, feed them to chickens in the afternoon after birds have eaten complete feed, and then provide only as much scratch grains as chickens can finish in 15 to 20 minutes.”
This article about chicken scratch feed was written for Chickens magazine. Click here to subscribe.
Mud boots are one of the most essential items for any farmer, hobbyist or seasoned pro alike. Without them, life on the farm would be a muddy, soggy mess—socks drenched, shoes ruined, and mud everywhere it shouldn’t be. They might not live in your toolbox or barn, but their importance can’t be overstated. Here’s why mud boots are a must-have for every farm, no matter the size.
1. Stay Dry in Any Weather
This seems elementary and obvious, but it’s really worth thinking about for a minute. Mud boots keep our feet dry. And as farmers, doesn’t it seem like we’re always out working in less-than-dry conditions? Rain, mist, heavy dew, mud and, of course, manure—all of these combine to make a pair of mud boots a must-have on your farm boots list. Your socks and feet will thank you.
2. Mud Boots Are Built to Handle Hard Work
Farming takes determination, hard work and guts. And while you’re out there working hard in a determined, gutsy way, you feel better knowing that your feet are protected by a tough and durable pair of boots that are able to handle the challenges that farming throws at you.
3. Perfect for Every Farm Task
Wherever your farming projects take you, mud boots are ready to go along for the ride: working in the garden, cleaning the barn, mucking out stalls, and foraging for wild leeks in the woods. Your boots have got you covered. Can you name any other type of footwear that can claim this type of versatility? Boots don’t have to break the bank, so be sure to look for how to save money on farm boots, such as sales and purchasing the best quality.
4. Style Meets Function on the Farm
A favorite attribute of mud boots is that they are an attractive complement to just about any outfit. Fashion isn’t number one on a farm, but it doesn’t hurt, especially if you have to go somewhere quickly and don’t have time to change. They can be paired with jeans (obviously), overalls, heavy winter snow pants, skirts, and—yes—even pajamas. (Hey, those late-night foaling checks are the perfect occasion for those pajama-boot pairings. It’s an eye-catching combination!)
5. Mud Boots Are Reliable Footwear You Can Count On
Whenever you need them, there they are, just waiting for you to slide your feet inside. Mud boots are one of the hardest-working members of your farm team, and they wait patiently, ready to spring into action at the first sign of a mud puddle, dirty stall or thunderstorm. You can count on your boots to be there for you—in any situation and at any time.
For any farmer, hobbyist, or homesteader, mud boots are an indispensable piece of gear. They provide reliable protection, durability, and versatility across a wide range of tasks, helping keep feet dry and comfortable in challenging conditions. Investing in a quality pair ensures that your footwear supports your work on the farm, season after season.