Categories
Recipes

Spicy Roasted Broccoli with Sunflower Seeds

Roasting broccoli brings out a deliciously different flavor in this garden staple.

Roasted Broccoli with Sunflower SeedsIngredients

  • ½ lbs. broccoli, cut into long spears
  • ¼ cup olive oil
  • ½ tsp. salt
  • 1 tsp. crushed, dried red pepper flakes (use less or more according to personal preference)
  • ½ cup roasted, salted sunflower seeds

Preparation

Preheat oven to 450 degrees F. Combine broccoli, olive oil, salt and pepper flakes, and toss to coat spears evenly.

Heat a large, rimmed baking sheet until it’s very hot; about four minutes. Remove from oven and spread broccoli mixture evenly over the pan. Return to oven and roast broccoli for approximately 12 to 15 minutes or until broccoli is tender and browned in spots. Stir once or twice during roasting, being careful to return broccoli to an even layer on the pan.

Remove from oven, toss with sunflower seeds and serve. Serves 6.

Categories
Homesteading

Everything Tastes Better Outdoors

By Maggie Oster

Going on a picnic is one of life’s most delectable pleasures, whether it’s a romantic tête-à-tête or a rollicking family affair.

Anytime you combine great food with fresh air and sunshine, you’re bound to have fun.

Have a picnic to celebrate a special occasion, to simply while away a few pleasant afternoon hours or to watch the glorious, changing colors of a setting sun.

No matter the reason or the season, what’s important is to get into the picnic habit, with its inherent joyful approach to life. 

Oh, The Places We Can Go
Choosing where to have a picnic is part of the adventure. No doubt there are any number of parks, lakes, beaches, state or national forests and many other possibilities near you from which to choose.

Go hiking or skiing and eat by the side of the trail. Buy fresh vegetables at a U-pick farm or a bottle of wine at a local winery and utilize the picnic areas provided for guests. On our farm, impromptu and very informal picnics most often occur in the fields as a break from work. At more relaxed times, our picnics are the endgame for a hike to the creek that runs through the farm or to a wooded promontory overlooking the countryside.  

Of course, a picnic can certainly be in your own backyard, but part of the charm of a picnic is to be at least a bit removed from your most immediate, day-to-day surroundings. Try to think of a picnic as a mini vacation that takes you away from your usual routines. Perhaps you have a gazebo that seldom gets used or maybe there’s a part of the yard with a large, sheltering tree and an old-fashioned picnic table. 

On the Menu
Picnic food? A couple of deli sandwiches or some wine, cheese and bread readily make a picnic. Supermarkets have a huge range of ready-made and prepared foods that can be used for a quick picnic on short notice. 

From there, the edible options are endless, dependent only on your time, energy and pocketbook. Remember, this is supposed to be fun, so, for the most part, aim for simplicity. A few well-made dishes that travel easily should be the goal. Homemade dishes made from fresh  vegetables and fruits, from your own garden or a farmers’ market, bring great flavor, top-notch nutrition and the ultimate satisfaction. 

Spicy Oven-fried Chicken
Choose a high-quality chicken, such as organic or free-range, for this updated, healthy version of an old- fashioned, picnic favorite.  More picnic recipes >>

Ingredients
1/2 cup buttermilk
1 tsp. Dijon mustard
1/2 tsp. garlic powder
1/2 tsp. hot sauce, such as Tabasco
2 cups cornflakes cereal
1/3 cup all-purpose or white whole-wheat flour
1 tsp. dried thyme
1 tsp. paprika
1/2 tsp. salt
1/2 tsp. ground black pepper
2 lbs. chicken parts, skin removed

Preparation
Preheat the oven to 400 degrees F. Line a baking sheet with foil. Set a wire rack on the baking sheet and coat it with nonstick cooking spray.

In a shallow dish, combine the buttermilk, mustard, garlic powder and hot sauce. With a sealable plastic bag and rolling pin or in a food processor, crush and  combine cornflakes cereal, flour, thyme, paprika, salt and pepper. Pour this mixture into another shallow dish. Dip the chicken pieces in the buttermilk mixture, then place one or two pieces at a time in the cornflakes  mixture, rolling to coat. Shake off excess and place on the prepared rack. When all the pieces are on the rack, spray with nonstick cooking spray. Bake the chicken until golden brown and the internal temperature is 165 degrees F, about 40 minutes. Serves 6.

Great Picnic Recipes
Marinated Cherry Tomatoes
This makes even grocery-store tomatoes taste great. 

Ingredients  
1/4 cup extra-virgin olive oil  
3 T. white wine vinegar  
1 T. fresh parsley, minced  
1 tsp. sugar  
1 tsp. salt  
1 to 2 tsp. fresh thyme, oregano, marjoram, basil or rosemary, minced  
1/4 tsp. black pepper  
1 scallion, thinly sliced  
1 garlic clove, minced  
1 lb. cherry tomatoes, sliced in half  

Preparation
In a small bowl, whisk together all ingredients except tomatoes. Place tomatoes in a bowl and pour in the marinade. Stir, then cover. Marinate at room temperature for 30 minutes before serving. Serves 6.

Pasta, Potatoes and Green Beans with Pesto
The combination of potatoes, pasta and green beans dressed with pesto is a popular one-pot in parts of Italy. At the height of summer, pesto is readily made from fresh basil, but store-bought can be substituted.

Ingredients  
8 oz. small, red-skinned or fingerling potatoes, quartered (each potato should weigh about 1 oz.)  
2 tsp. salt  
8 oz. rotini or rigatoni pasta  
8 oz. green beans, trimmed and cut into 1-inch pieces  
3/4 cup pesto 

Preparation
Place potatoes in a large pot of water with salt. Cover, put on medium-high heat and bring to a boil. Once the water is boiling, add the pasta. Leave uncovered and cook for 5 minutes. Add the green beans. Continue cooking until beans are crisp-tender and the pasta is al dente, about 5 minutes. Drain and put into a bowl; add pesto and toss. Taste and season with salt and pepper as desired. Serves 6. 

Pesto Ingredients  
3 cups fresh basil leaves   
1/3 cup pine nuts or walnuts, toasted  
1/4 cup Parmesan cheese, freshly grated   
1 to 2 garlic cloves, coarsely chopped  
1/2 cup extra-virgin olive oil 

Preparation
Combine nuts, basil, garlic and Parmesan in a food processor and purée until finely chopped. With the machine running, slowly pour the oil through the feed tube and process until smooth. 

Dill and Celery Seed Coleslaw
This German-inspired slaw keeps for two weeks in the refrigerator.  

Ingredients  
1 lb. cabbage, shredded  
1 cup green, red and/or yellow bell pepper (whatever combination you prefer and is available), thinly sliced   
1 medium sweet onion, such as Vidalia, cut in half vertically, then thinly sliced  
1/3 cup canola oil  
1/3 cup granulated sugar  
1/4 cup white wine vinegar  
1 tsp. celery seed  
1 tsp. dill weed (fresh or dried, more or less to taste)  
1/2 tsp. salt 

Preparation
In a large bowl, layer the cabbage, bell pepper and onion. In a saucepan, combine oil, sugar, vinegar, celery seed, dill and salt. Bring to a boil over medium-high heat and boil for 2 minutes. Pour the hot dressing over the vegetables. Cover tightly and refrigerate for at least 4 hours before serving. Serves 6.
 

Blueberry Upside-down Cake
Try substituting other fresh berries in this easy-to-make dessert. 

Topping Ingredients  
3 T. butter  
1/2 cup packed, light or dark brown sugar  
1/2 tsp. ground cinnamon  
3 cup fresh blueberries  
1 T. lemon juice  batter ingredients 
2 cups white whole-wheat flour  
2 tsp. baking powder  
1/4 tsp. salt  
4 T. (1/2 stick) unsalted butter at room temperature  
1/2 cup granulated sugar  
2 large eggs  
1 tsp. lemon peel, freshly grated   
1 tsp. vanilla extract  
1/2 cup milk 

Preparation
Preheat oven to 350 degrees F.  To make the topping, melt the 3 tablespoons of butter in a 9-inch, round cake pan, tilting to evenly coat the bottom. Stir in the brown sugar and cinnamon. Add the blueberries, spreading evenly. Sprinkle with the lemon juice. To make the batter, combine flour, baking powder and salt in a small bowl. In a large mixing bowl, cream the 4 tablespoons butter and granulated sugar until light and fluffy. Add the eggs, lemon peel and vanilla, and beat until smooth. Add half the flour mixture and stir until combined, then add the milk, stirring until smooth. Add the remaining flour and stir just until the batter is evenly moist. Pour the batter over the fruit in the cake pan. Bake until a toothpick inserted into the center of the cake comes out clean, about 45 minutes. Remove from the oven and cool for 5 minutes in the pan. Invert onto a serving platter and let sit for 1 minute before removing the pan. Scrape any fruit that remains in the pan onto the cake. Serves 6.

Picnic Essentials
Meal-planning tips: 

  • Avoid foods that require last-minute preparation. The goal is to be relaxed, not frantic. 
  • Skip foods with drippy sauces or sauces that change consistency when they’re cold.
  • Finger foods are always a success at picnics. 
  • Except for the French sandwich pan bagnat, which means “wet bread,” don’t pre-assemble sandwiches. Place meats, cheese, vegetables and condiments in separate  plastic bags or containers to assemble when ready to eat.  
  • Avoid or minimize dairy- or mayonnaise-based  dishes as these are more difficult to keep properly chilled to prevent spoiling. Instead, go for vinegar-based dishes as they stay fresh longer and the flavor intensifies with time.
  • Experiment with different beverages. There are many different bottled juices, teas and waters available; or treat yourself to homemade lemonade. Wine or champagne is delightful, but not if it’s illegal to have at your picnic spot. 
  • Include fresh fruit in your picnic basket as a  nourishing, refreshing snack or dessert.

Transporting and Storage 

  • Choose a cooler with high-quality thermal insulation. Check out the newer, soft-sided coolers that have excellent insulating properties. 
  • Reusable, gel ice packs are preferable to loose ice as the packs eliminate the worry of food getting wet from melting ice. 
  • Pre-chill the cooler with a few gel ice packs. Place food on top of these, moving it directly from the refrigerator into the cooler just before leaving home. Don’t place warm food in the cooler; it should already be chilled if it’s to be eaten chilled.
  • Pack food and beverages in separate coolers if you’ll be getting drinks out throughout the day; the more often the cooler is opened, the more likely food will warm up. 
  • Place food in unbreakable, air-tight containers. 
  • Arrange food in the cooler so that the items you’ll be eating first are on top.
  • Pack the cooler as full as possible. Consider getting coolers in several different sizes. 
  • Transport the cooler on the floor in the backseat of the car rather than in the trunk and keep it in the shade during your picnic. 
  • Select a sturdy, easy-to-carry basket for transporting plates, glasses, utensils, napkins, bottle openers and other picnic paraphernalia. 

At Your Service
To be ready for a picnic at a moment’s notice, have at least a few of the following items in a picnic basket stored in a closet:  

  • Go Victorian-elaborate with fine linens, china and silver or take an uncomplicated tack with inexpensive pottery or plastic plates, glassware and stainless-steel utensils. Either way, you’ve chosen “green” alternatives to throw-aways. Scout yard sales or flea markets and mix and match. 
  • Cloth napkins are another green choice.
  • Spill-proof salt and pepper shakers eliminate waste and mess. 
  • Bottle opener and corkscrew. 
  • Cutting board and knife. 

For Your Comfort and Convenience
To help remember everything, make a list and check off items as they’re packed. Save the list and later add items that you wished you’d taken. 

  • Picnic blanket or tablecloth. If practicality is an issue, consider a vinyl-coated tablecloth. 
  • Cushions, pillows or folding stools or chairs, depending on the occasion and personal choice. 
  • A folding picnic table might be a luxury for some, but a necessity for others.
  • Insect repellent and sunscreen are indispensable to health, safety and a pleasurable picnic. Also consider including a poison-ivy treatment such as Technu (www.teclabsinc.com).  
  • Games, books, Frisbees, balls and a badminton or croquet set.

For Cleanup 

  • Wet washcloths in a zip-top, plastic bag for washing fingers and faces both before and after eating.
  • Cloth towels for drying hands and faces, mopping up any spills, and wrapping up dirty dishes. 
  • Trash bags for collecting trash so that it can be deposited in the proper receptacle. 

For Your Safety 

  • Do not leave food out of a cooler for longer than two hours and for only one hour when the temperature is above 90 degrees F.  
  • If taking raw fish, poultry or meats for cooking at your picnic destination, wrap securely to prevent juices from cross-contaminating prepared food and pack with plenty of ice or frozen gel packs. Also, take a food thermometer to be sure that the food reaches a safe internal temperature.  
  • Bring plenty of liquids, especially water, to keep everyone hydrated.
  • If kids are along on the picnic, be aware of any nearby hazards, such as busy roads, deep water or cliffs.  
  • Stay on the beaten path and check the rules and regulations for the area you’re visiting.
  • Keep a first-aid kit in the car. 

About the Author:  Maggie Oster writes about and photographs food and gardens from the family farm in southern Indiana, where she continues her family’s tradition of frequent, spontaneous picnics

Categories
Animals Farm Management

Grazing the Surface: Managed Grazing

Hobby farms and critters (or the dream of critters) go together like, well … like chickens and eggs!

The first thing people do when they start acquiring stock, be it a horse and a few goats, some sheep, or a few cows, is learn how to feed and care for their animals. But few animal owners learn how to take care of their land at the same time.

The evidence is plentiful: Drive around the country, and where there is livestock, there is often lots of bare dirt and weeds in pastures.

But the good news is, with a technique known as managed grazing, you can take good care of both your animals and your land. With just a little extra money and time spent initially to develop a subdivided pasture, you will reap benefits year-round, including:

  • Good grass cover, which is aesthetically pleasing and increases your property value
  • Lower feed bills
  • Decreased weed pressure
  • Fewer animal-health problems, such as those related to parasites and dust
  • Less erosion (both from wind and water) and nutrient pollution (The Environmental Protection Agency recognizes managed grazing as being environmentally beneficial.)

The Pasture Environment

In a healthy pasture there’s a complex and diverse group of animals and plants (from your cherished critters and visiting wildlife, all the way down to the single-celled bacteria that live in the soil) that interact with each other.

One goal of managed grazing is to foster this healthy complexity. The variety of plants, animals, insects and microscopic organisms that inhabit a healthy pasture differ regionally. But wherever you live, if the pasture is healthy, many creatures call it home.

If you live in the eastern states, where there is generally higher rainfall, improvements to your pasture with managed grazing show up quickly.

This is because biological activity in the soil is very high, resulting in higher organic matter and quicker breakdown of manure, urine and decaying plant matter into usable nutrients for the pasture’s plants.

However, in these areas, leaching can carry the minerals and trace nutrients too deep into the soil for the plants to make use of them. Soil tests will help you determine if some soil amendments are needed to jump-start things, lime being one of the most common (and cost effective) amendments in very wet areas.

The arid, western states have little or no leaching, so the mineral content of soil is usually pretty good. But the breakdown of manure, urine and decaying plants is driven more by physical and chemical breakdown than by biological activity, meaning that pasture improvement may take a little longer to see.

Grass Farmers

To best take care of your animals, and your land, begin to think of yourself as a “grass farmer.” In other words, your main crops are pasture plants (the true grasses, like blue grass and timothy; legumes, such as clover and alfalfa; and forbs, like dandelions and other tap-rooted “weeds”), which in turn feed your animals.

Ideally, a pasture should contain about 60 percent grass and 40 percent legumes. If yours doesn’t have enough legumes, talk to your local county extension agent (see “Extending a Helpful Hand” in the December/January 2003 issue of HF) to find out what types grow well in your area. Legumes can be introduced simply by spreading seed in early spring on top of the ground, either with a whirligig seeder or by throwing handfuls out as you walk around.

Growth primarily takes place near the soil surface, at the plant’s “basal growth point.” Initially a new plant gets all its energy from the seed, and seed-dependent growth is slow. Once sufficient green, leafy matter is exposed, above the basal growth point, the power plant kicks in (photosynthesis) and growth speeds up. As a plant reaches maturity, its growth slows, and the energy it creates through photosynthesis begins flower and seed-head production.

Depending on the species of plant, it may die after it produces a seed head, go dormant until next year, or it may experience a second growth period.

As a grass farmer, you want to control things so that the plant’s activity is maintained in the quick-growth phase. To accomplish this, you need to “clip” the plant just before its growth slows with flower and seed production, but leave enough green surface showing to keep the power plant operating at full steam.  Typically, this requires taking about 40 to 50 percent of the leaf off, and it can be done either mechanically, with a mowing device, or with those “natural” clipping units—your animals.

After a plant has been grazed (or mechanically clipped) it requires a recovery period. The recovery period is the time it takes the plant to regain the energy it lost by being cut back—or the time that it takes for the plant to regrow to the length it was when it was clipped. If plants aren’t allowed an adequate recovery period before they’re bitten a second time, they weaken, and may die.

Set-Stocking
Set-stocking is the most common grazing method. Animals are put into a pasture and kept there indefinitely. Like kids in a candy store, they first go around eating the things they like best. Then, before their feed of choice has had an adequate recovery period, they come along and bite it again. Meanwhile, a plant they don’t like quite as well, or one that’s got manure near it, never gets bitten so it reaches slow growth. The paradox: both plants continue to lose energy, one plant because it is bitten too often, and the other because it isn’t bitten often enough.

Set-stocking results in overgrazing and overresting of plants in the same pasture, at the same time. Sometimes the overrested plants do well in the short term, but many overrested plants are noxious weeds, so weed infestations usually increase with set-stocking.

Paddocks

Grass farmers manage grazing by subdividing the pasture into multiple paddocks, usually with electric fencing. The animals are moved before they have a chance to regraze the same plants twice, and are kept out of the paddock until the plants have had time to recharge their batteries.

Generally speaking, the more paddocks available the better. Paddocks may be either permanent or temporary. Four to eight permanent paddocks, which can be further subdivided with polywire or tape, step-in posts, and a portable fence charger, provide the most flexibility and allow you to time your animals’ movement between paddocks.

Timing Moves

The timing of animal movement from one paddock to the next is critical. In the spring and early summer the grass is growing very quickly, and recovery may only take seven to 10 days. Later in the summer the plants may require a month or more.

As an example, let’s say you’ve subdivided your five-acre pasture into five permanent paddocks. It’s May, and the grass is growing quickly. When you move the animals out of a paddock, they can return in about 10 days. With four paddocks left to be grazed, you can move them every two to three days (10 days divided by four paddocks equals two-and-a-half days per paddock).

Now it’s the dog days of July; the grass is growing much more slowly and requires about 40 days to recover. If you move the animals out of a paddock, they’d have to spend about 10 days in each of the next four paddocks (40 days divided by four paddocks). The problem during this period is that at 10 days between moves, animals are starting to bite the same plants twice. How do you allow an adequate recovery period, but not let them regraze plants? Use temporary subdivisions to cut the permanent paddocks in half. Now each temporary paddock gets grazed for only five days, but the paddock you’re leaving gets its full 40 days to recover (40 days divided by eight paddocks).

Sacrifice Areas

It’s usually beneficial on a small property to fence out a sacrifice area, which is a spot where you know the grass is never going to grow really well, because it will be hit too hard. Droughts and flood periods are inevitable, and the sacrifice area provides you an option during these periods when you need to keep the animals out of the paddocks for a short time.

A sacrifice area doesn’t have to be very large. It could simply be a small corral adjacent to your barn. On our place, we have two sacrifice areas that we created with 12-foot-long stock panels. We have our water tank in these areas, so it’s always easy to catch our animals in them. This past summer, we suffered with an extreme drought, so our animals had to spend the majority of each day in our sacrifice pens, only getting out to graze for an hour or so per day.

Just Try It

It may seem complicated but don’t give up hope: with practice you’ll get to know how your grass is doing (and your animals will thank you for it). As Andre’ Voison, an early pioneer of managed grazing, said in his book Grass Productivity (Republished, Island Press, 1988), “In the long run, it is the eye of the grazier, supported by his experience, that is the judge.”

Rules Of Thumb For Managed Grazing

  • Aim for 40 percent legumes, like clover, alfalfa and birdsfoot trefoil in your pasture.
  • In a well-developed pasture, don’t graze plants until they have reached at least six inches, and do graze plants before they reach 12 inches. In a newly seeded pasture, let the plants reach at least eight inches before grazing.
  • Aim to remove 40 to 50 percent of the plant’s leaf
    matter in each grazing period.
  • During the growing season, don’t graze plants lower than three inches from the soil surface. In winter, you can allow plants to be grazed to within about an inch of the soil surface.
  • When the grass is growing fast during the spring and early summer, rotate animals frequently; when growth is slower, rotation can be less frequent.
  • If the grass is getting too far ahead of you (getting too long) during fast growth, mechanically clip it for hay, or to leave on the paddock as green manure.

Grazing Tips

  • Check your pasture regularly for poisonous plants and unwanted weeds. Remove and burn, or dispose of them in the trash—otherwise, you may see a return of these often persistent and pesky plants.
  • Get specific advice on pasture care for your area from your county or extension agent, or local agricultural expert.
  • Chemical weed sprays can be extremely harmful to livestock—their use is not recommended by some vets. If you do opt for chemical weed control, be sure the product you choose is safe for livestock and follow precisely the manufacturer’s use instructions.

Just because your animals live outdoors doesn’t mean you’re off the hook for manure removal. Either pick it up or drag the pasture to spread the manure so it will decompose more quickly. Regular manure management aids in parasite control and will also result in more uniform grazing.

This article first appeared in the February/March 2003 issue of Hobby Farms magazine. 

Categories
Farm Management

Project Pond

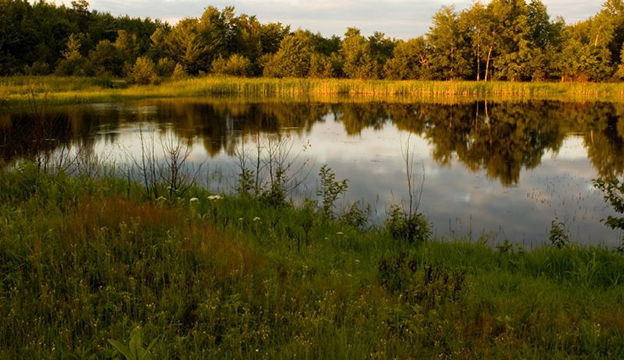
What is a farm pond? Most of us imagine a tranquil body of blue water glistening in the sunlight with lunker bass swimming lazily beneath the surface while children cavort happily on a homemade raft.

But is this fantasy really why people build farm ponds?

The old-fashioned reasons for building a farm pond include irrigation, drinking water, erosion control and fire preparedness.

But times have changed for farmers, and so have the reasons for building ponds. Fire, irrigation, livestock watering and boats notwithstanding, the number-one reason farmers build ponds these days is that they want to raise fish.

Aquaculture is a legitimate business—and as thousands of farmers are discovering, there are plenty of crops that can be raised in or around ponds.

Farmers are known for being a practical lot, and most all small farmers who do own a pond would be interested in adding to the financial well being of the farm business.

In that light, we’ve taken a brief tour of some of the many possibilities that exist for making use of a farm pond. While managing ponds for multiple use is difficult, in some cases the lunker bass and children on rafts might still fit into the equation.

Ponds Provide Water for Livestock

As every farmer knows, clean drinking water and quality forage are required to produce healthy livestock. For some farmers, ponds serve as reservoirs for animal drinking water.

When constructing a livestock pond, consider that most are entirely fenced. Fencing prevents animals from grazing stabilizing vegetation on the pond banks, dam and spillway, and thereby reduces erosion and sediment in the water. In order to water livestock, water from the fenced pond goes through a drainpipe and is gravity-fed to a stockwater tank on the property.

If a pond is constructed on flat land, a gravity-fed system may not be practical. Instead, these ponds can be partially fenced to allow only limited livestock access along one or two bank areas. In many instances the fence extends out into the pond basin, but doesn’t permit extensive wading by large numbers of animals.

In some situations, fencing a pond is not practical due to herd size, cost and maintenance. However, whenever possible, fence the pond’s most vulnerable areas (such as the dam and spillway).

The amount of water needed depends on the type of livestock you raise. For example, a dairy cow or horse each need approximately 15 gallons of water per day; sheep need 2 gallons; hogs need 4.

Water that is polluted from untreated sewage, pesticides and other chemicals, manure and urine leads to poor animal health and livestock losses. Contact your county extension agent or state water agency to arrange testing if poor water quality is suspected.

Fish-Out Operations Offer Fishing for a Fee

A good-looking pond tends to attract the attention of anglers: Some fishermen ask permission to fish on the pond, while others will sneak onto the property when they think nobody is looking.

A crafty farmer can take advantage of the situation by operating a commercial fishing operation on the pond, thereby turning the aquatic charisma into a source of income.

Fish-out operations are those in which customers pay an entry fee to fish well-stocked ponds. The customers also pay additional fees based on how many fish they catch.

Fish-out ponds:

  • are especially appealing to families with children because bites are plentiful.
  • have the potential to generate revenue, but they also require a high amount of management and initial costs.
  • offer operators a way to generate more income by selling drinks, food, bait and tackle than they earn from the entry fees and fish that are sold.

Day leasing is a less hectic way of making people pay to fish on your pond. The fish that anglers are going after in this situation are usually just the bass and bluegills that have grown naturally in the pond.

Day-fishing ponds tend to be at least an acre in size, and fees can range from $5 to $50 per day for ponds with really big bass.

Some pond owners with prize lunkers and catch-and-release programs report earning as much as $1,000 per day. Sometimes operators have fee campgrounds around the ponds, and the camping fees include fishing rights.

Plant Pond Crops for Food

There really are not any edible pond plant crops currently being grown in the United States, but there are some opportunities in shallow water agriculture. Rice and cranberries are both farmed in managed wetlands, and watercress and water chestnuts are popular food plants that are frequently cultivated for sale in the United States, usually in cold flowing water or as an alternate planting in flooded rice fields.

Wild rice may hold the most promise as a new crop, as it commands high prices as a gourmet and organically raised food. A wild rice and organic crawdad cropping system may not be the worst idea a pond farmer ever had.

Grow Landscaping Plants for Other Pond Owners

Small garden ponds continue to be a favorite among suburban homeowners, and pond farmers can easily find opportunities to raise horticultural crops to sell to this market. Water lilies, rushes, reeds, bog plants and water irises all seem to find a ready market among homeowners.

Retail customers are in need of both material and advice, and a farm pond owner could develop an active sideline by opening a pond plant nursery. Visiting a full-sized beautiful farm pond can inspire homeowners who are creating their own backyard ponds, and this inspiration can effectively open their wallets.

Grow Aquarium Plants

Pond farmers near a major metropolitan area may find a tremendous opportunity for raising aquarium plants. Planted aquariums are more beautiful and healthier, and the market for good aquarium plants is always high. Both rooted and floating plants are in demand, and even farmers in cold climates can raise considerable quantities of aquarium plants during the warm summer months.

Despite anacharis having pond-weed status, it is still highly valued in aquariums. Other pond pests such as duckweed and cabomba are also constant sellers in the aquarium industry, and many shoreline plants such as acorus are planted into tiny pots and sold as submersible aquarium plants. Any pond farmer should be able to come up with at least one or two aquarium plant species to package and sell as a profitable sideline.

Raise Fish for the Commercial Food Industry

The commercial food fish-raising business in the United States is fairly active and often very competitive.

While some experts have stated that 10 acres of ponds is probably the minimum required to raise catfish or bass profitably, others calculate that a farmer could raise 4,000 fish per acre of pond and earn between $6,000 and $10,000 per acre annually. A slightly smaller and potentially more profitable operation could possibly work for trout production if an abundant clean water supply was available.

Most of these modern pond systems are ecologically balanced, and fish waste becomes valuable fertilizer rather than a pollutant as unfortunately occurs in saltwater fish farming.

Channel catfish are the single most popular aquaculture fish in the United States due to their almost boneless meat and the fishes’ rapid growth and high tolerance of water temperature variations and crowding.

Trout, striped bass, and tilapia are other commonly raised freshwater edible fish, and all have experienced a dramatic increase in market demand and research studies concerning technology used to cultivate fish in the past decade.

Compared to chickens, fish are considerably more efficient meat producers, often yielding one pound of fish for one pound of fish feed.

Raise Fish For Aquariums

One other possibility for farm pond owners who like the idea of raising fish is to cultivate species that are popular in the aquarium-fish trade. Koi, for instance, will spawn quite well in a pond. One may be able to start with two older but less expensive parents, and start selecting young the first season. Koi are prolific when happy, and the sight of hundreds of youngsters swimming in golden swirls can make an enterprising farmer very happy.

Foreign cichlids and other tropicals are quite tempting, as a few good breeding seasons can produce tremendous revenue, but even Florida occasionally gets temperatures down in the freezing range, and this can be disastrous for a tropical fish pond operation.

Raise Fish for Other Pond Owners

Farm ponds are a big business these days, and everybody who has one seems to want to put more fish into it.

The market for fish to stock all these ponds is enormous, and growers who have good stock find many customers.

Bass, sunfish, grass carp, catfish and trout are the big five, and there is a perennially high demand for these fishes, regardless of the fact that many state agencies give them away for free to pond owners who qualify. (Usually it must be a new or otherwise uninhabited pond.)

Get Involved in Shrimp Farming

During the last 30 years the market for aquaculture shrimp has grown to become one quarter of the world’s supply of shrimp. Shrimp are now one of the darlings of the aquaculture industry.

Tropical area shrimp crops grow in three to four months, and produce yields of around one and a half tons per acre, even in the huge ponds and extremely casual conditions that exist now in Asia and the tropical Americas.

Although there are some great tasting coldwater shrimp, warm water does seem to be important, at least to the speed of growth and therefore profitability, and it is unlikely that massive shrimp farms will appear in Alaska soon. But still, the demand for this product is very strong, and smaller but more sophisticated subtropical ponds will surely be producing a significant amount of our shrimp in the future.

Consider Raising Frogs

There have always been a few persons in America who claimed to be frog farmers, but generally these individuals are merely harvesting frogs that grow naturally on their property.

Fencing to exclude predators, and stocking a few tadpoles may have helped things along, but the frogs have always been left to take care of themselves.

The biggest problem with a potential frog-raising operation is that food-quality bullfrogs are slow growers, and take about four years to reach market size. They are also quite cannibalistic, and eat their own young readily.

Frog farms also need to be huge because a bullfrog generally needs at least 20 feet of shoreline as exclusive territory in order to thrive. Finally, the diet of adult bullfrogs is limited to live prey, and pellets just won’t do as frog food.

The Crawdad Market Could be For You

Someday, some enterprising farmer is going to figure out that there could be a market for crawdads outside of Louisiana and Texas.

The farmer will probably have to come up with a new name, something like Happy Shrimp, and he’ll have to do a little adventurous marketing. But there is absolutely no good reason why the rest of the country should not enjoy these delicious crustaceans.

Most of the crawdads currently raised for food in the United States are grown in the southern states, where they are cultivated in rice fields as an additional crop.

Crawdads are omnivores, and quite happily eat the rice crop residues that are left behind. In general, fields are drained during the summer to encourage weed and leftover crop growth, and then re-flooded in the fall. Crawdads bury themselves in the mud during the summer dry season and emerge when the fields are flooded.

Use Your Pond to Grow Baitfish

In areas close to active fishing spots, pond farmers may want to consider raising baitfish.

The three most common are fathead minnows, goldfish and golden shiners. All three species reproduce prolifically, grow quickly, and do not require any complicated farming methods. These fish can also be sold to pond owners who wish to fatten their trophy bass.

There are over 16,000 baitfish-raising operations in the United States today. They average 44 acres in size and raise an average of 22,000 pounds of fish per year. That adds up to over 35 million pounds of baitfish per year, which means there are a lot of people fishing in America!

Provide Picnic and Swimming Areas for a Fee

Farm ponds look quite inviting on a hot summer day, and pond owners can often take advantage of this by opening the pond for swimming during the hot months. Rafts for teenagers to gather on, lessons for the younger set, and swimming lanes for the exercise conscious all help to draw customers. Sunbathing is always popular, and a few enterprising pond operators have installed rope pulley systems that drag water skiers around a part of the lake.

The beauty of the pond setting can be easily leveraged to create a commercial picnic spot. Often rented out for group events, such locations can also benefit by operating concessions stands and offering group activity areas such as horseshoe pits, ping-pong tables, volleyball courts, bandstands, dance floors and informal theaters.

Set Up a Boat Rental Business

There is really very little in this world more enjoyable than tooling around in a boat. Creative pond owners have a world of diverse opportunities with which to amuse and attract potential customers.

Fishing boats, paddleboats, sail boats, sailing schools, water-safety schools, glass-bottomed boats, houseboats, kayaks and canoes, windsurfing, and romantic rowboat rentals are just some of the many different types of boat operations that could conceivably be added to a farm pond’s business.

For owners interested in expanding their pond business to include public recreation, legal liabilities and insurance premiums are big considerations.

Tips for Pond Maintenance

Pond maintenance varies from one pond to the next, and may include vigorous weed removal or adding alum to flocculate and clear up muddy water.

Some pond owners have problems with turtles eating their fish and manage an active turtle-trapping program. Many pond owners cull their fish populations frequently, catching and releasing the prize specimens, but taking out the undersized fish so the big guys will have more food and space to grow even larger.

The single most important management task is maintaining an aeration system. Although fountains that spray water into the air might look nice, they are in fact much less efficient as oxygenating devices than bubblers placed on the pond bottom.

Pond water that is well aerated is much more active chemically, and has the capacity to cleanse itself of toxic materials that result from animal waste accumulation and dead plant material degradation. In general, aerator bubblers are best positioned in the deepest part of the pond, and just one bubbler may suffice for a half-acre pond.

Farm Pond Security

Here are some tips to help you keep your pond protected and secure.

Dam Height – The legal height of dams is always regulated. Homeowners cannot build 30-foot high dirt dams, because those dams would just be too dangerous. Before starting construction, it is absolutely imperative to find out what the dam construction regulations are in your area.

Drownings – Unfortunately, farm ponds contribute to accidental drownings. Children are the most frequent victims of the majority of farm-pond drownings, but inebriated young adults are common victims as well. All farm ponds used for swimming should have a prominent rescue post with a life preserver.

Water Quality – Not all farm ponds are suitable for swimming. If the water is cloudy, has a foul odor or excess algae, it may contain infectious agents or be somehow contaminated. Ponds used for swimming should be analyzed for bacteria and other contaminants during the swimming season.

Winter Safety – Winter drowning victims may fall through thin ice and be unable to pull themselves to safety. Hypothermia can be a problem for anyone who falls into a winter pond, and should be treated quickly.

Unwanted Visitors – Farm ponds are sometimes trouble magnets because they are so attractive to unwanted visitors. Well-fenced and posted ponds, with resident owners who patrol frequently, are less likely to have trouble, vandalism and trash problems.

Troubleshooting Pond Problems

As much as it might seem that ponds are made by simply building a dam, in reality they aren’t so easy to build. Ponds are complex ecosystems, so leaks, algae plagues and stunted fish are common among amateur pond builders. Hiring a professional pond builder is definitely the best way to ensure a satisfactory result.

One of the most frequent pond problems starts with the arrival of a few Canada geese. These majestic looking birds instantly make a new pond look more natural and lived in.

Unfortunately, the geese often return again and again, and as their population increases, so does the incredible mess they cause. A dozen geese will each produce a pound and a half of droppings every day. That’s almost a half-ton of smelly sticky material deposited along the shoreline of your new pond every year. As cute as these geese are, smart pond owners will let their dogs chase them away.
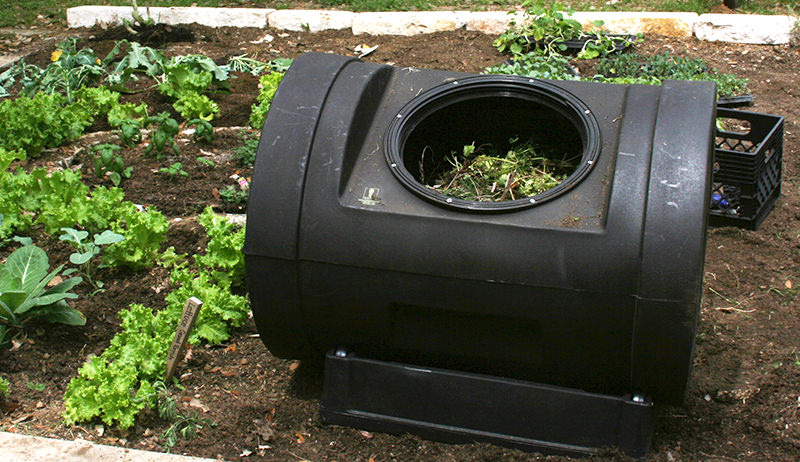
Categories
Crops & Gardening

Got Compost? The Basic Facts on the Methods & Benefits of Composting

Any properly functioning ecosystem should be self-supporting: Things grow, they use energy, they die and are eventually recycled back into “food” to begin the cycle anew. As a result, there is no waste.

Consider the forest, whose fallen leaves and dead organisms go on to nourish the next generation of trees. Organic farmers must think of their soil as such an ecosystem.

Crops are planted, those plants use nutrients from the soil, and when the plants die, they are recycled back into the earth through the process of composting. The cycle of life and death on an organic farm becomes an essential part of soil management.

Composting in an organized farm setting lets the organic matter and nutrients used by plants return to the soil. Plants depend on soil organic matter for nutrients and disease suppression; while there is some organic matter naturally present in all soils, its quality and quantity are depleted by the plants growing in it.

There are, of course, other kinds of organic matter available to help organic farmers build their soil (including mushroom soil and peat moss), but no other source provides plants with as many benefits as high-quality compost. What’s more, few other sources are made from ingredients readily available at home.

Why Compost?

The benefits of compost are many.

  • It improves the structure of any soil, be it sandy, loamy or clay; soils amended with compost retain more water and drain better. A mere 5 percent increase in organic matter quadruples a soil’s water-holding capacity.
  • Compost contains not only macronutrients, but also many trace nutrients; this balanced array of nutrients is available in a slow-release form. Finished compost typically has .5 to 2.5 percent total nitrogen in either organic or slow-release form; about 10 percent of this amount is available in each subsequent year.
  • Compost helps balance soil pH, fosters good soil structure, and improves tilth and fertility.
  • It loosens clay soils and prevents nutrient leaching by loosely binding nutrients into the soil.
  • A key benefit of compost is the diversity of soil life it supports and promotes. Be it bacteria, fungi, worms or beetles, these creatures help process nutrients and create healthier, more pest-resistant plants. Compost is a known disease suppressor, with university research indicating that plants grown in soils regularly amended with compost have a marked reduction in diseases—particularly those diseases caused by soil-borne pathogens. Overall, compost promotes biologically active and diverse soil.
  • Compost ingredients are easy to come by. What goes into the creation of compost is often the result of the farm’s production. Compost is made from a combination of many available ingredients—be it garden scraps or kitchen scraps.
  • Composting is also an economically sound practice. Instead of sending waste to a landfill, that waste is recycled and reused. The farmer also sees a reduction in the need to buy other fertilizers and pesticides. The nutrients present on the farm stay on the farm, and they continue to nourish and benefit its future.

The Right Stuff

The first step in building a compost pile is choosing the proper ingredients. It’s important to understand that different materials provide different things.

There are two basic classes of ingredients constituting a well-balanced compost blend: the carbon suppliers and the nitrogen suppliers.

  • Carbon suppliers are materials added to the compost pile in a non-living state. They are usually brown in color and have low moisture content. Carbon suppliers are generally high in lignin and other slow-to-decompose plant components, so they take longer to fully break down into available nutrients.
  • Nitrogen suppliers are ingredients used in a fresh state. Nitrogen suppliers are often green in color (except in the case of manures) and contain a lot of moisture. Because they contain many sugars and starches, they are quick to decompose.

The relative proportion of carbon-containing materials to those materials higher in nitrogen (the C:N ratio) is a decidedly important factor in determining how well a compost pile breaks down.

Basically, the pile should contain about 30 times more carbon than nitrogen (a C:N ratio of 30:1). This ideal ratio is accomplished by building a pile that contains two to three times more carbon materials than nitrogen materials (by volume).

So for every five-gallon bucket of fresh, green grass clippings, three five-gallon buckets of straw or leaves will also have to be added.

Why the C:N Ratio Is Crucial

The microbes and other organisms that process the ingredients of your compost pile use carbon materials as a source of energy. They need a lot of it to work efficiently and quickly. If the ideal C:N ratio is created, the days to finished compost are reduced because these organisms are working at the fastest pace possible.

In addition, piles with a C:N ratio of 30:1 reach temperatures as high as 160 degrees F, while those with a C:N ratio of 60:1 will seldom rise above 110 degrees F. Decomposition occurs faster at the ideal temperature of 160 degrees F.

If the model C:N ratio is not achieved when the pile is started, the finished product will not have it either. This can lead to some unfavorable situations. For example, if finished compost with a C:N ratio much greater than 45:1 is added to fields, any continued decomposition will rob nitrogen from the soil. The microbes need to get nitrogen from somewhere and, because it isn’t in the compost, they take it from the surrounding soil.

On the other hand, if the C:N ratio is less than 20:1, the microbes use all the available carbon and release the extra, unused nitrogen into the atmosphere, depleting the finished compost of this essential nutrient.

Finished compost used on Certified Organic farms must have a C:N ratio between 25:1 and 40:1. Home gardeners who grow organically, but aren’t interested in certification, don’t necessarily need their C:N ratio to fall exactly within this range. However, if it does, they will discover the pile finishes faster and creates compost of exceptional quality.

The appropriate ratio will also prevent the need for additional supplies of water.

That said, if the pile ever appears dry, don’t hesitate to add extra water. The pile should consistently feel like a wrung out sponge. If it gets too wet, add more brown ingredients to soak up some of the excess.

Pay close attention to the initial blend of ingredients—aim for two to three times more “browns” than “greens” by volume.

Carbon Sources or “Browns”

  • Autumn leaves
  • Straw
  • Hay
  • Newspaper (no shiny insert pages)
  • Sawdust (only in limited quantities—acidic)
  • Unbleached paper towels and napkins
  • Chopped cornstalks and cobs
  • Shredded cardboard
  • Pine needles (only in limited quantities—acidic)
  • Grass clippings

Nitrogen Sources or “Greens”

  • Weeds (before going to seed if possible)
  • Plant trimmings
  • Animal manures
  • Kitchen scraps
  • Coffee grounds and filters
  • Grass clippings
  • Seaweed (rinsed of salt water)
  • Spent garden plants
  • Pond algae (freshwater ponds only)

What Not to Compost

Biosolids (human sewage sludge) are never found on a list of acceptable compost ingredients for organic farming. Biosolids can contain heavy metals, human pathogens and chemicals of all sorts; this material has no place in organic or home food production. If you use commercially produced composts, it’s exceedingly important to question the producer about the potential use of biosolids and avoid any products containing them.

Here’s what else not to add to your compost pile and why.

  • Meat, bones and fish: They can cause odor and attract animals.
  • Dairy products: They can cause odor and attract animals.
  • Dog, cat, pig or reptile feces: They can carry pathogens and parasites
  • Oils: They’re slow to decompose and might cause odor.
  • Diseased plant material: It can spread disease back to your garden.
  • Dryer lint: It can contain synthetic fibers that will not break down.
  • Vacuum bag contents: This contains synthetic carpet fibers and chemicals.
  • Glossy, colored newspaper inserts: The ink contains heavy metals.
  • Treated grass clippings: Any chemicals present can damage soil, flora and fauna.
  • Cat litter: It can contain pathogens and chemicals.

The Scoop on Poop

Animal manures are listed as one possible nitrogen provider, including manures from cows, horses, sheep, goats, chickens, rabbits, ducks and geese. (Avoid manures from meat eaters such as pigs, dogs or cats.) Manure can form an important part of the soil fertility program on an organic farm. It’s important to note, however, that manure can be a source of E. coli and other human pathogens, and it should be handled with care.

Well-composted and processed manures are generally safer than raw manures, but all require special consideration. Uncomposted, raw manure can be used on fields not growing edible crops. It can also be added directly to fields if a few rules are followed.

  • Raw manure must be worked into the soil at least 120 days before the harvest of crops contacting the soil (potatoes and other root crops, or any crops that might get splashed with soil).
  • A 90-day wait period is required for crops that must be peeled or that do not come in contact with the soil.
  • Even manure that sat in a pile for years might still be raw and might not fit the definition of “composted.” It still needs to meet application requirements or be properly composted as described below.

Well-composted manure can be used any time, though the definition of “well-composted” should be strictly monitored. The manure, along with the other compost ingredients, must heat to 160 degrees F for a minimum of 15 consecutive days to be considered fully composted; it must be turned at least five times during that period.
This temperature, sustained for this time period, kills any potential pathogens—and it’s a very important step in safe, organic food production.

Processed manures (heated to more than 150 degrees F for one hour or more, frozen or dried) are acceptable because they are pathogen-free and are not in a raw state; therefore they don’t have a waiting period, and there is no need to incorporate them into the soil before planting.

The difference in manure usage between conventional and organic farms: Organic farmers must apply either well-composted manures or apply the manure a minimum number of days before harvest.

The Truth About Rodents

One common misconception about compost is that it attracts rodents. While the occasional field mouse might find a home in the pile (you can’t blame them—it’s warm in there all winter), the pile should not attract rats, raccoons, opossums or any other critters.

To ensure they won’t show up, bury kitchen scraps under straw, leaves or other “brown” material, and never add meat or dairy products. If adding eggshells to the pile (a great source of calcium), wash and crush them well beforehand.

If you have the right C:N ratio, the pile will get good and hot—160 degrees F is just too hot for even the toughest rat. Yet another great reason to do it right!

Meet the Crew of Decomposers

Once the right ingredients have been used to create the pile, it’s the job of billions of microbes and other soil-dwelling organisms to break it down. The organisms needed for this decomposition process are already present in most compost ingredients. However, adding some finished compost as the pile is built might increase populations more quickly. Compost activators, consisting of inoculants (bacteria), enzymes and sugars, are also available to rapidly establish microbe populations, though it’s not necessary to use them.

There are literally thousands of different decomposers at work in the typical compost pile and they number in the tens of billions. They all do their part, and they do it year-round. Some species of bacteria continue to work even in freezing temperatures. Fortunately, these bacteria usually generate enough heat to support those bacteria that prefer warmer temperatures.

The most rapidly decomposing bacteria work at the highest temperatures, between 100 and 160 degrees F. At 160 degrees F, the rapid decomposers are happiest and the decomposition process is fastest. These microbes require very little from the farmers hosting them. They ask for only two things: food and oxygen.

Aerating the Pile

Microbes use oxygen and exhale carbon dioxide while decomposing, which means it’s an aerobic process. To maintain those necessary aerobic conditions, provide oxygen by turning or otherwise aerating the pile on a regular basis (at least once a week).

If the pile is not turned and no oxygen is present, decomposition happens through fermentation. Different organisms are at work here, and they release methane and ammonia; as a result, the pile stinks. In addition, fermenting piles don’t generate enough heat to kill pathogens, creating a potential food safety issue.
Decomposition doesn’t smell bad when adequate oxygen is present.

We are mimicking nature in a compost pile by trying to create the right blend of ingredients, including sufficient oxygen. Creating quality compost is all about pleasing those decomposers.

Hot, Hot, Hot!

Because the process of decomposition naturally creates heat, properly constructed compost piles will be hot to the touch. For Certified Organic farmers, the pile must reach between 131 and 170 degrees F for a minimum of 15 days, during which time the pile is turned at least five times. This is essential because it takes sustained high temperatures to kill human and plant pathogens as well as weed seeds.

Compost thermometers are available at garden supply retailers and online. They have long probes that reach into the center of the pile where temperatures are usually the highest. The temperature should be checked at approximately the same time every day.

“Cold” or “slow” composting methods (otherwise known as pile-it-up-and-wait) are valid techniques for home gardeners, but use caution when animal manures are used in these methods. All organic materials will eventually decompose; the rate at which they do might or might not be important to individual gardeners, but the safety and weed seed contents of “cold” piles are important to consider when choosing a type of compost pile.

The Worms Have It

Vermicomposting is another technique for reducing fresh organic materials into compost. An artificial system meant to support worms is created in order to harvest their rich castings. Though a bit more expertise and equipment is required to compost via worms, it’s a satisfying experience, providing growers with a nutrient-dense, natural fertilizer.

You can buy special bins for large-scale production of castings, or you can easily construct one yourself. Simply cut holes in the bottom and the lid of a large plastic storage bin and layer plenty of shredded newspaper, kitchen scraps, small pieces of cardboard and such into the container (do not use animal manures in the bins).

Following the recipe for the proper C:N ratio isn’t strictly necessary, but it might help speed decomposition. Add purchased worms to the bin and store the container in a cool area, but do not allow it to freeze. Add thin layers of raw, organic matter at one- to three-day intervals. The required duration to complete decomposition is anywhere from two to four months.

Where to Compost

For large-scale production of compost, ingredients are usually organized into windrows and turned with a tractor or bulldozer. Moderate-sized farms might prefer a series of large, freestanding piles turned by hand or with a tractor. Home gardeners and small farmers have more options, including commercial and homemade composting bins.

Commercial composting bins can be constructed of plastic, wood or recycled materials and are available in many shapes and sizes. Freestanding composting containers, including plastic, oblong tumblers and spinning cylinders, are meant to make turning the pile easier. Many of these models come with handles or cranks that rotate the whole container along with its contents. The contents of rectangular, ground-level composting bins are a little more difficult to turn, but the finished compost is easy to empty through bottom doors; these types are usually cheaper.

Kits for do-it-yourselfers are another option; containing metal corner pieces and a lid, these kits are installed by sliding appropriately sized lumber (purchased separately) into the metal pieces to construct a square bin.

If commercial composting bins are used, consider their size (3 by 3 by 3 feet is the minimum size necessary to reach required temperatures), ease of use, number of aeration holes (especially important for enclosed tumblers) and appearance. If the bin will be prominently located, it might be worth spending a little extra money for an attractive model.

You can build composting bins from pallets (avoid ones used to store chemicals), wood slats (never use treated lumber—the preserving chemicals might leach into the compost), hay bales, perforated plastic trash cans or wire cages. Many construction plans are available online.

The Timeline

Organic matter can fully compost in as little as four weeks or as long as six months (or more). The finish time depends on the ingredients used, the C:N ratio, the frequency of aeration, the moisture content and the size of the ingredients when the composting process began. (Shredding or chopping materials before adding them to the pile will help speed decomposition.)

For record-fast compost, begin with two to three times more “browns” than “greens,” finely shred or chop all ingredients, add a few shovels of finished compost to the new pile, aerate at least once a week, maintain moderate moisture levels and actively monitor temperatures (don’t forget to thank those microbes, too).

Testing the Finished Product

Tests for C:N ratio, compost stability and pathogens must be documented before any compost (even homemade) is used on a certified organic farm. Tests can also be conducted for nutrient content, an assessment of biological activity and pH.

For home gardeners, testing isn’t necessary, but it is interesting to find out what your finished compost is all about. Remember, temperature is really the best indicator of proper decomposition—160 degrees F is an easy indicator that compost is done right.

Categories
Recipes

Butternut Squash and Apple Soup

Butternut squash and apple soup

If you have apples, squash and maple syrup available locally, you’re ready to make this tasty, satisfying soup. It freezes well, so feel free to double the recipe and freeze some for a cold winter’s night.

Ingredients

  • 2½ pounds butternut squash, peeled and diced
  • 3 to 4 cooking apples
  • 4 cups chicken broth
  • 1 stick cinnamon
  • 1 cup milk
  • 1/4 cup melted butter
  • 2 T. maple syrup
  • 1/4 tsp. salt
  • 1/4 tsp. nutmeg
  • 1/4 tsp. ginger

Preparation
Peel and dice squash; peel and quarter apples. In a heavy pot, combine squash, apples, chicken broth and cinnamon stick; bring to boil. Reduce heat and simmer 20-30 minutes, until tender. Remove cinnamon stick. Process in blender until smooth. Return mixture to pot; stir in milk, butter, syrup and spices. Cook over low heat, stirring constantly, until well heated. Garnish with thin apple slices and ground nutmeg.

Serves 6.

Categories
News

Charts Show Ties Between Corporations, Organics

A chart showing the latest ties between organic brands and the top corporate food processors is now available. The current charts show that number of ties continue to increase.

Click to Enlarge >>
Corporate Ties
 to Organic Brands


Corporate Ties to Organic Brands

Courtesy Dr. Phil Howard and The Cornucopia Institute

Two other charts that reveal connections within the business of organics are also available:

Major Independent Organic Companies

Major Independent Organic Companies

Courtesy Dr. Phil Howard and The Cornucopia Institute

Private Label Organic Brands (such as supermarket chains)

Private Label Organic Brands

Courtesy Dr. Phil Howard and The Cornucopia Institute

Dr. Phil Howard, researcher and assistant professor at Michigan State University, creates and updates the charts showing ties between corporations and organic food. The Cornucopia Institute regularly promotes the findings as part of its “Who Owns Organics” project. Howard teaches in the University’s Community, Agriculture, Recreation and Resource Studies program.

According to Howard’s university website, his research focuses on investigating the relationships between food, agriculture and public health, as well as assisting communities to characterize and respond to changes in the food system. 

Howard currently is exploring “food environments” and their potential relationships with health outcomes. He is also studying national consumer interest in “ecolabels” as a potential strategy for improving the livelihoods of small- and medium-scale farms, and consolidation in the food system, particularly in the rapidly growing organic sector.

Categories
Animals

Foot and Mouth Disease

By Dr. Aaron Tangeman

Q: We recently had relatives from England visit our farm here in Nebraska. My brother-in-law said there had been a minor occurrence of foot and mouth disease there last year and asked if we vaccinated our cattle for it. What is foot and mouth disease and where can I purchase the vaccine to protect my herd?
 

A: Foot and mouth disease (FMD) is caused by a highly contagious virus affecting animals with cloven hooves such as cattle, sheep, goats, and pigs. Deer are also susceptible and pose a significant problem in controlling the spread of the disease in affected areas. In the United States you may hear FMD referenced as hoof and mouth disease (HMD).

Infected animals may demonstrate a fever. Excessive salivation may develop early. Erosive lesions in the mouth, on the tongue and lips can make it difficult for the animal to eat, leading to weight loss and decreased milk production. Blisters might break out around the teats, or between the hooves, making the animal lame and reluctant to move. FMD symptoms can be confused with vesicular stomatitis. 

The United States has been free from foot and mouth disease since 1929 and claims FMD-free status, which is economically beneficial to our farmers and ranchers engaging in international trade. Routine vaccination for FMD would eliminate that designation, costing farmers and ranchers who market internationally millions, perhaps billions of dollars, in lost income.

The USDA’s reluctance to implement a routine vaccination program stems from several sources. While vaccinating an animal may prevent it from developing the clinical signs of FMD, it may not prevent the virus from infecting the animal. A vaccinated animal can be exposed to and carry the virus for an extended period of time. Because there are seven different types of FMD virus currently identified and over 60 subtypes, each vaccine needs to be tailored to the specific type and subtype of the virus involved in an outbreak. It is possible to contaminate a farm that is uninfected by carrying the virus from an infected farm on clothing, shoes or vehicles.

In a suspected outbreak, the USDA’s first response would be one of “stamping out,” quarantining herds and limiting human traffic to farms with outbreaks to lessen the risk of transmission. During a suspected FMD outbreak, USDA officials will coordinate with state and local forces to inform livestock producers and the public of necessary quarantines and vaccination protocols, culling herds as needed. Because FMD is so virulent, deer and other wildlife that would be difficult to manage are at risk for contracting and transmitting the disease.

The Plum Island Animal Disease Center (PIADC), located off the coast of Long Island, is the only facility housing the FMD vaccine bank. In 2003, the PIADC was transferred to the control of the Department of Homeland Security to monitor safety of livestock production and food supply against the threat of “agroterrorism.” The Agricultural Research Service (ARS) is currently conducting research with GenVec, Inc. to develop a vaccine without using infectious FMD material.

Top

Dr. Aaron Tangeman received his Doctorate of Veterinary Medicine from the Ohio State University in 1998 and practices in Northeast Ohio.

Categories
Homesteading

Summer Fun: Five Great Ways to Involve Kids in Farm Life

By Lisa Kivirist
 

How do you keep your kids involved in farm life
How Do You Keep Kids Involved?

We’d love to hear from you! Leave a comment or post your idea on our Message Boards.

Related Article

Savor Summer!

When the mercury peaks, here’s a dash of fresh ideas for engaging children in the farm scene:
 
1. Grow Some Green
Helping in the garden takes on new meaning for kids when there’s a financial incentive. During peak harvest season, help your kids organize a stand at your local farmers’ market. From harvest handling to counting change, a farmers’ market provides a one-stop summer school of learning fun.

2. Throw Summer-long Contests
Add a fun twist to daily farm routines with a summer-long challenge, something you track all summer long and declare a winner at the end of the season. This could be:

  • Tracking the longest zucchini
  • Heaviest pumpkin or
  • Timing how fast you can all get the evening chores done when you work together. 

3. Search for Treasure
Organize an on-farm scavenger hunt. Create a list of either:

  • Small, natural items they can collect (acorns, maple leaves) or
  • Farm landmarks to identify (number of windows in the dairy barn). 

4. Organize a Farm Field Trip
Go on an educational day trip and check-out a neighboring farm. Plug your zip code into the Local Harvest website (get links to Local Harvest and more!); you’ll be surprised by the number of nearby farms you never have crossed paths with.

5. Camp Out
Daily animal chores and responsibilities often put a damper on traveling off the farm overnight. Instead, bring the camping adventure home by pitching tents and sleeping under the stars right on farm ground. Create the “getaway” feel and pack your cooler, toothbrush and camera and appreciate the beauty of home.
 
About the Author: Lisa Kivirist is the co-author of ECOpreneuring and Rural Renaissance and writes from her Wisconsin farm and B&B, Inn Serendipity.